Windows Templates with Cloudbase-init: Step-by-step Guide & Best Practices
This section provides step-by-step instructions for creating Windows templates that support cloud-init, using Cloudbase-init. With these templates, you can specify many system settings (hostname, users, password, etc.) without setting up each VM manually. For more details on how to use Cloudbase-init, read the online documentation.
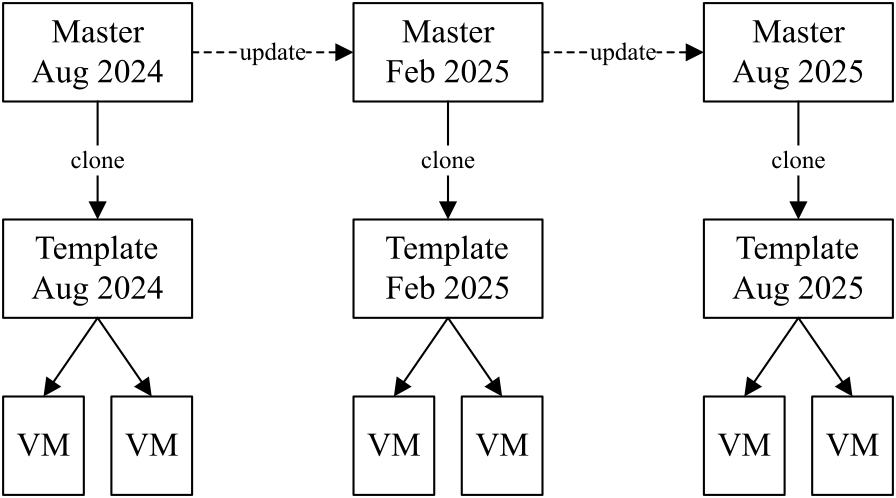
In short, you will maintain a master VM containing a fresh, up-to-date copy of Windows. From this master VM, you can branch out template VMs and customize them with drivers, tooling and settings as desired. Finally, these template VMs will be generalized with Sysprep and converted into templates that can be used for VM creation. See the following diagram:
Here is a list of steps for preparing a Windows template:
- Create and install master VM (for Windows Update)
- Branch out master VM to template VM
- Install software in template VM
- Sysprep, reseal and template creation
- Instantiate new VM
Why use a master VM?
- Windows installed from older media may take a very long time to catch up with updates (especially Windows Server 2016).
- Creating VMs from a recently-updated template also reduces the time and resources needed to bring each new VM up to date.
- You can save time and effort by branching many different kinds of template VMs from the same master.
- Note that you don't need to produce a new template every time you update Windows. Instead, consider your VM update policy and refresh your templates as necessary.
- If you don't expect to have multiple different kinds of templates, feel free to install software directly onto your master VM. Every time you want to refresh your template, simply clone your master then run Sysprep.
Installing master VM
In this guide, we install Windows in Audit mode, a special Windows boot mode that skips customizations normally applied after Setup. Using Audit mode helps avoid certain Sysprep issues, especially with Store apps.
Create a Windows VM using the included default templates for Windows, then install Windows as usual. However, at the initial Welcome screen after Windows starts up, press Ctrl+Shift+F3 to enter Audit mode.
Our guide uses Windows Server 2022 as a reference, but any supported version of Windows works the same way.
We highly recommend starting from the default Windows templates, as they contain optimal settings for Windows guests. Use at least 4 vCPUs and 4 GB of RAM to ensure that the update process goes smoothly.
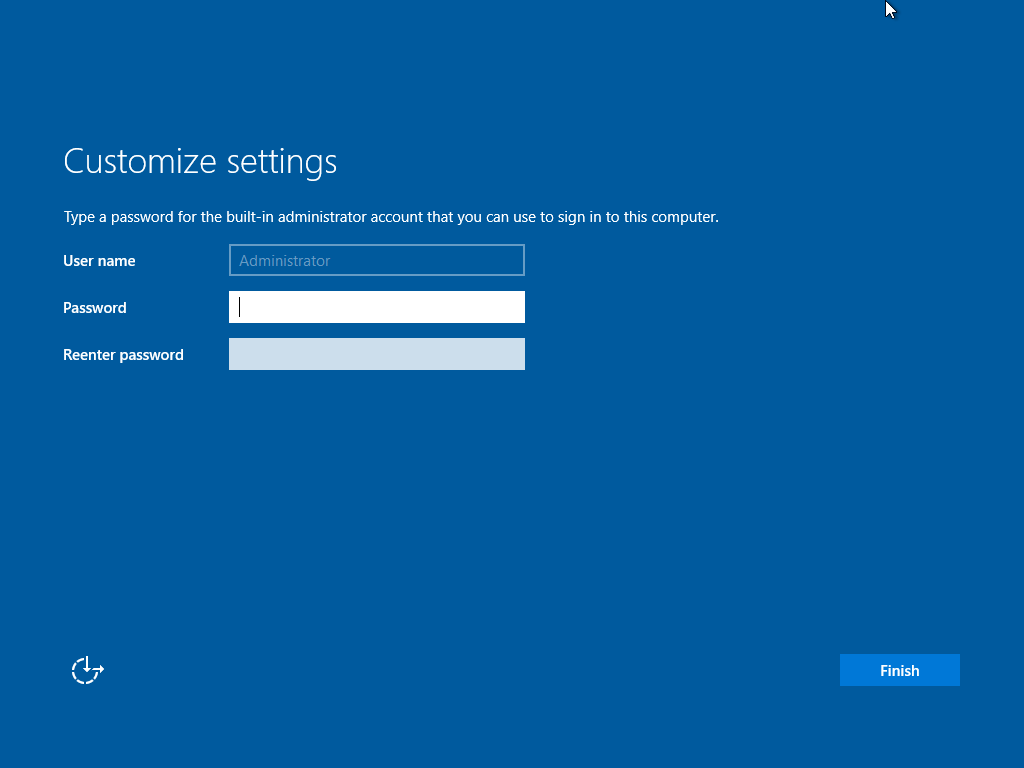
Master VM: Press Ctrl+Shift+F3 here to enter Audit mode.
Windows will automatically restart, and you will be presented with the Sysprep GUI as follows.

Master VM: Windows in Audit mode
Keep this Sysprep window open throughout the entire Audit mode up until you manually invoke Sysprep.exe. If you close the Sysprep window by accident, you may get locked out and be forced to reboot.
Now, you can keep your master VM up-to-date using Windows Updates in preparation for future templates.
Branching out template VM
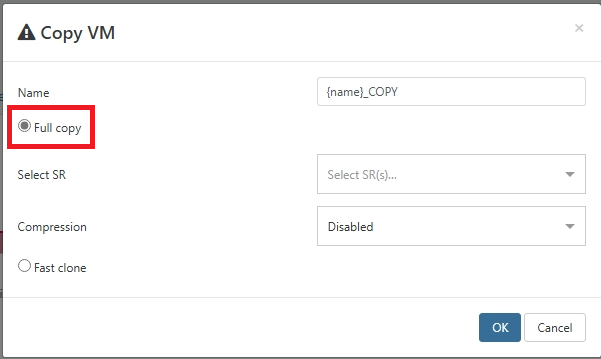
Every time you want to refresh your templates, copy your master VM into a new template VM. As its name indicated, this VM will become your new Windows template for future production VMs.
Use a full VM copy (Copy button) to avoid having too many VM disk layers, which may degrade performance.
Installing software in template
You can install any software you need in this template. In this example, we install the XenServer VM Tools:
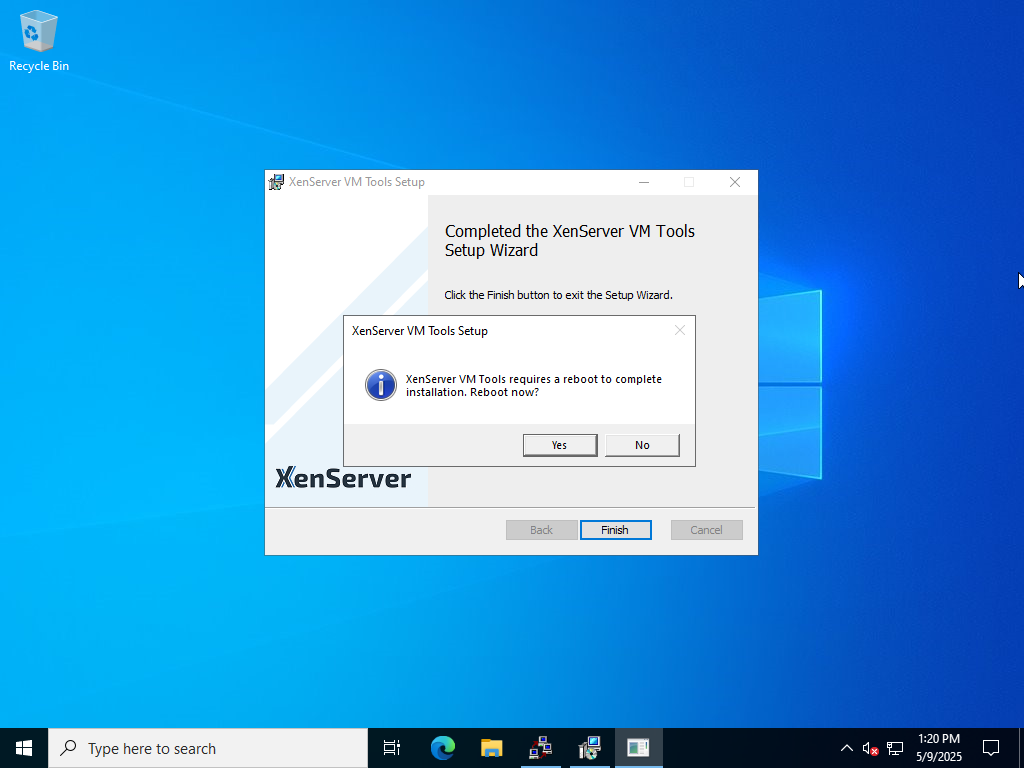
You can freely restart the VM when prompted. Once restarted, the VM will go back to Audit mode until you run Sysprep again.
Configure Cloudbase-init
Grab the latest installer from cloudbase.it and start the installation process.
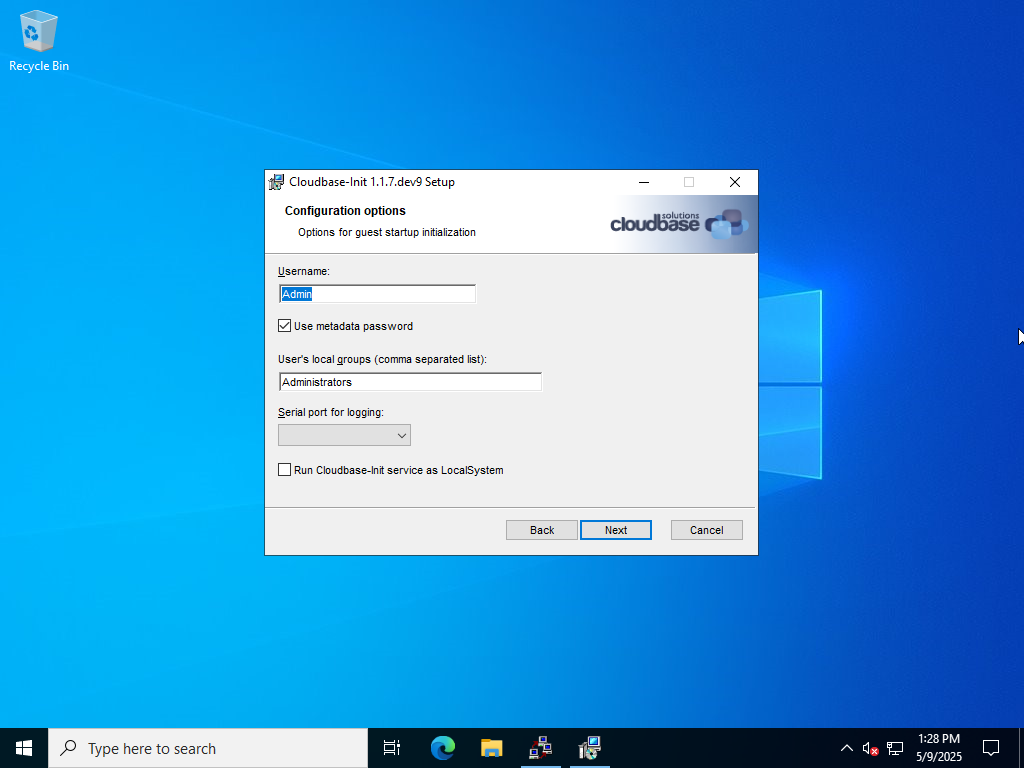
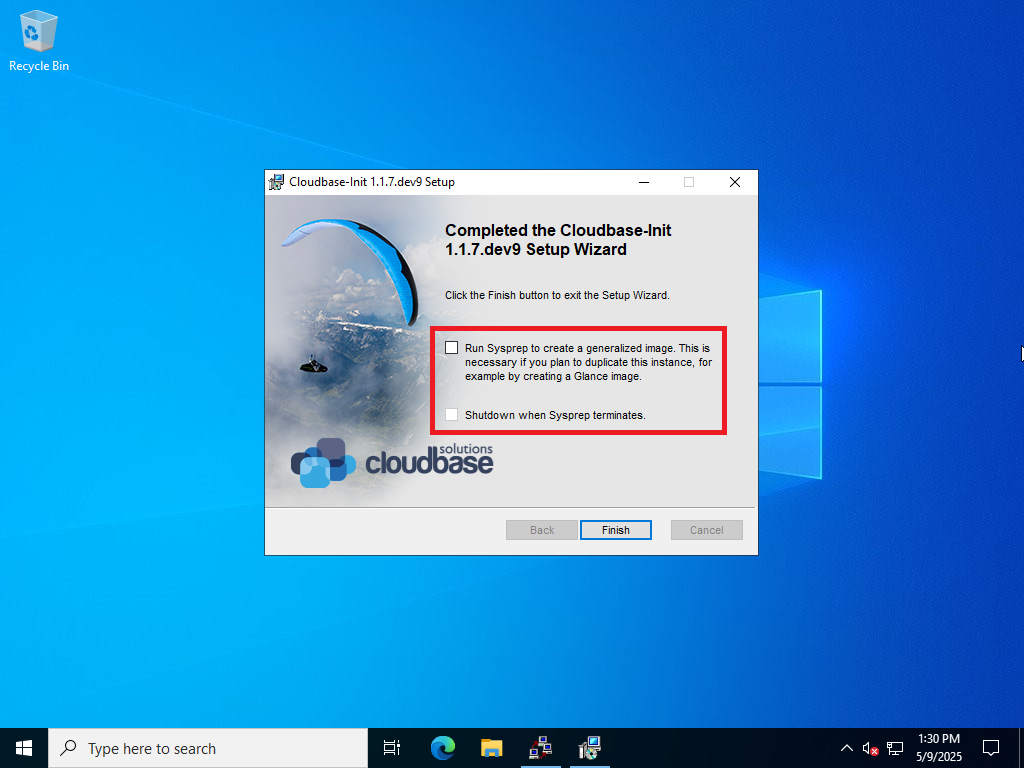
Don't run Sysprep yet; you still need to configure Cloudbase-init.
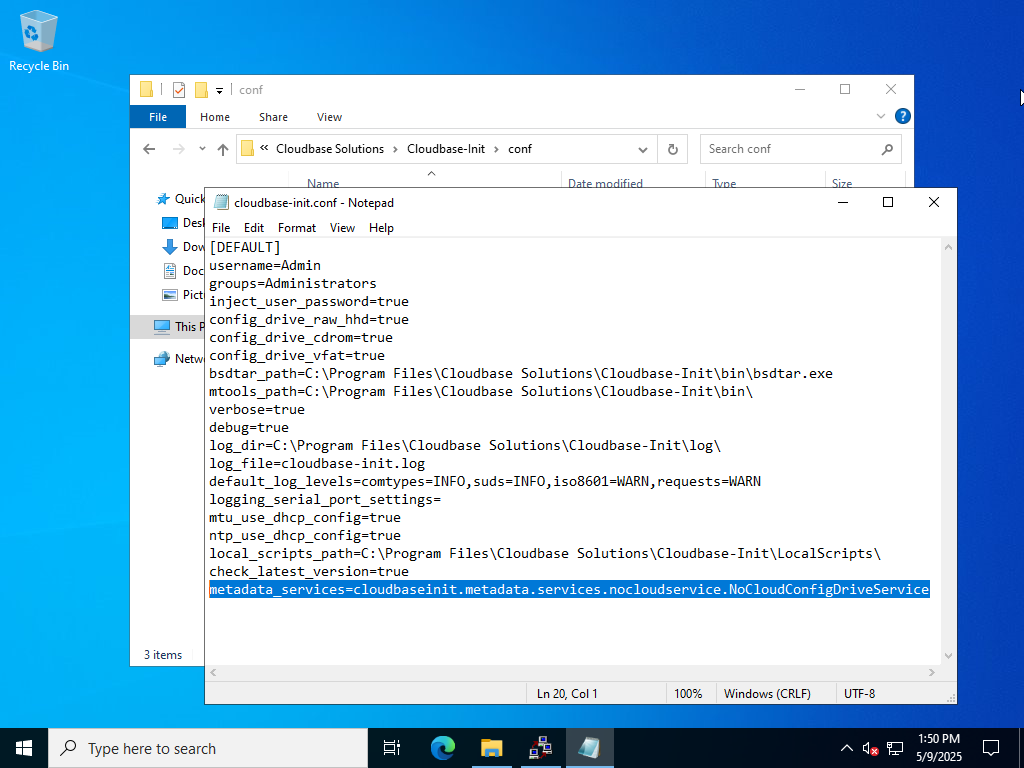
Enter the directory C:\Program Files\Cloudbase Solutions\Cloudbase-Init\conf.
You will find the following two files: cloudbase-init.conf and cloudbase-init-unattend.conf.
For each file, replace any metadata_services lines with the following:
metadata_services=cloudbaseinit.metadata.services.nocloudservice.NoCloudConfigDriveService
This line makes sure Cloudbase-init uses the NoCloud configuration drive (as generated by XO) as its data source.
Your VM is now ready for conversion to template.
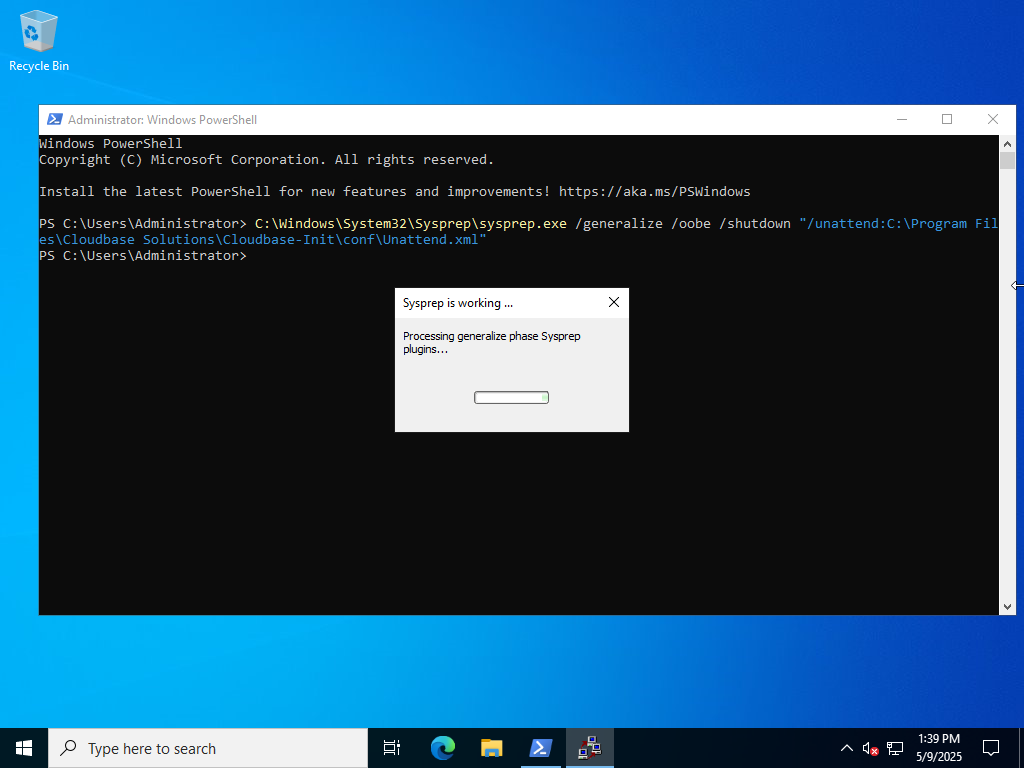
Sysprep and reseal
Close the running Sysprep window and run the following command in a PowerShell window running as Administrator:
C:\Windows\System32\Sysprep\sysprep.exe /generalize /oobe /shutdown "/unattend:C:\Program Files\Cloudbase Solutions\Cloudbase-Init\conf\Unattend.xml"
- Specify Cloudbase-init's Unattend.xml. This file is necessary to start the cloud-init configuration process.
- The Unattend parameter should be fully quoted because the Unattend.xml path contains spaces.
Once the Sysprep process is complete, your template VM will shut down.
Convert your VM to a template; do not start it again or the cloud-init configuration process will begin.
Instantiating new VMs
Create VMs from your prepared template and enter your cloud-init configs as necessary.
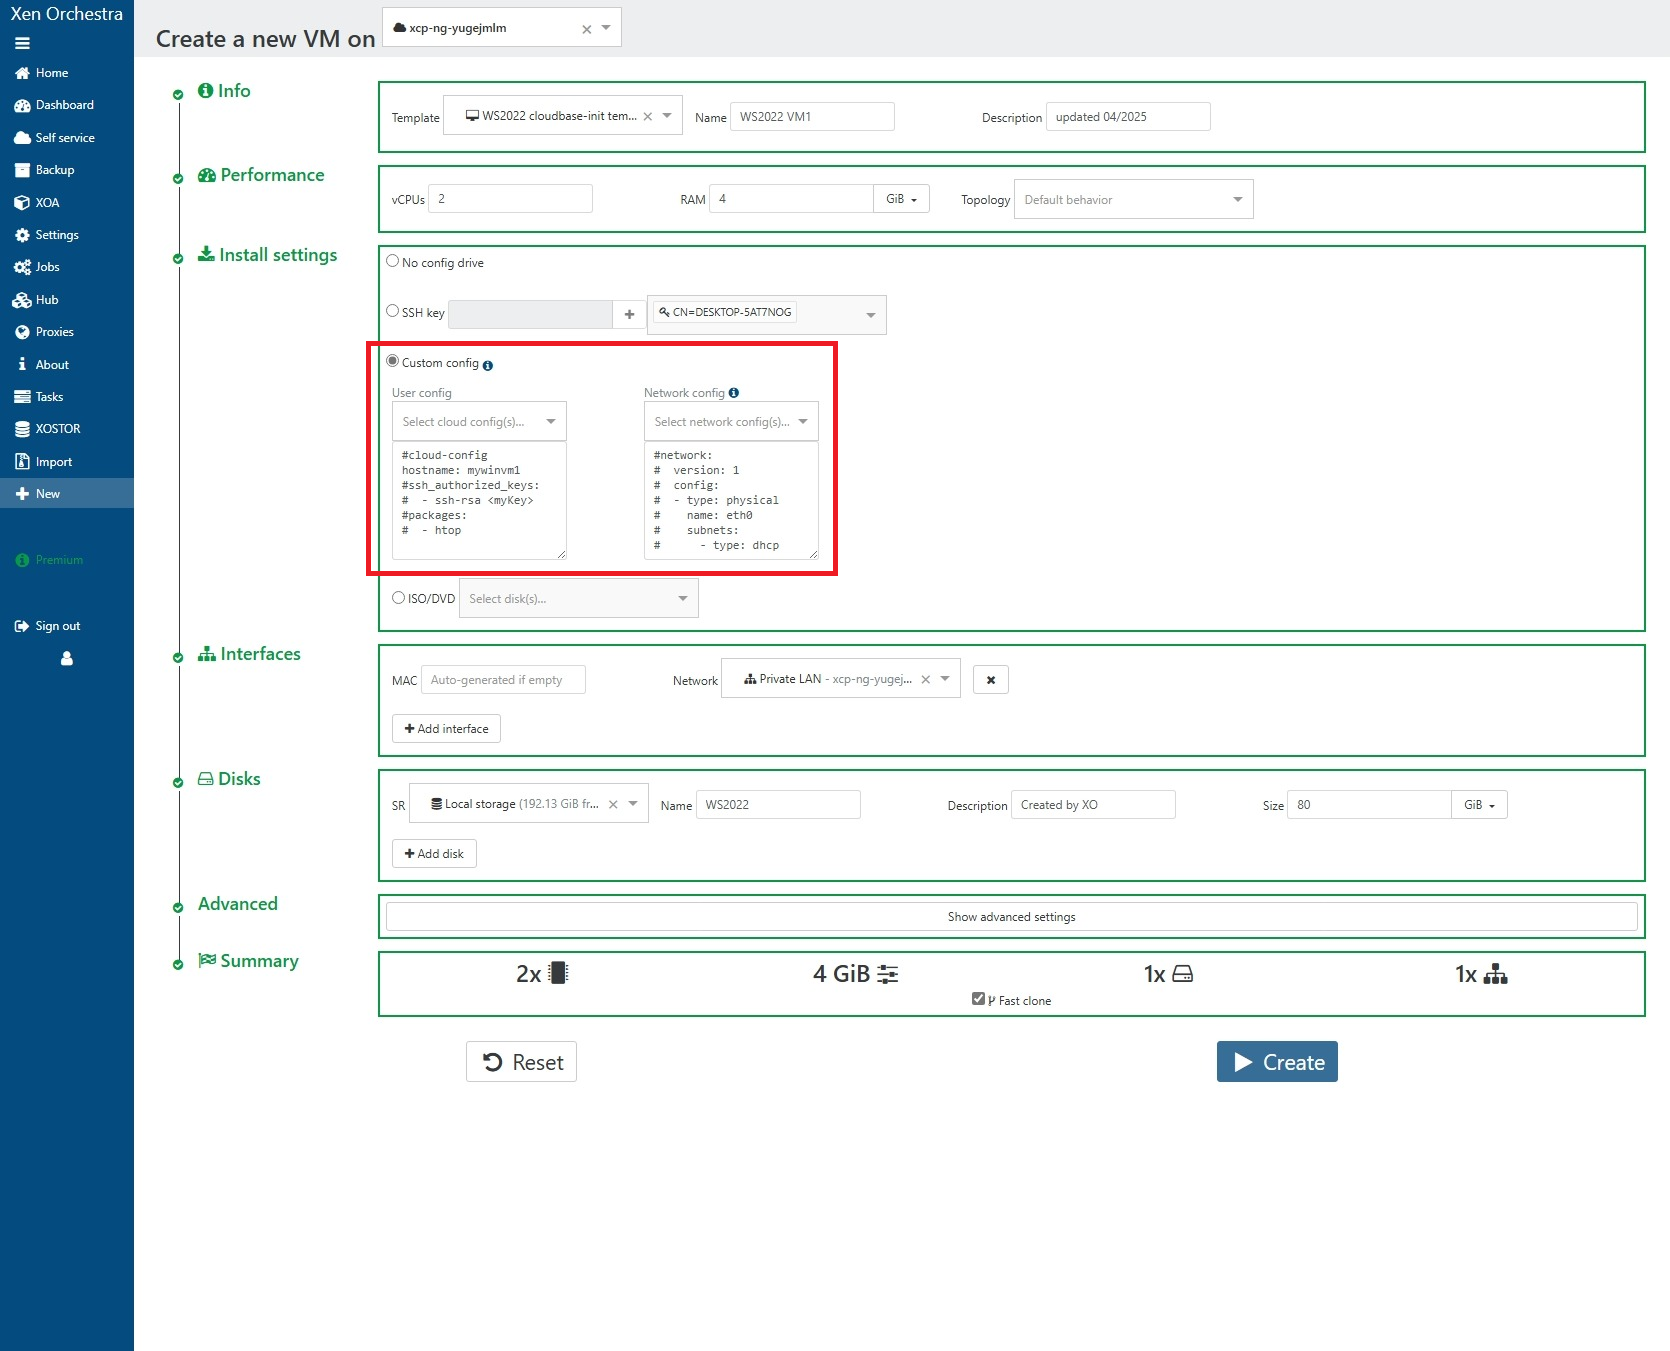
Refer to the Cloudbase-init plugins documentation for information on how to configure cloud-init for Windows guests.
Your VMs will reboot several times during the unsealing process.
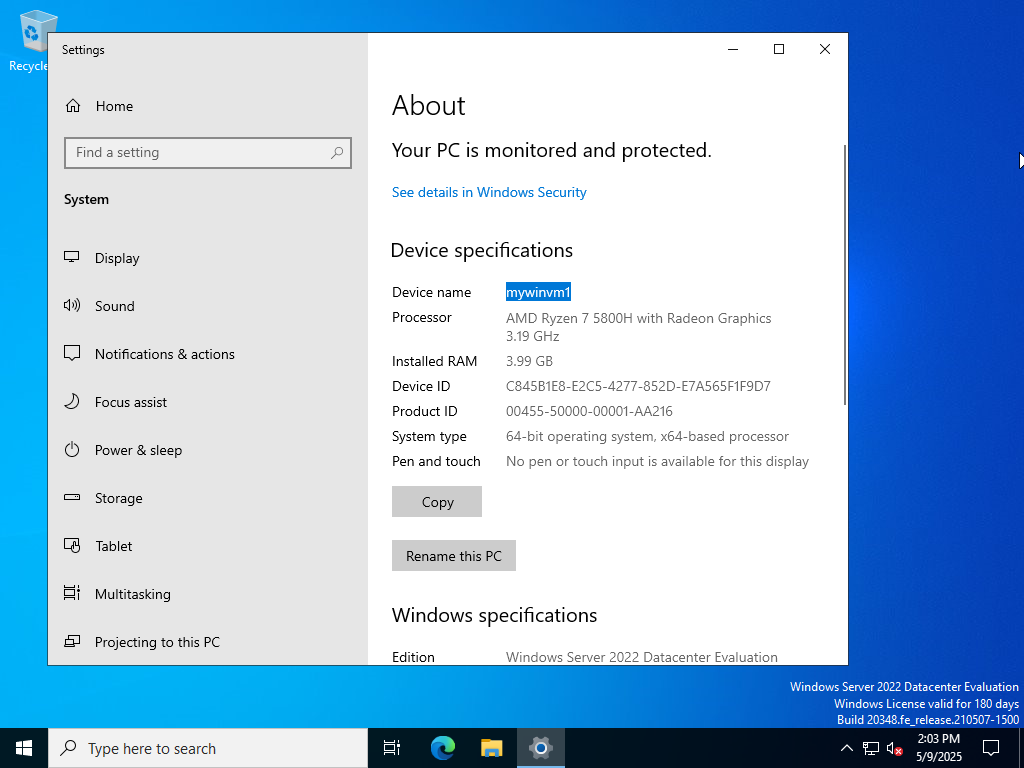
Enjoy your finished product!
Tips and tricks
- If you are Sysprepping an installation containing the XenServer/XCP-ng PV drivers, you may need to set the
PersistAllDeviceInstallsoption in yourUnattend.xml(Cloudbase-init'sUnattend.xmlalready includes this option). - Windows Server in Audit mode is not activated, and will automatically shut down after 1 hour. Be sure to either finish your work in 1 hour, or simply reboot before the timeout expires.