Load balancing
Basic notions
A generic definition (from Wikipedia), is:
In computing, load balancing distributes workloads across multiple computing resources, such as computers, a computer cluster, network links, central processing units or disk drives.
In the case of virtualization, you have multiple physical hosts, which run your virtual machines (VMs). The goal here is to distribute the VM load in the best way possible across your servers.
You may have heard about VMWare DRS (Distributed Resource Scheduler). That's the same principle here, but for XCP-ng.
The first goal is to adapt your VM placement in real time —without service interruption— depending of the load. Since Xen Orchestra is connected to multiple pools and XCP-ng supports live storage motion, we can perform load balancing on a whole XCP-ng infrastructure, even between remote datacenters.
A load balancing policy is called a plan.
Here's a simple example, with 2 hosts running 6 VMs:

Let's say both hosts are using only 5% of all their CPUs. Suddenly, one of your VM starts to have a very high CPU load (in yellow): performance of other VMs on this same host could be impacted negatively (in pink):

Host 1 still using 5% of its CPUs, but Host 2 is now at 95%.
We can detect that and now move others VM to the other host, like this:

Host 1 has a slightly higher load, but Host 2 can fully handle the “problematic” VM without disrupting the other VMs.
This way, the heavy load on a single VM doesn’t end up penalizing everything else.
However, there are more ways to look at it and optimize your resource usage:
- Performance mode: You might want to spread VM workloads across as many servers as possible, to get the most out of your hardware (as in the previous example).
- Density mode: You might prefer to reduce power consumption by consolidating VMs onto as few hosts as possible, then shutting down the unused ones.
Configuration
Essential parameters
Load balancing plans have:
- A name
- Pool(s) where to apply the policy
- A mode (see Plan modes)
Plan modes
Plans can work in one of these 3 modes:
-
Performance: VMs are placed to use all possible resources. This means balance the load to give the best overall performance possible. This tends to use all hosts available to spread the load.
To specify how the performance plan should act, go to the Performance plan behavior section. -
Density: This time, the objective is to use the least hosts possible, and to concentrate your VMs. In this mode, unused (and compatible) hosts are shut down.
-
Simple: This mode allows you to use VM anti-affinity without using any load balancing mechanism (see VM Anti-affinity).
Create a new plan
To create a new plan:
-
From the navigation bar, go to the Settings → Plugin section.
-
Open the load-balancer plugin and click the + button to show the Configuration menu:
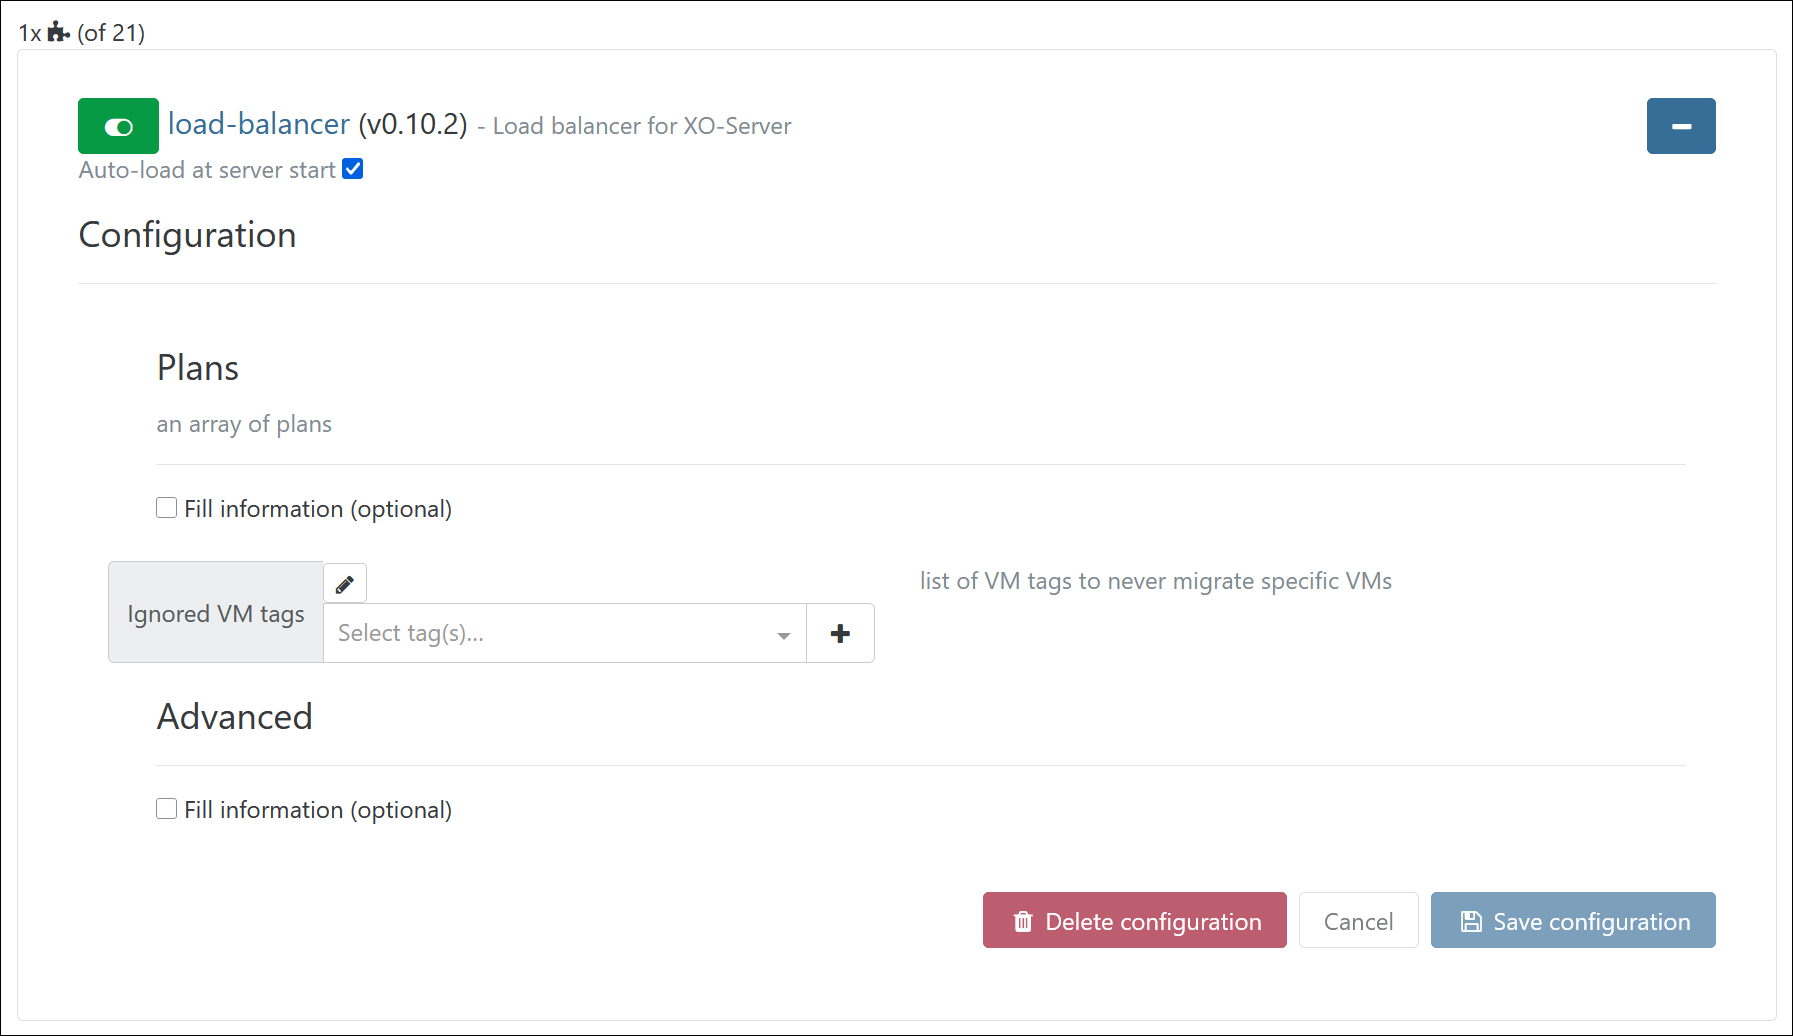
Here, you can create a new load balancing plan or edit an existing one.
-
In Configuration → Plans, check the box called Fill information (optional):
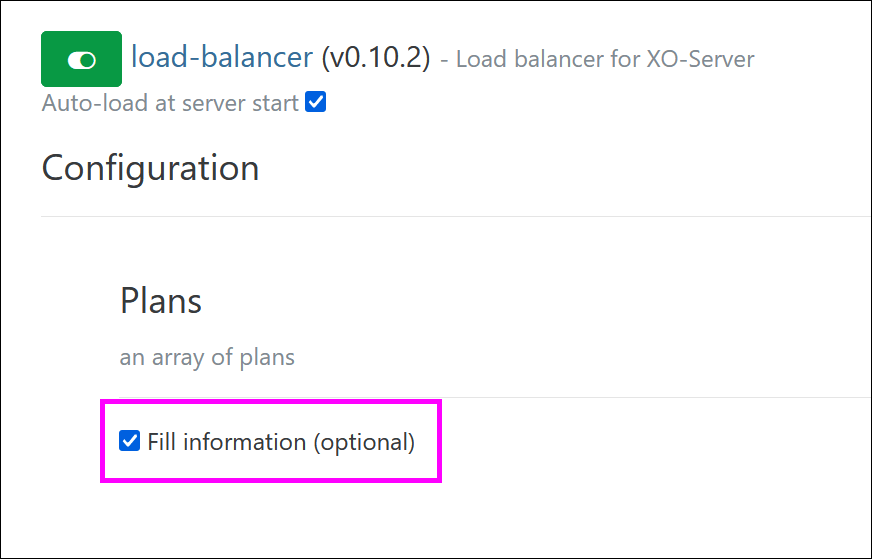
The Add button will appear. -
Click Add:
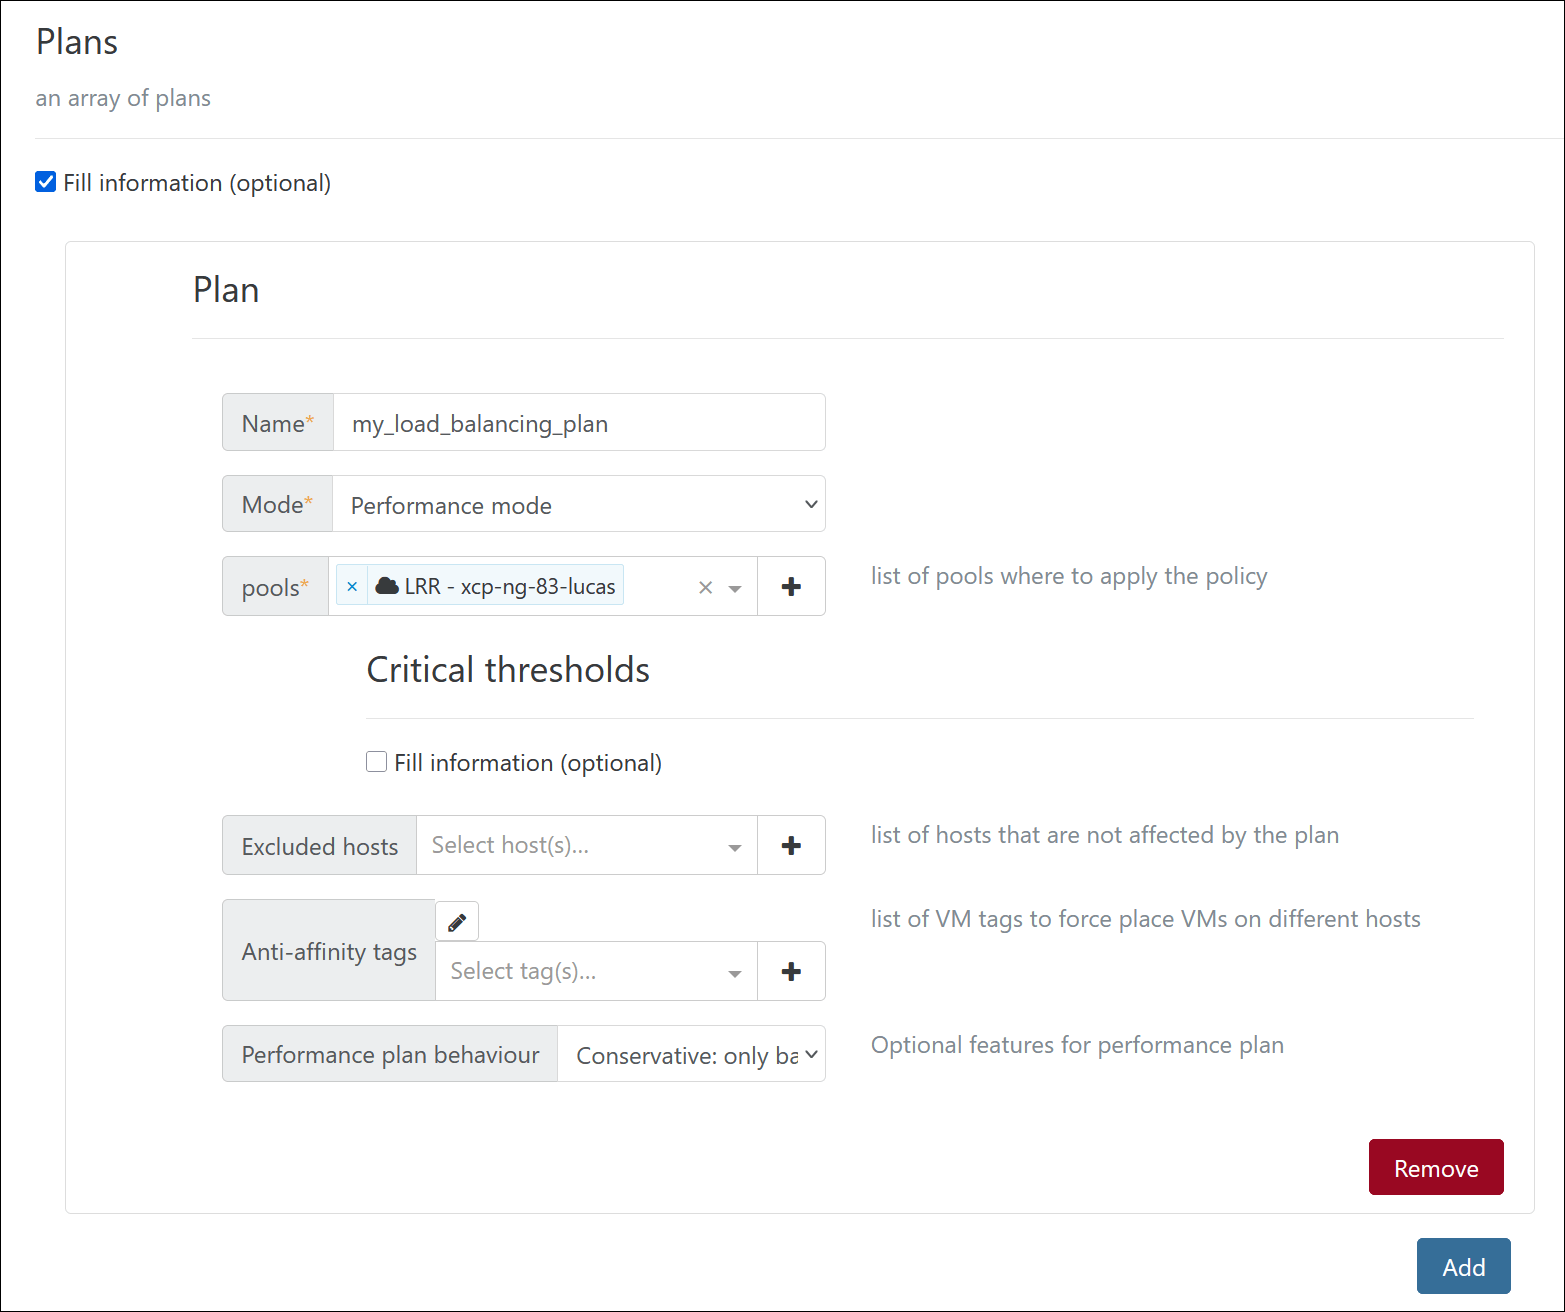
 A new form will open, where you can set up your plan:
-
Enter a Name for your plan.
-
Select a Mode.
-
Choose the pools where the plan should apply.
-
Go to the bottom of the page and click Save configuration.
Your load balancing plan is saved and ready to work.
Critical thresholds
In a load balancing plan, you can define different performance thresholds, such as:
- CPU threshold
- Free memory
To configure thresholds for your plan:
- Go to Configuration → Plans.
- Select the plan you want to update.
- Go to Plan → Critical thresholds.
- Check the Fill information (optional) box.
New fields will appear where you can set your thresholds:
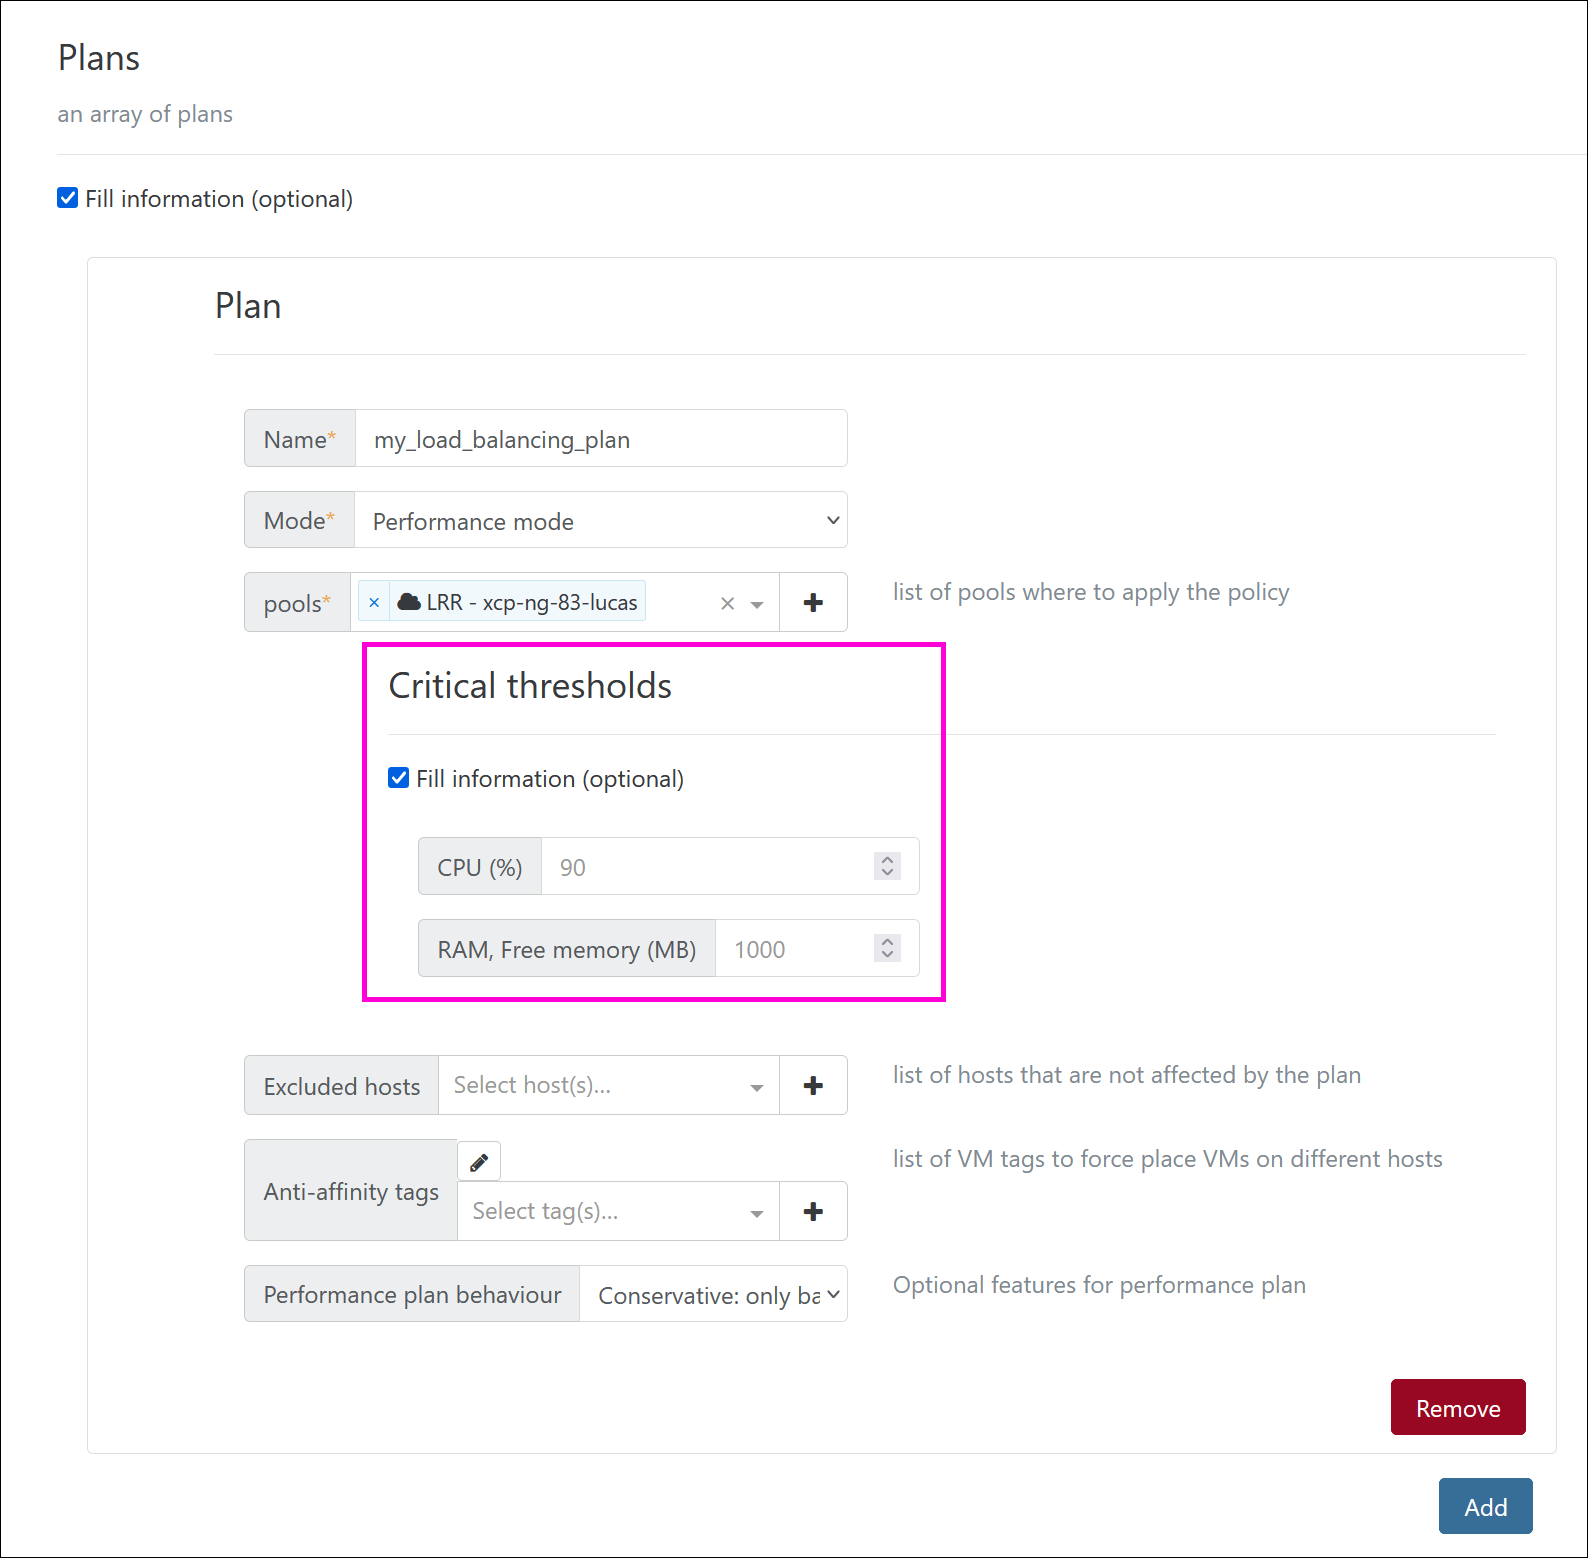
If the CPU threshold is set to 90%, the load balancer will only trigger if the average CPU usage on a host exceeds 90%.
For memory, load balancing will trigger when free RAM drops below the Free memory threshold.
Exclusion
If you want to prevent load balancing from triggering migrations on a particular host or VM, you can exclude it from the process. This can be done with:
- The Excluded hosts setting in each plan
- The Ignored VM tags parameter, which is common to every plan
Timing
The global situation (resource usage) is examined every minute.
TODO: more details to come here
Advanced settings
You can fine-tune your load balancing plan using the advanced settings.
To do this:
- Go to Configuration → Advanced.
- Check the Fill information (optional) box.
A list of advanced parameters will appear. - Configure the parameters as needed.
- Scroll to the bottom of the page and click Save configuration.
Your changes will be applied immediately.
Maximum concurrent migrations
This option lets you define the maximum number of migrations that can run at the same time. Limiting concurrent migrations can help maintain the overall performance of your environment.

Performance plan behavior
With a performance plan, you can enable a performance sub-mode that adds extra features on top of the plan’s default behavior.
These features are complementary and do not replace the default behavior.
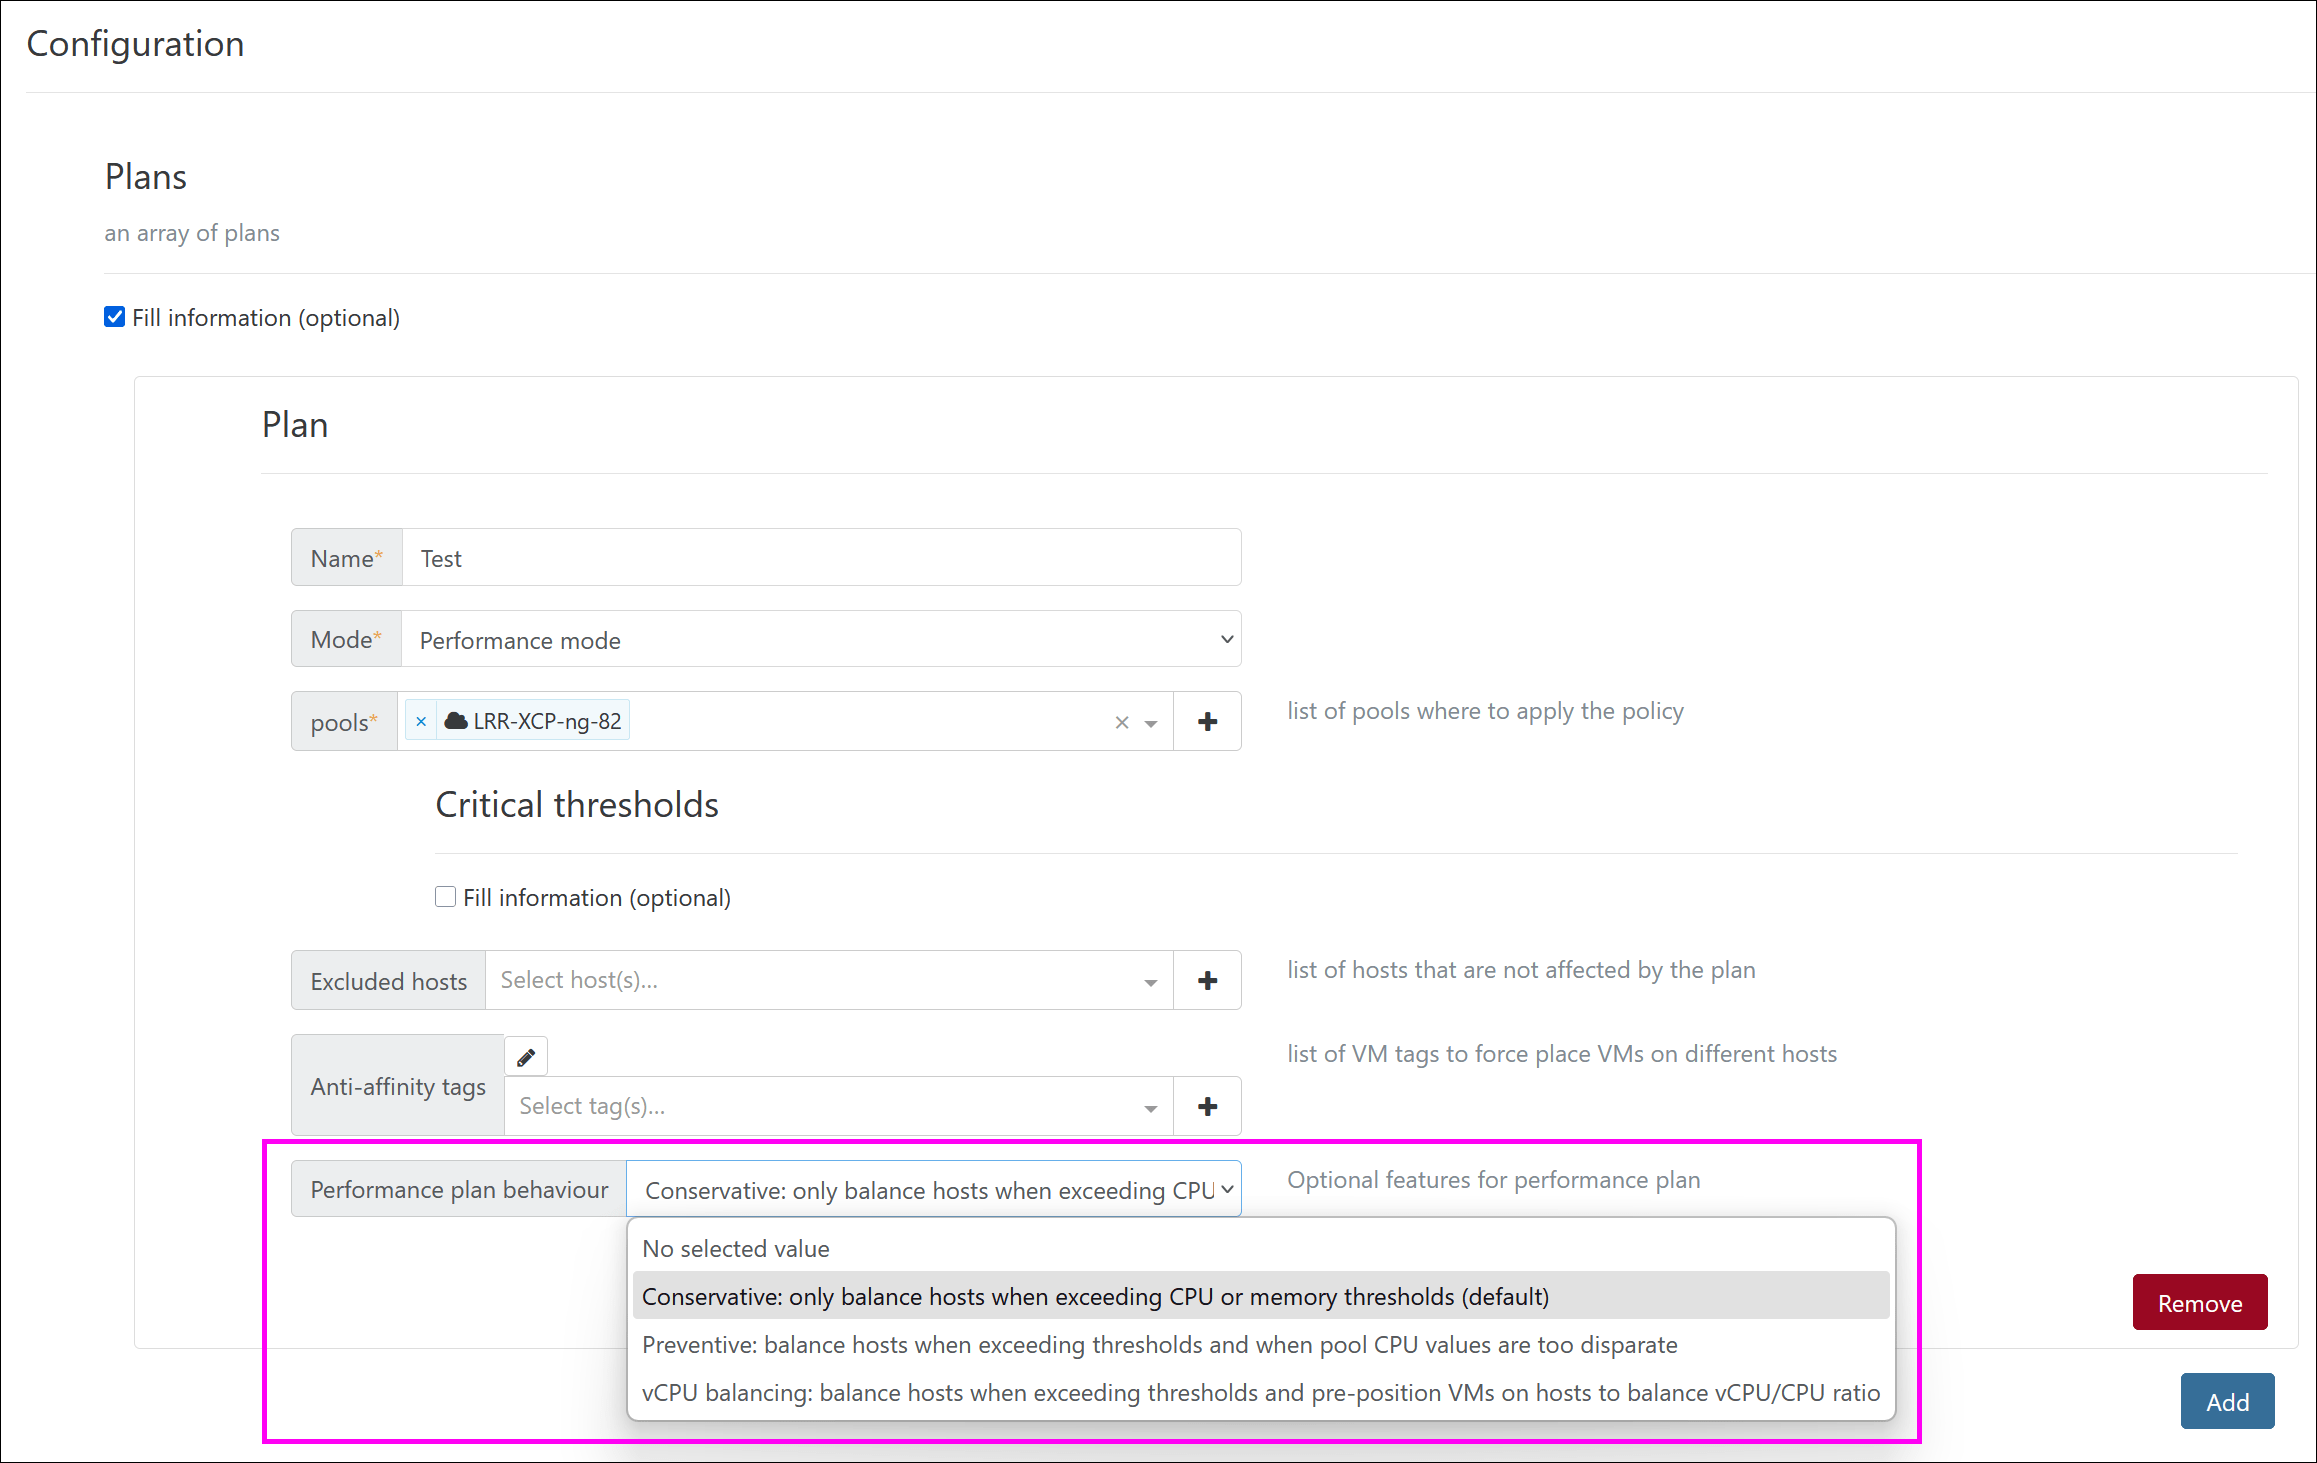
Conservative (default)
This is the standard behavior of the performance plan.
Preventive
By default, the performance plan only migrates VMs once CPU or memory usage reaches critical levels. The Preventive option goes further by trying to reduce CPU usage imbalances between hosts in the pool. For example, it aims to avoid a situation where one host runs at 60% CPU while others sit at 10% — something the default behavior would normally allow.
vCPU balancing
When the pool load is low (under 40% CPU usage), this option proactively distributes VMs across hosts to reduce large disparities in the number of vCPUs per CPU, rather than waiting until a host is overloaded.
This way, VMs are pre-positioned to minimize the number of migrations needed later as the load increases.
VM anti-affinity
VM anti-affinity is a feature that prevents VMs with the same user tags from running on the same host. This functionality is built into the load-balancer plugin. It helps you avoid situations where redundant or similar VMs end up on the same host.
For example, imagine you have several VMs running MySQL and PostgreSQL with high availability or replication.
Naturally, you don’t want both replicated databases to be placed on the same physical host.
To prevent that, set up your plan like this:
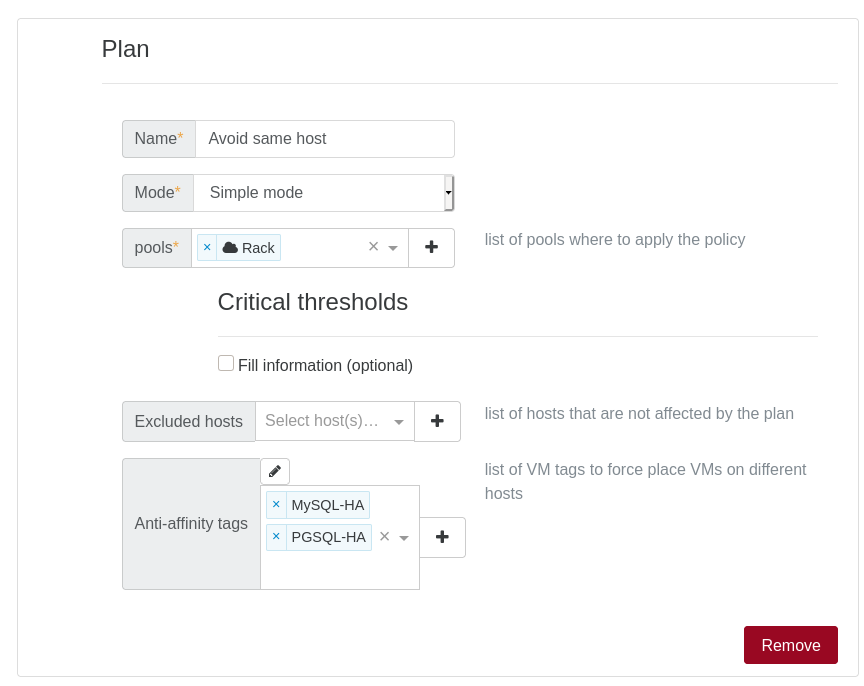
- Simple plan: no active load balancing mechanism is used.
- Anti-affinity: we added two tags, meaning any VMs with one of these tags will not run on the same host as another VM that has the same tag (whenever possible).
You can also use the Performance plan with Anti-affinity enabled to continue migrating VMs that don’t have tags.
This feature is not limited by the number of VMs sharing the same tag. For example, if you have six VMs with the same anti-affinity tag and two hosts, the plugin will try to place three VMs on each host. It distributes VMs as evenly as possible and, in most cases, takes priority over the performance algorithm.