Backup reports
At the end of a backup job, Xen Orchestra can send you a report through the channel of your choice: email, XMPP, Slack or Mattermost, and even straight into your Nagios or Icinga 2 monitoring.
Whatever the channel, the logic is always the same, in three steps:
- Enable and configure the backup-reports plugin, which builds the report and lists the recipients.
- Enable and configure the transport plugin matching your channel (
transport-email,transport-xmpp,transport-slack,transport-nagiosortransport-icinga2). - In the backup job itself, pick a report condition: Always, Skipped and failure, Failure (errors only) or Never.
Email
Step-by-step
- In the Settings → Plugins view, enable and configure the backup-reports plugin. This is where you add the list of email recipients. You can also set a custom subject suffix, appended to the subject of every backup report email.
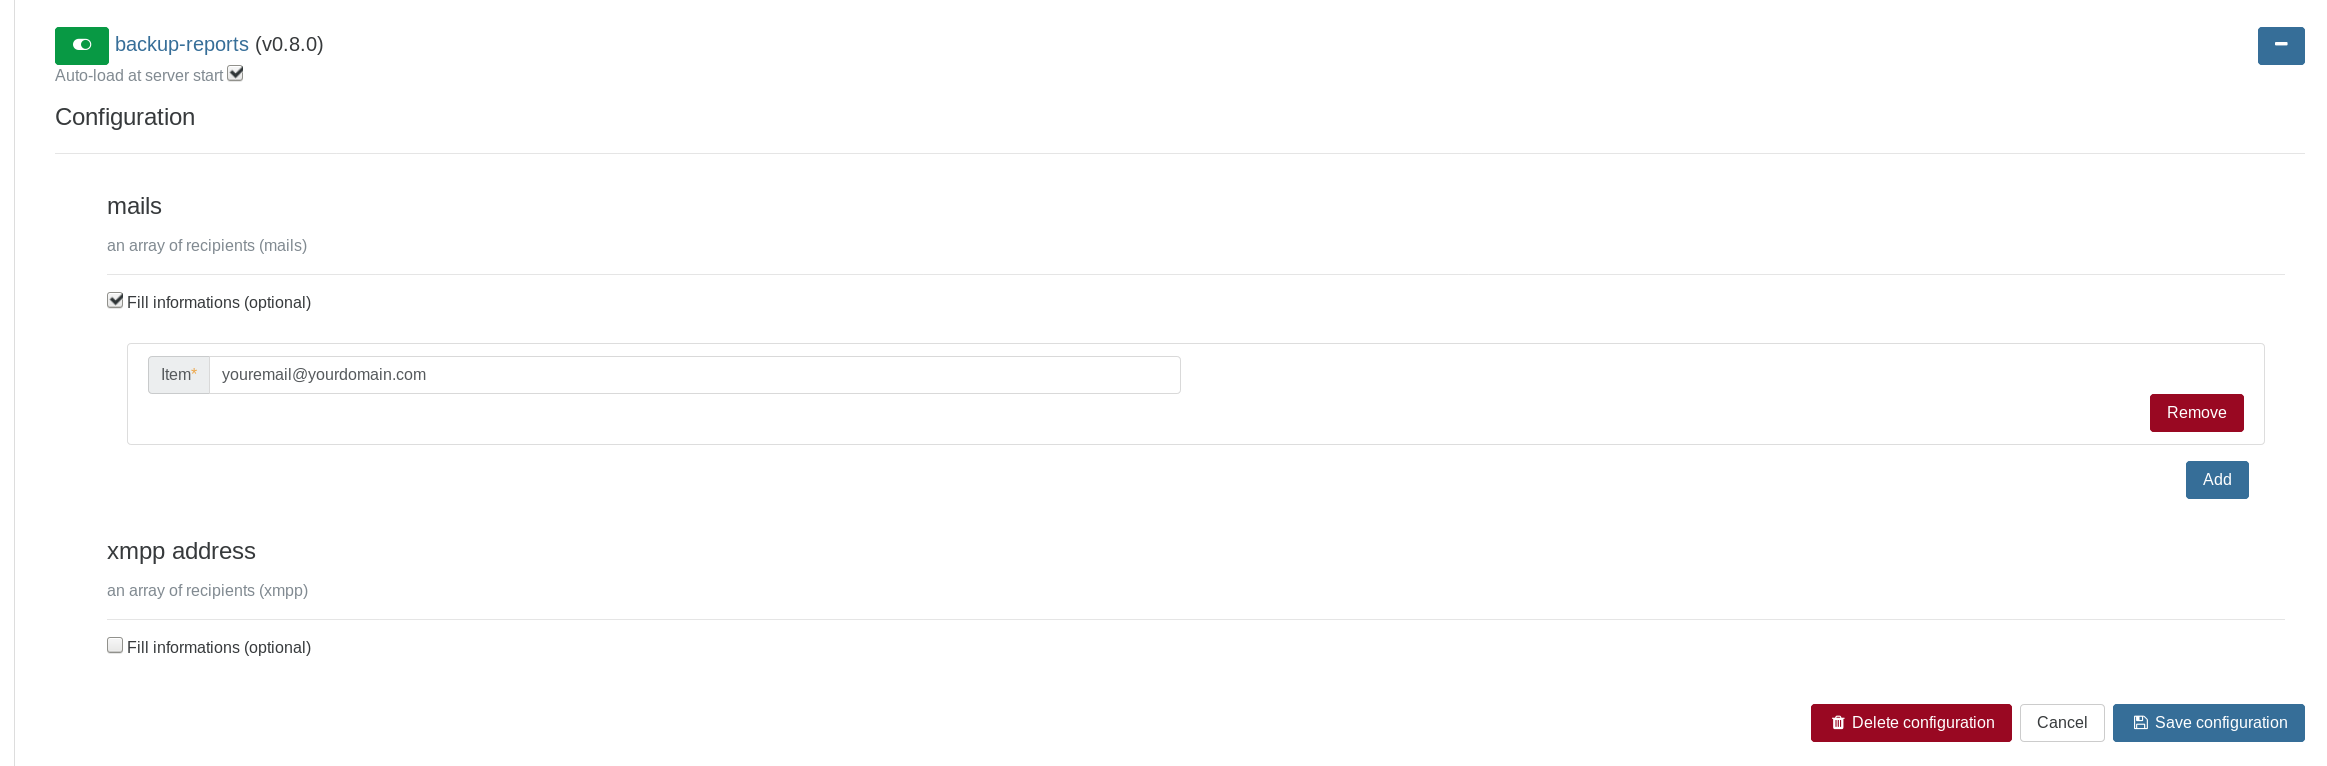
- Enable and configure the
transport-emailplugin: sender name and address, then the SMTP transport itself (host, port, security mode, user and password). See the provider walkthroughs below for concrete values.
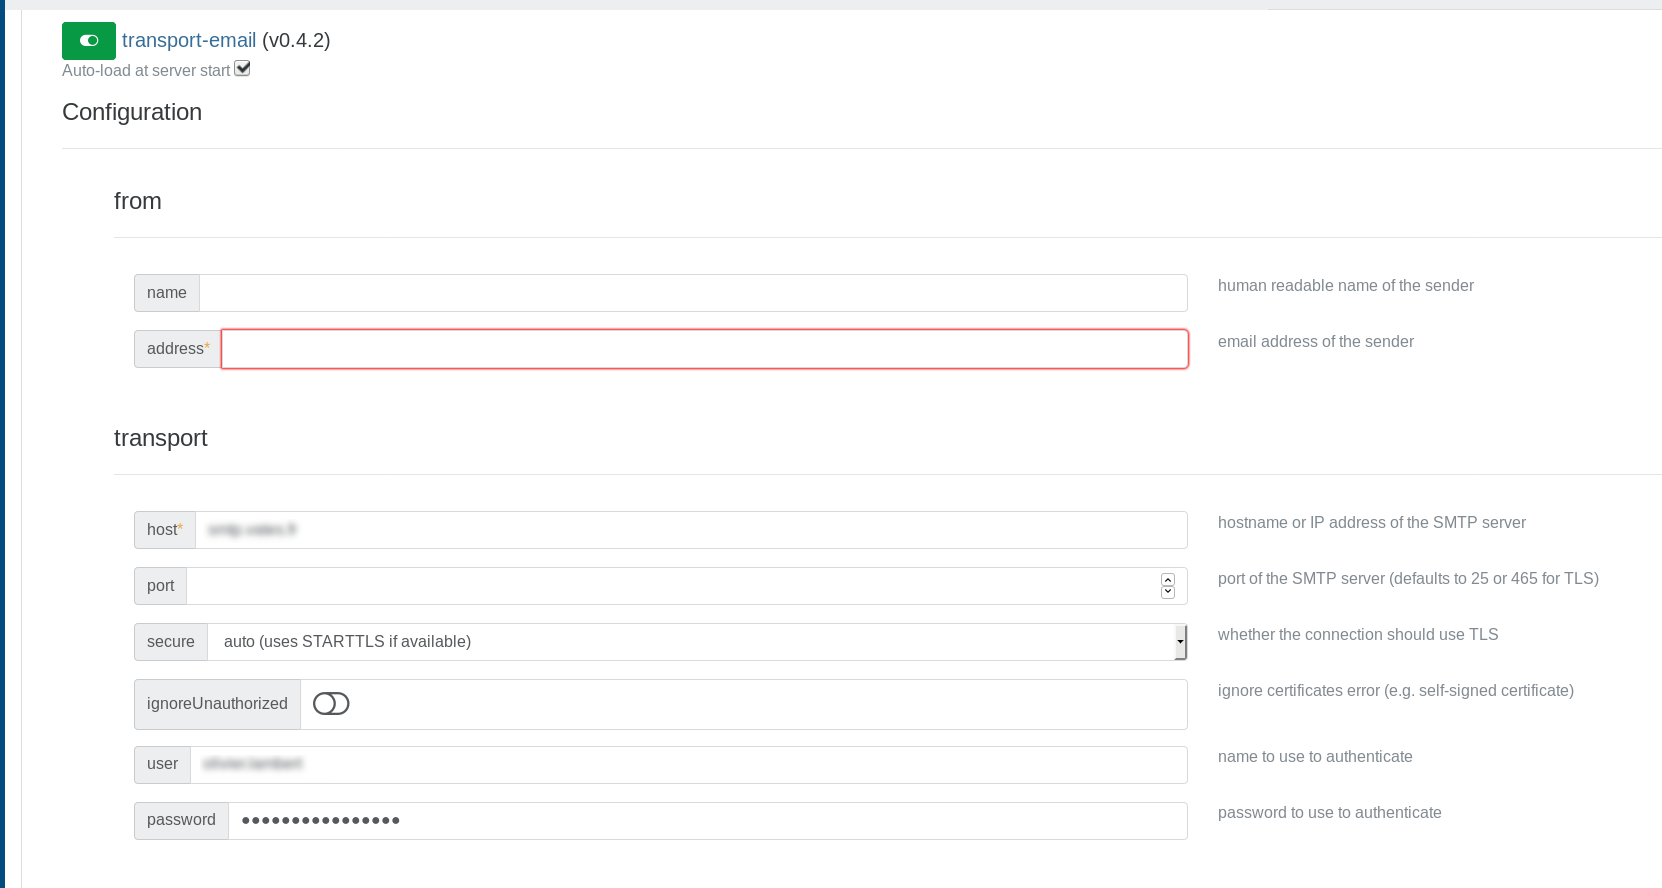
- Once done, create your backup job. In the Report selector, choose when you want to receive an email: Always, Skipped and failure, Failure (errors only) or Never.
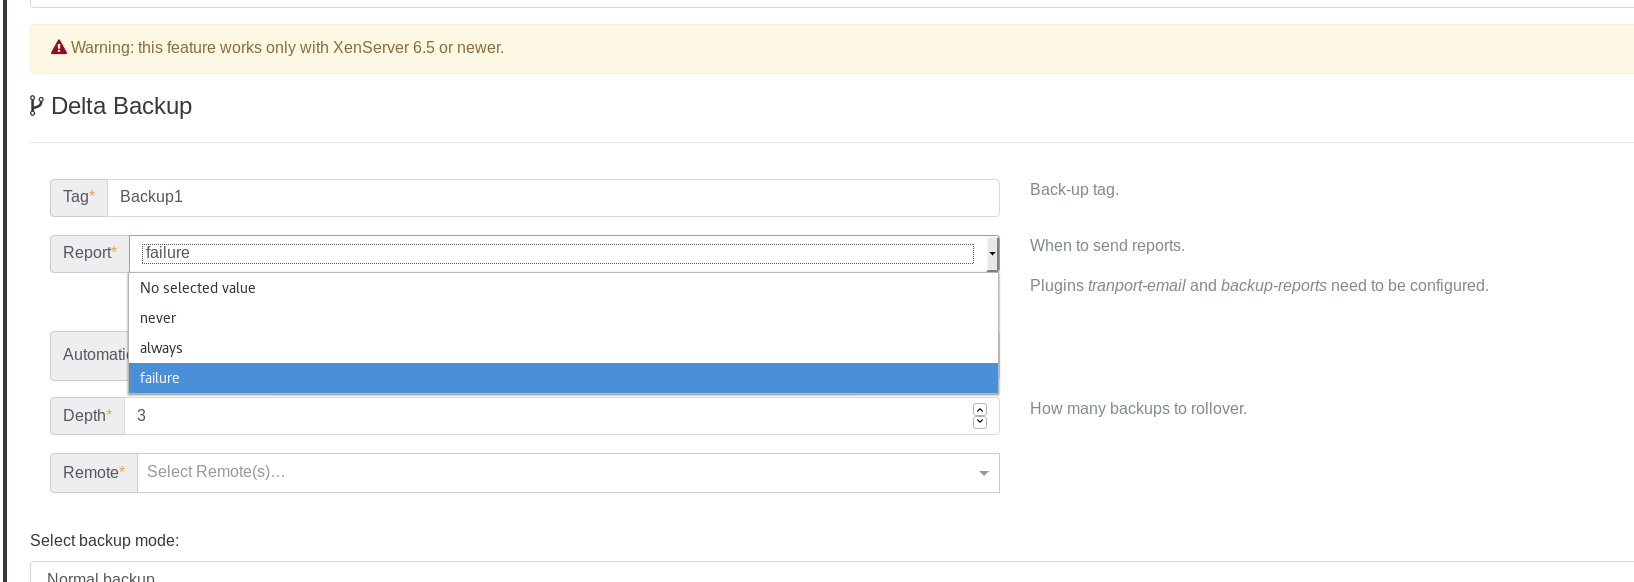
You can also modify existing backup jobs and change the behavior of the report system at any time.
Email Provider Configuration
Authentication requirements
- Gmail: standard passwords no longer work. App Passwords with 2FA are required.
- Microsoft 365: basic authentication is now permanently disabled (since spring 2026). Direct SMTP submission with a plain password no longer works, see below.
Gmail Configuration
Gmail users must use App Passwords for SMTP authentication.
Prerequisites:
- Enable 2-Factor Authentication on your Google account.
Steps:
- Enable 2FA: Go to Google Account Security → 2-Step Verification
- Generate App Password: Visit App Passwords → Select "Mail" → Generate
- Configure the transport-email plugin:
- Host:
smtp.gmail.com - Port:
587 - Secure:
auto (uses STARTTLS if available)orforce (requires STARTTLS or fail) - User: your Gmail address
- Password: the 16-character App Password (no spaces)
- Host:
App Passwords are more secure than regular passwords, as they require 2FA and can be revoked individually.
Microsoft 365 Configuration
Microsoft permanently disabled basic authentication for SMTP submission between March and April 2026. The historical configuration (smtp.office365.com, port 587, your Microsoft 365 email address and password) no longer works, and the transport-email plugin does not support the OAuth2 flow that Microsoft now requires for direct submission.
If your email notifications went through Microsoft 365 and stopped working, you have several honest ways forward:
- Use an SMTP relay in front of Microsoft 365: point
transport-emailat an internal relay (a Postfix or similar MTA) and let that relay deliver to Microsoft 365, for example through an Exchange Online connector restricted to your relay's IP address. - Use Microsoft's replacement services: Azure Communication Services Email and Exchange Online High Volume Email both provide SMTP endpoints with their own credentials, designed for application-generated mail such as these reports.
- Switch to another SMTP provider: any provider that still supports user and password authentication works out of the box with the plugin (see below).
Other SMTP Providers
For providers supporting basic authentication:
- Host: your SMTP server
- Port:
587(STARTTLS) or465(TLS) - User/Password: as provided by your service
Network Requirements
The transport-email plugin requires outbound access to:
- Port 587 (SMTP with STARTTLS)
- Port 465 (SMTP over TLS)
- SMTP server addresses (e.g., smtp.gmail.com)
Troubleshooting
Gmail "Authentication failed":
- Ensure you're using an App Password, not your regular password.
- Verify 2FA is enabled.
Microsoft 365 "Authentication unsuccessful":
- Basic authentication is permanently disabled since spring 2026: a direct password-based configuration cannot work anymore. Use one of the alternatives described in the Microsoft 365 section.
Connection timeouts:
- Verify your firewall allows outbound SMTP.
- Test connectivity:
# telnet smtp-server.example.com 587
XMPP
You can be notified via XMPP after a backup job run. The flow is the same as for email:
- In the backup-reports plugin, add the list of XMPP recipients (the xmpp address field).
- Enable and configure the
transport-xmppplugin: XMPP server host, port (5222by default), the user (XMPP address) and password used to authenticate. - Choose the report condition in your backup job.
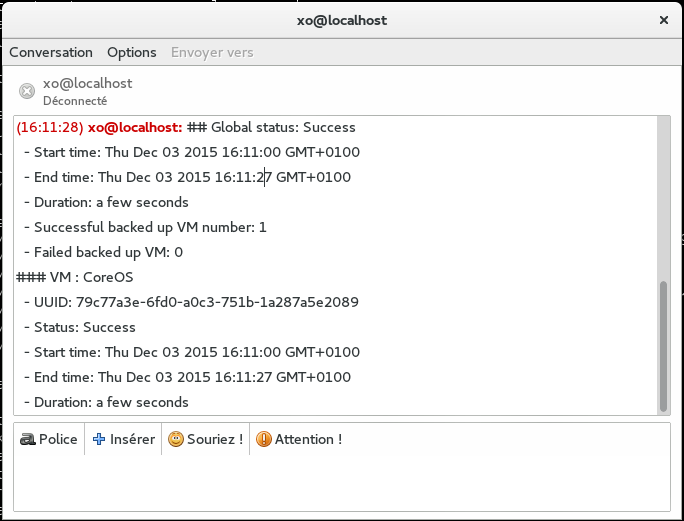
That's it: your next scheduled job will be recapped in a message:
Slack or Mattermost
Xen Orchestra is able to send backup reports to Slack or Mattermost. Both are handled by the same transport-slack plugin, which posts the report to an incoming webhook URL.
Plugin configuration
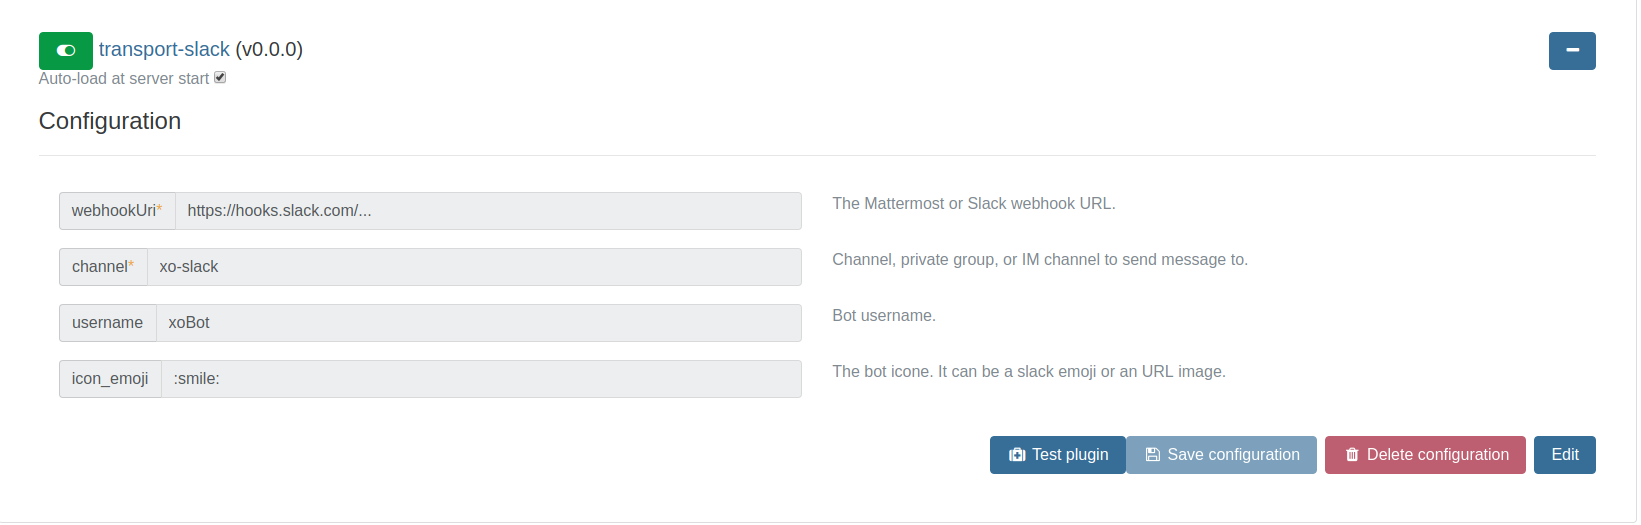
Like all other xo-server plugins, it can be configured directly via the web interface, see the plugin documentation. The plugin needs:
- Webhook URI: the Mattermost or Slack webhook URL (see below to generate it)
- Channel: the channel, private group or IM channel to send the message to
- Optionally, a bot username and icon (a Slack emoji or an image URL)
Then choose the report condition in your backup job, as for any other transport.
Generate the Webhook
Slack
-
Log in to your Slack team account.
-
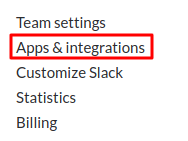
Click on the Main menu at the top and choose Apps & Integrations.
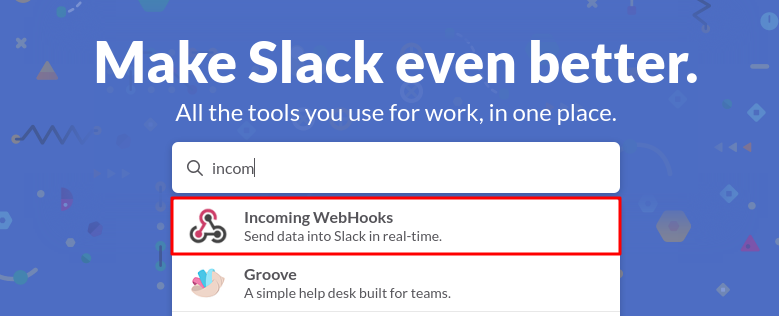
- Search for Incoming WebHooks.
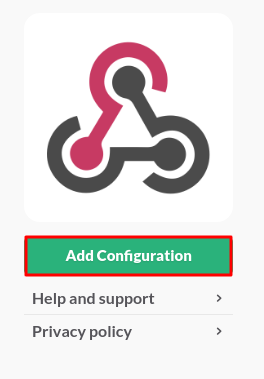
- Click on Add Configuration.
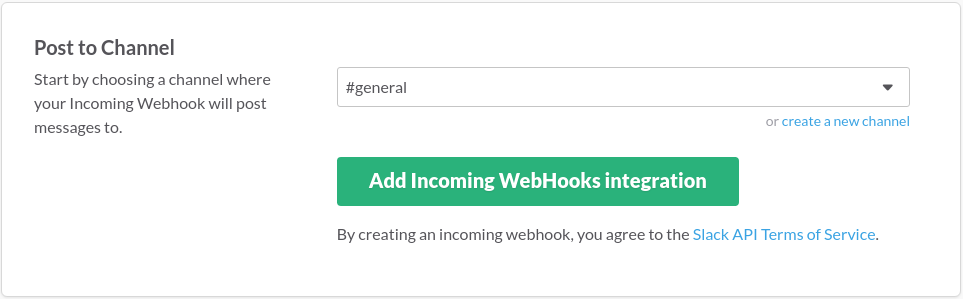
- Choose the default channel and click on Add Incoming WebHooks integration.
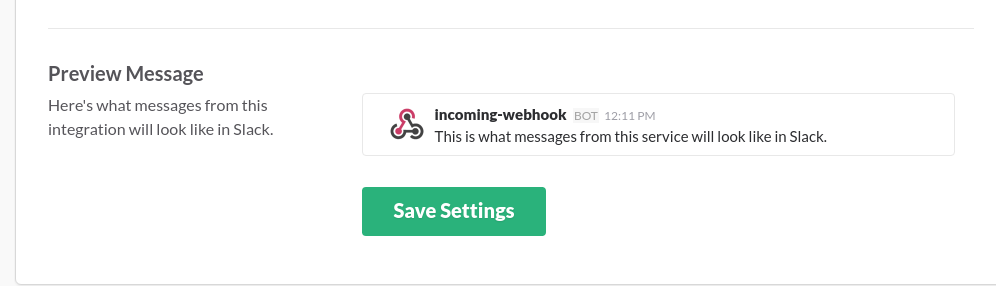
- Modify the default settings and click on Save Settings.
Mattermost
You need to be an admin:
- Go into the Mattermost menu, then Integrations.
- Click on Add Incoming webhook.
- Copy the generated webhook URL into the plugin configuration.
Testing the plugin
Slack
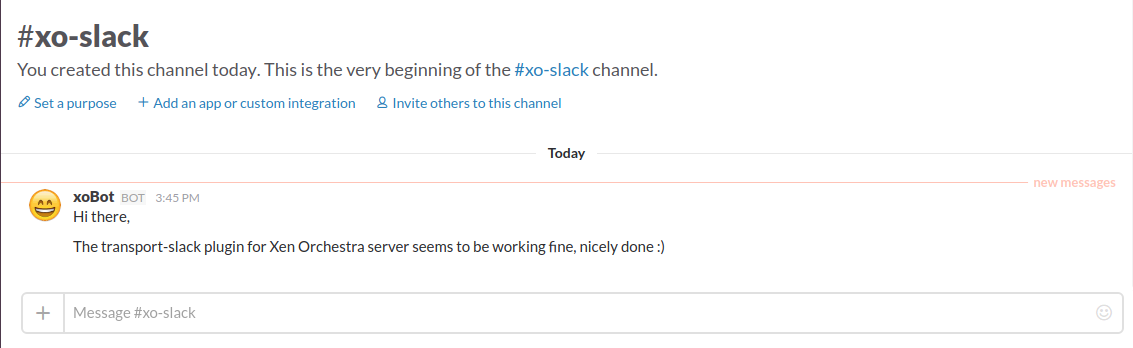
Fill the plugin configuration with your webhook URL and channel, then use the test button:
Mattermost
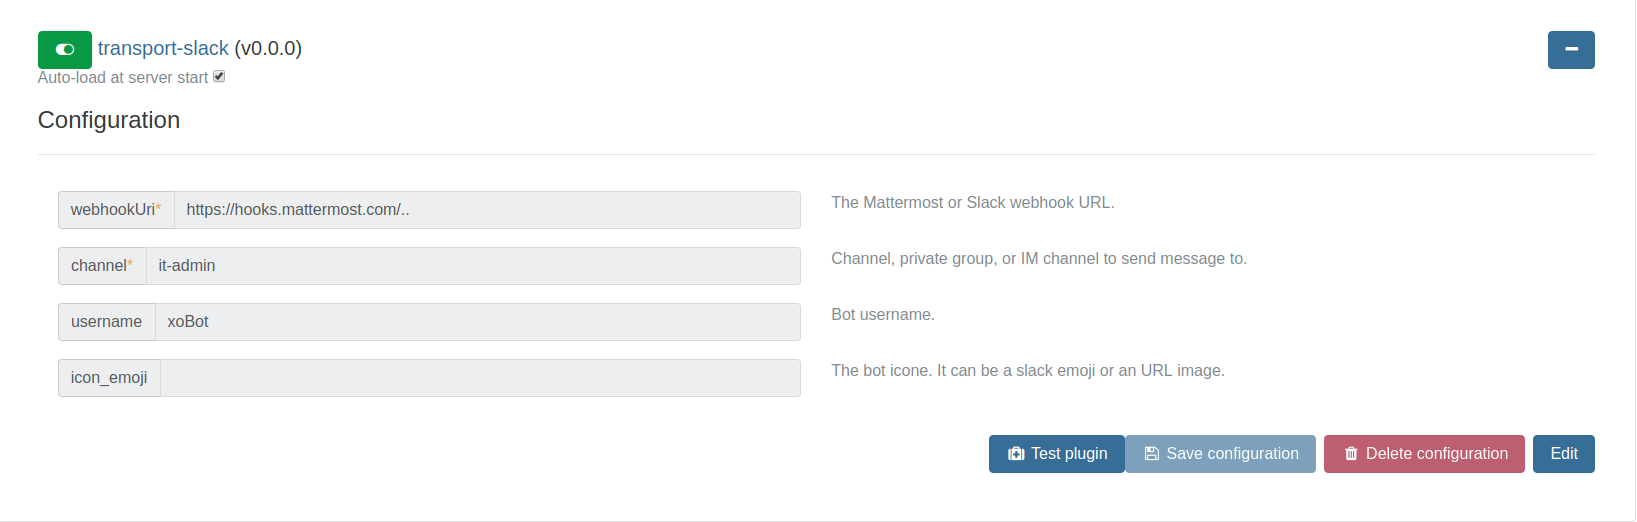
The same plugin works for Mattermost, only the webhook URL changes:

Nagios
The transport-nagios plugin allows you to integrate Xen Orchestra backup reports directly into your Nagios monitoring system.
Instead of relying solely on email notifications, this plugin sends the status of your backup jobs as passive checks to Nagios. This ensures that your infrastructure monitoring dashboard remains the single source of truth for your backup health.
Overview
When a backup job completes, Xen Orchestra sends a report. By using the plugin, the result (Success, Warning, or Error) is pushed to the Nagios command file.
- Success: sends an
OKstatus. - Warning: sends a
WARNINGstatus. - Error/Partial Success: sends a
CRITICALstatus.
By default, the plugin reports each VM under a Nagios host named after the VM ({vm.name_label}) and a service named after the backup job ({job.name}). You can customize both patterns in the plugin configuration, as long as the custom values still include the {vm.name_label} and {job.name} templates respectively.
Prerequisites
NSCA
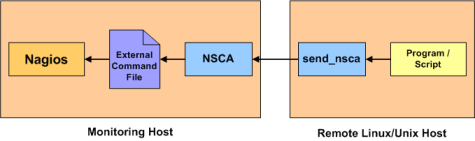
In order to contact Nagios, you must have NSCA (Nagios Service Check Acceptor) running on the Nagios host.
NSCA is a Linux/Unix daemon that lets remote systems "push" status updates to a Nagios server as passive checks. It basically acts as a bridge, by sending data from a client to a server-side daemon that feeds the results directly into Nagios's command file.
The architecture is like this:
Check your NSCA config file and add a password and at least XOR encryption:
# password=mypassword
decryption_method=1
Nagios configuration
1. Create a host for each backed-up VM
With the default plugin configuration, the Nagios host name must match the VM name:
# define host{
      use                     generic-host
      host_name               my-vm-name          ; must match the VM name in XO
      alias                   My VM
      address                 192.168.0.245
      }
2. Create a dedicated service for the backup reports
With the default plugin configuration, the service description must match the backup job name:
# define service{
      name                            passif-generic
      use                             generic-service
      service_description             my backup job       ; must match the job name in XO
      host_name                       my-vm-name
      active_checks_enabled           0
      passive_checks_enabled          1
      is_volatile                     1
      max_check_attempts              1
      check_freshness                 1
      freshness_threshold             86400
      check_command                   no-backup-report!0!No backup message sent in the last 24 hours
}
This service will wait for Xen Orchestra to send backup news in the last 24 hours.
Your Nagios setup is now ready. If the service doesn't hear from Xen Orchestra in time, it will be in CRITICAL state, like this:

Installation in XOA
The plugin is part of the standard Xen Orchestra transport packages.
- Go to Settings → Plugins.
- Locate
transport-nagios. - Toggle the switch to Enabled.
Configuration
Once the plugin is enabled, you need to configure the connection to your Nagios server.
- Click the edit icon (+) for the
transport-nagiosplugin to show the configuration form:
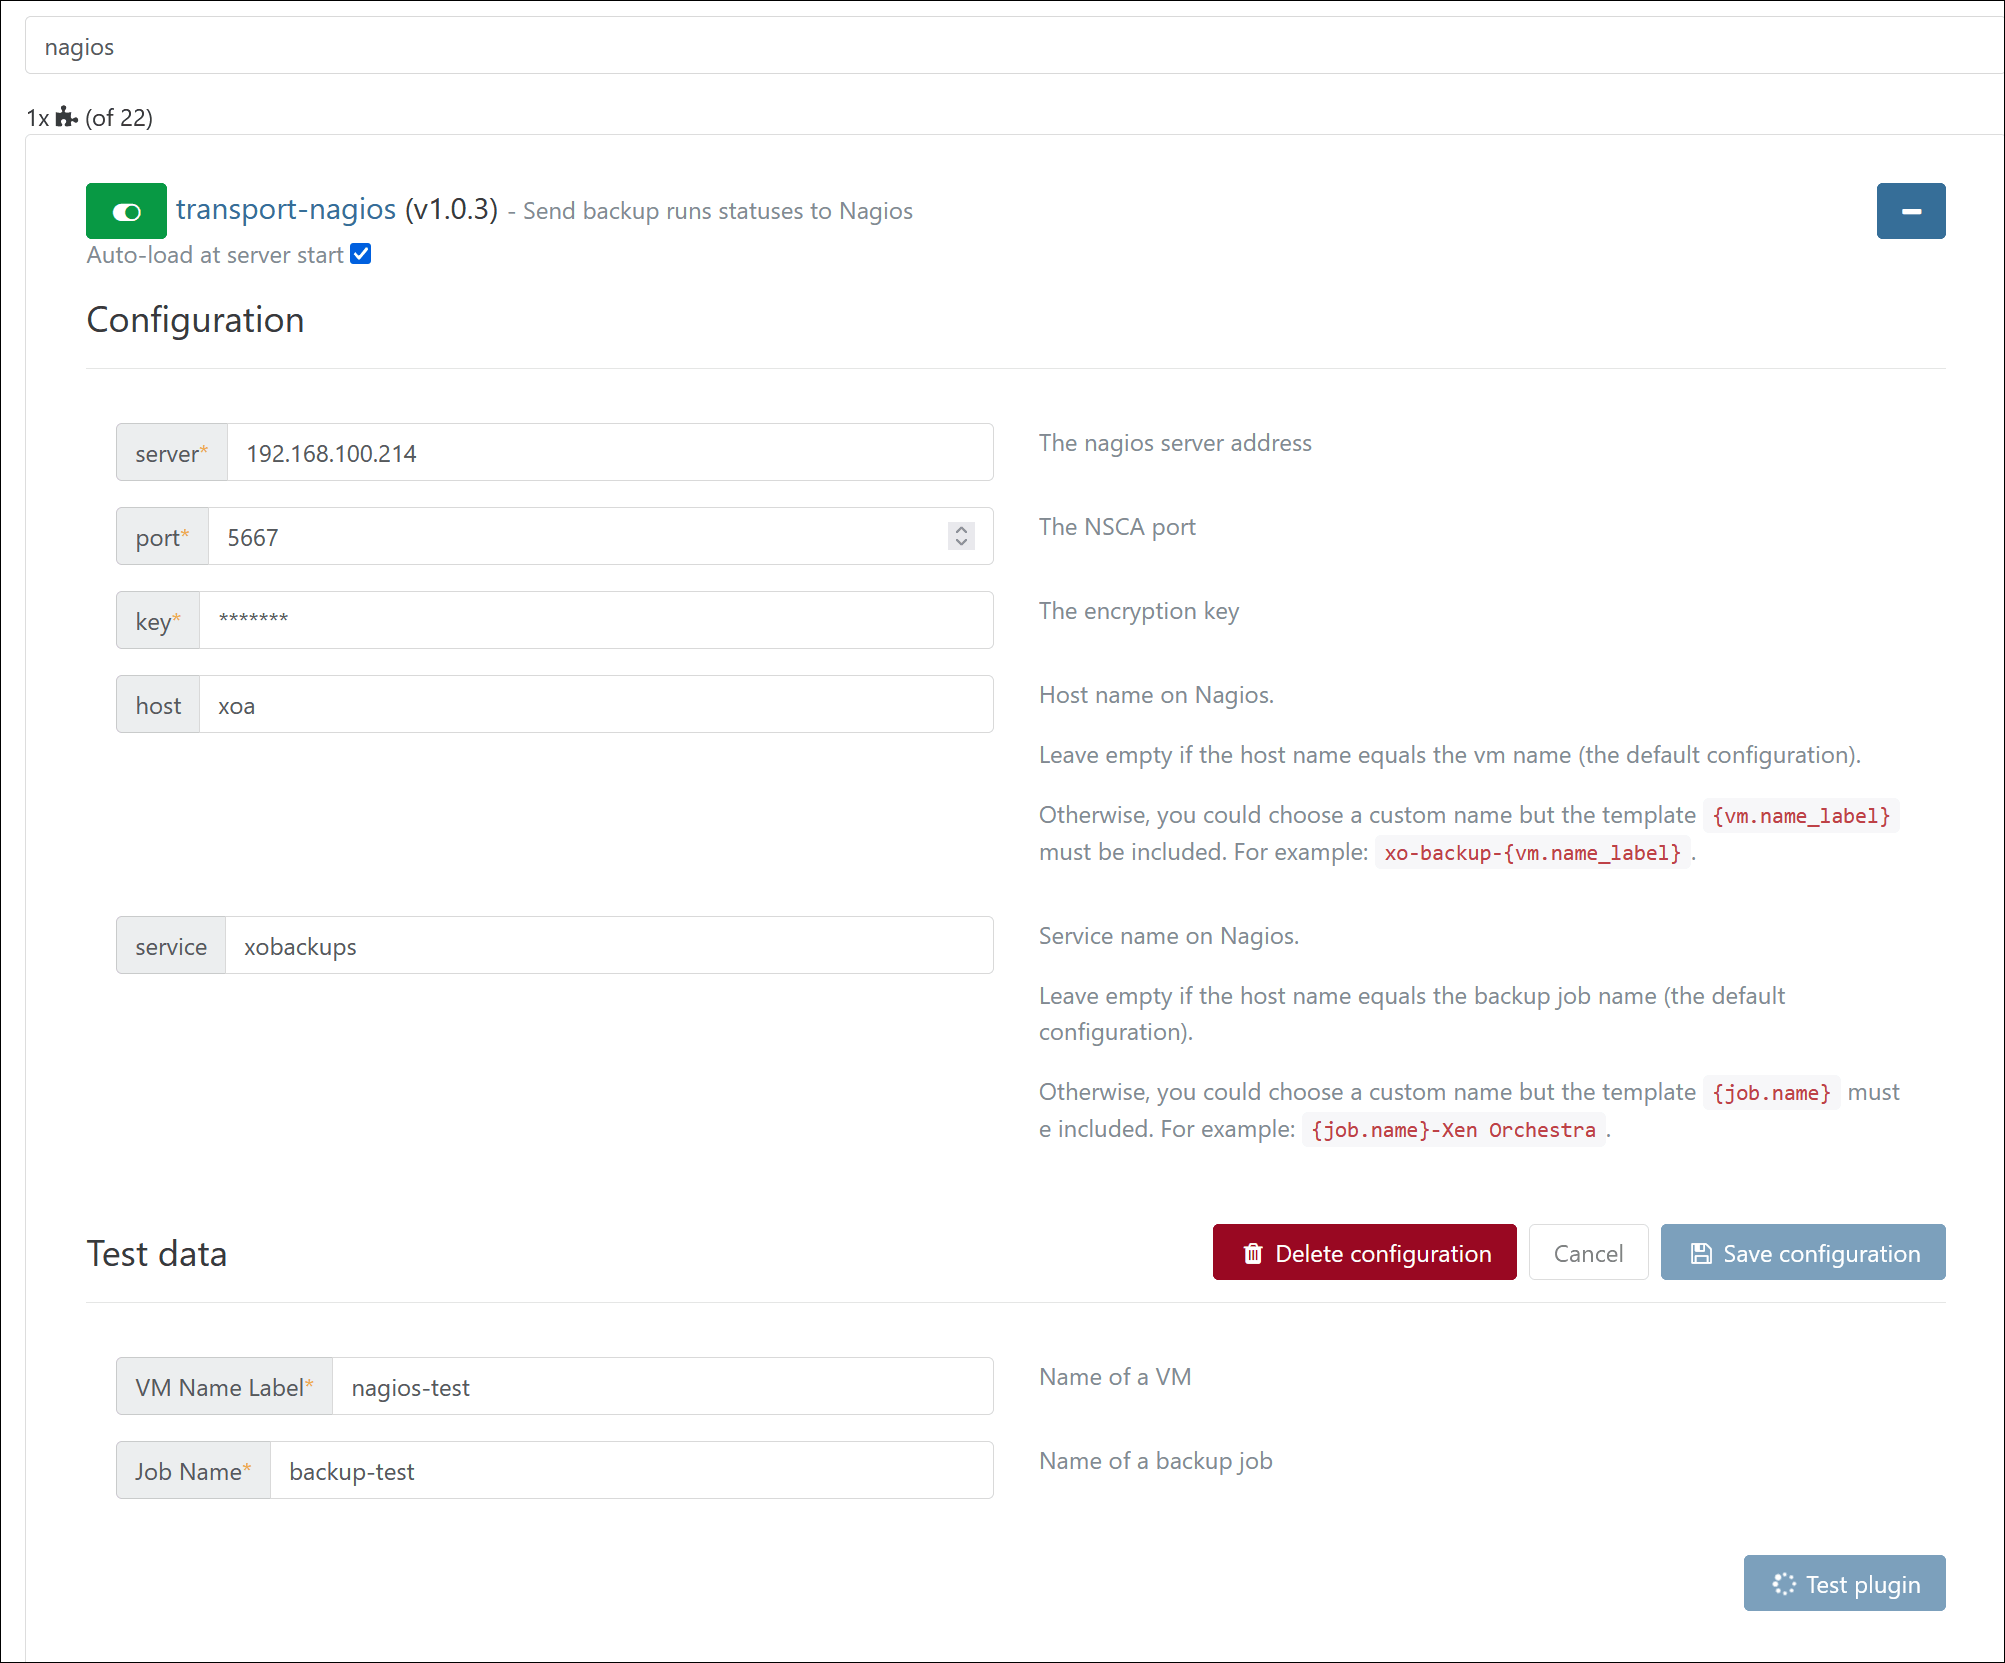
- Enter the Nagios server address, the NSCA port and the encryption key, and adjust the host and service name patterns if needed.
- Click Save configuration to save and apply your changes.
Test the plugin
In the transport-nagios configuration form, you can test the plugin.
If the plugin works correctly, the result should look like this:

If your backup was completed successfully, the result should look like this:

Further resources
Icinga 2
The transport-icinga2 plugin does the same job for Icinga 2: it pushes the backup result as a passive check result through the Icinga 2 REST API (/v1/actions/process-check-result), so no NSCA daemon is needed.
- In Settings → Plugins, enable
transport-icinga2. - Configure it:
- Server: the Icinga 2 HTTP/HTTPS API address (e.g.
https://icinga2.example.com). If no port is given in the URL,5665is used. - User and password: the Icinga 2 API credentials.
- Filter: an Icinga 2 API filter selecting the service(s) to update, e.g.
host.name=="xoa.example.com" && service.name=="xo-backup". - Optionally, accept unauthorized (self-signed) certificates.
- Server: the Icinga 2 HTTP/HTTPS API address (e.g.
- Choose the report condition in your backup job.
Backup results are mapped to the standard Icinga 2 states: OK for a success, WARNING for a partial success, CRITICAL for a failure.
Web hooks
You can also configure web hooks to be sent to a custom server before and/or after a backup job runs. This won't send a formatted report but raw JSON data that you can use in custom scripts on your side. Follow the web-hooks plugin documentation to configure it.