This page describes the backup configuration in the XO 5 interface. XO 6 already shows your jobs, their runs and each VM's protection status; creating, editing and restoring still happens here. See what lives where.
This section is dedicated to all general concepts about Xen Orchestra backups.
Replication modes have been renamed
The two replication job types now have clearer names, but the XO 5 screens below still show the former ones:
Nothing changed in behaviour: only the labels differ. XO 6 uses the current names, and the tags XO puts on replicas (Disaster Recovery, Continuous Replication) kept the former ones.
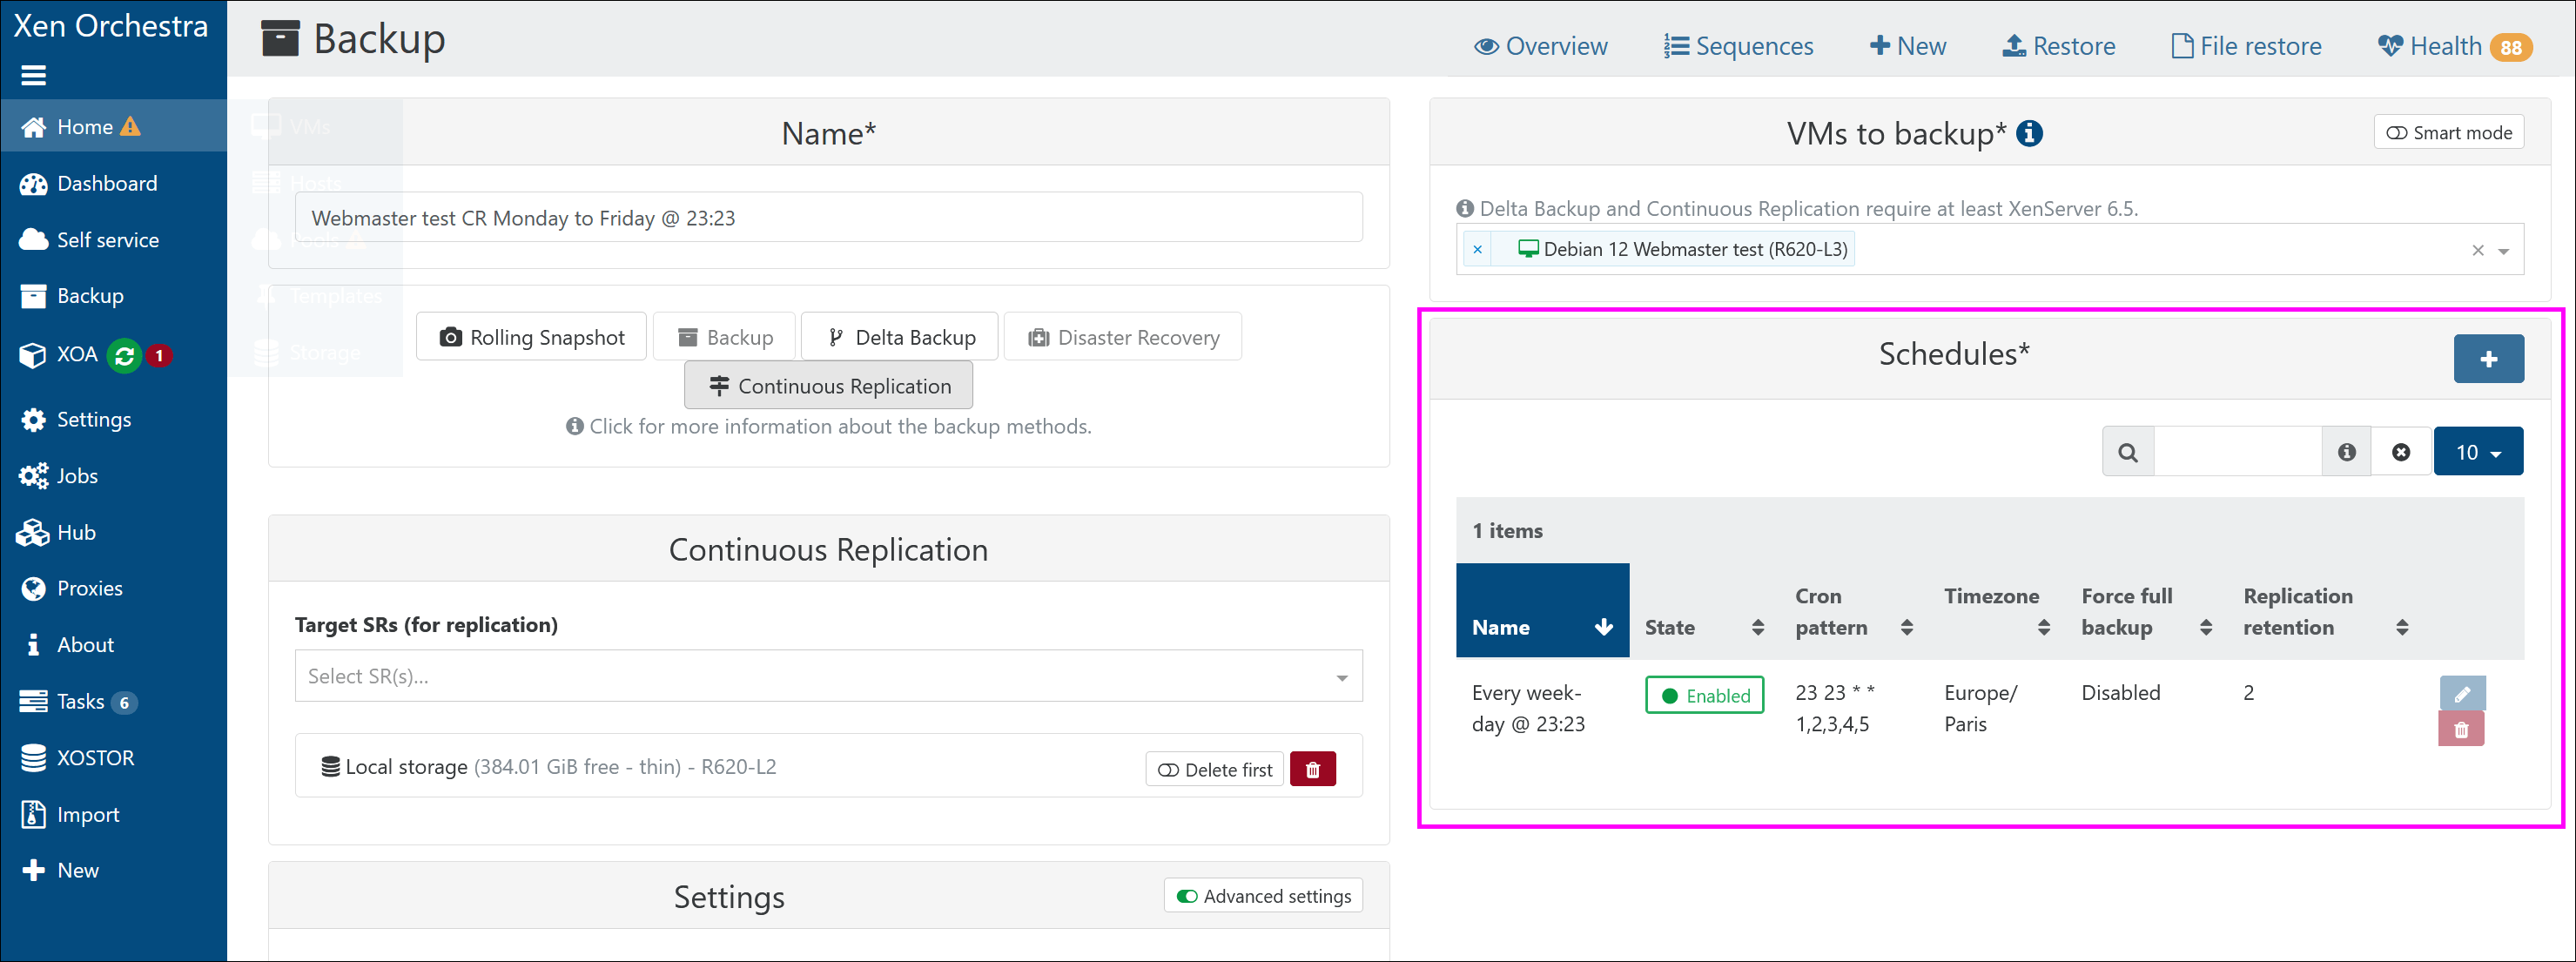
All the scheduled operations (backup, snapshots and even replication) are displayed in the main backup view.
A successful backup task will be displayed in green, a faulty one in red. You can click on the arrow to see each entry detail.
You also have a filter to search anything related to these logs.
tip
Logs are not "live" tasks. If you restart XOA during a backup, the log associated with the job will stay in orange (in progress), because it wasn't finished. It will stay forever unfinished because the job was cut in the middle.
Syslog is a standard protocol used for logging system messages in a network. It allows devices such as servers, routers, firewalls and applications to send log or event messages to a centralized log server, called a syslog server or syslog daemon.
This protocol simplifies log analysis and eliminates the need to connect to each machine individually. It's particularly useful for identifying common patterns and correlations among events, greatly aiding in debugging issues. Additionally, since logs are sent to a remote location, they remain intact on the destination machine even if deleted locally, which is beneficial in the event of intrusions.
A typical syslog message is a structured line of text that includes several components (typically in this order): priority, timestamp, hostname, process name, PID, and the actual message.
Xen Orchestra ensures robust data security for backups stored remotely, by leveraging advanced encryption algorithms. Here's a closer look at how encryption works and the technology behind it:
The encryption algorithms are authenticated, meaning additional metadata is appended to the end of each saved file. During restoration, this metadata ensures that the restored data matches the original encrypted data, allowing the system to detect issues like bit rot or tampering by an attacker without the encryption key. However, it's important to note that this is not a recoverable error: if the verification fails, the file will be unusable.
Encryption is opt-in and requires configuring an encryption key on the backup repository.
warning
Encryption is only compatible with block-based backup repositories: incremental backups sent to an encrypted repository must be stored as multiple data blocks, not as a whole VHD file.
Encryption cannot be changed (such as enabling, disabling or changing the encryption key) if a backup repository contains any backup.
Go to the Settings → Remotes menu.
Go to the section called New file system remote, or edit an existing backup repository.
In the subsection called Encrypt all new data sent to this remote you will find a text area. Enter your encryption key there.
Click the Save configuration button to finish the encryption setup.
Since February 2025, Xen Orchestra encrypts backup repositories with the ChaCha20-Poly1305 algorithm. This update addresses the file size limitations of AES-256-GCM while maintaining a high level of security and compliance with ANSSI guidelines.
Backup repositories that were encrypted with AES-256-GCM remain accessible, to ensure a smooth transition.
Backups on repositories encrypted before February 2025 use the AES-256-GCM encryption algorithm. While this is a highly secure option, it has a file size limitation of 64 GiB. This isn't an issue when working with incremental backups, as the data is split into smaller blocks, making it fully compatible with any backup repository (S3-compatible or file-based).
Full backups create one file per backup with all the data, which can go over 64 GiB, even with XCP-ng zstd compression enabled.
During a backup job, you can avoid saving all disks of the VM. To do that is trivial: just edit the VM disk name so it contains [NOBAK] somewhere, eg: data-disk will become data-disk [NOBAK] or perhaps [NOBAK] data-disk (with a space or not, doesn't matter).
The disks marked with [NOBAK] will be now ignored in all following backups.
tip
To exclude a whole VM from every backup job, give the VM the xo:no-bak tag instead. See backup modifier tags.
Automating your backups is key to ensuring the safety and recoverability of your virtual machines.
By scheduling regular backups, you protect your infrastructure from accidental deletions, system failures, or data corruption. Xen Orchestra lets you easily set up flexible schedules for your backup jobs, making sure they run automatically at times and frequencies that work best for you.
Navigate to the details page of your backup job (refer to the previous section, "Viewing schedules for a backup job").
In the Schedules section of your backup job, click the Add a schedule button, represented by a plus icon.
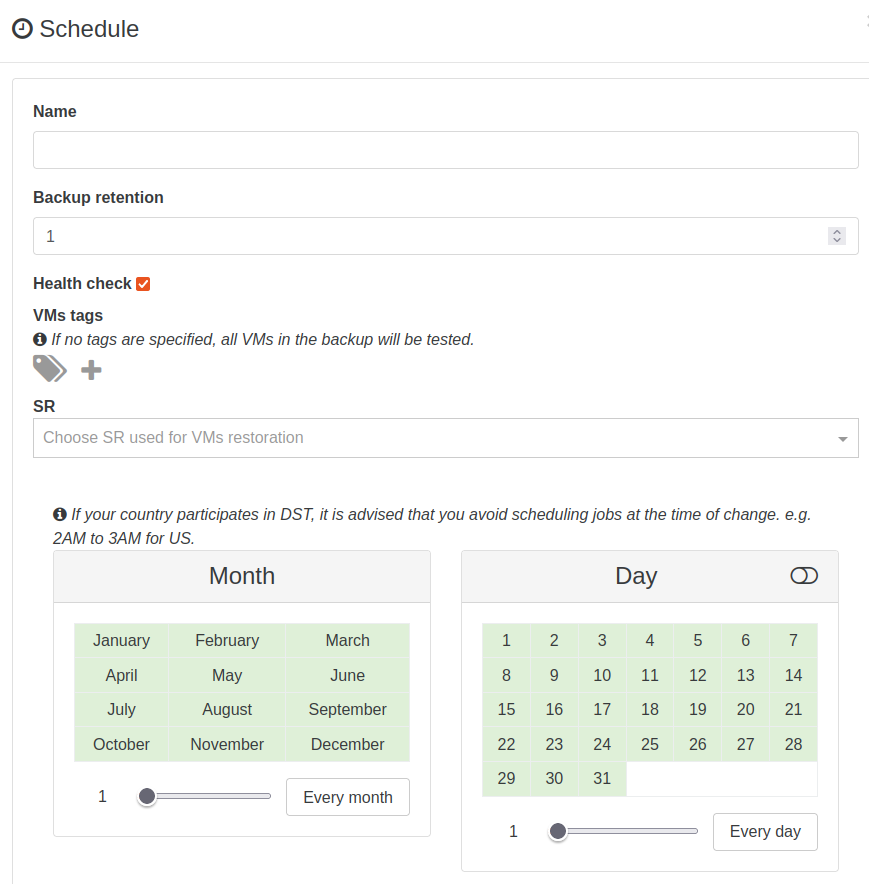
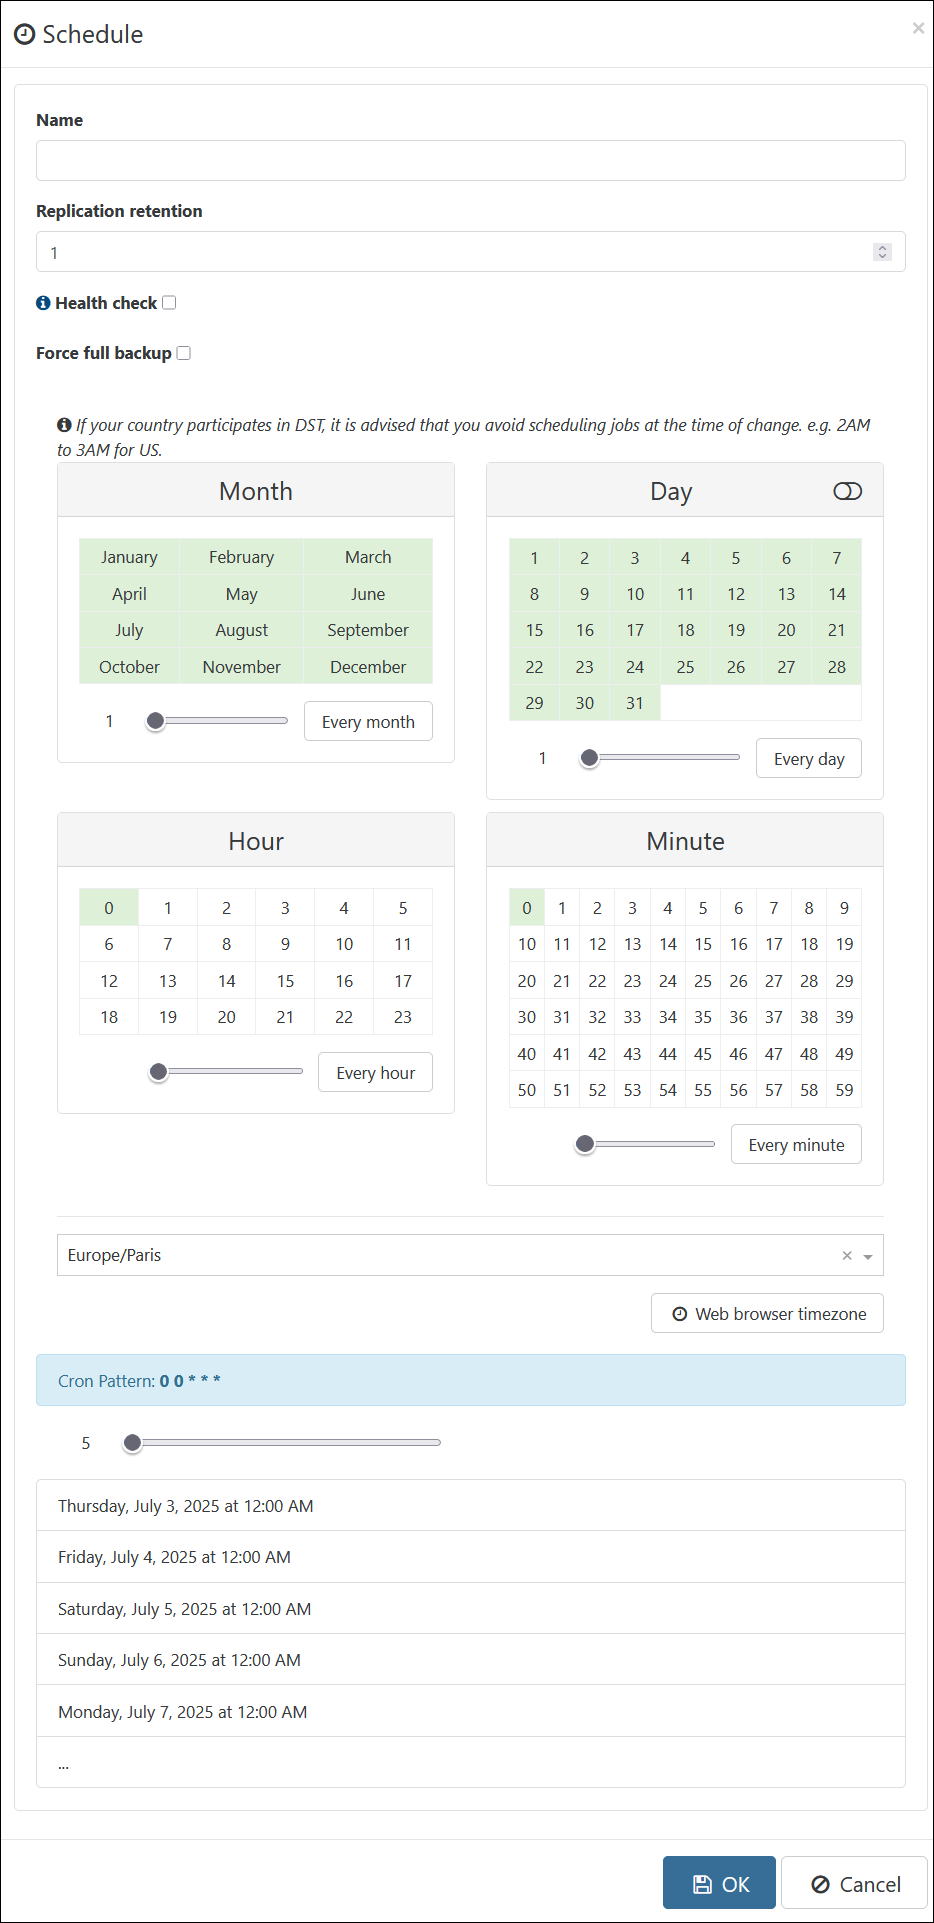
A form for creating a schedule will appear:
zoomed detailThe Schedule creation form: name, retention, health check, force full backup, then the month/day/hour/minute pickers, timezone, cron pattern and run preview
Use the form to configure your schedule.
Here's a list of the parameters you can adjust:
Parameter
Description
Name
A label to identify your schedule. Useful when managing multiple jobs.
Backup retention
Number of backups to keep on the backup repository (shown for Backup and Delta Backup jobs). Older backups beyond this count are automatically removed.
Replication retention
Number of replicated VMs to keep on the target SR (shown for DR and CR jobs). Older copies beyond this count are automatically removed.
Snapshot retention
Number of rolling snapshots to keep on the VM itself (shown when Rolling Snapshot is enabled).
Pool retention
Number of pool metadata backups to keep (metadata backup jobs only).
XO retention
Number of XO configuration backups to keep (metadata backup jobs only).
Health check
If enabled, a VM health check is performed after the backup to detect issues early (e.g., boot errors).
Force full backup
Forces a full backup at every run of this schedule, even if the job is incremental (delta jobs only).
Month(s)
Select specific months during which the schedule should run.
Day(s)
Select days of the month for the job to execute. You can choose specific dates or all days.
Hour
Choose the hour of the day the backup job should start.
Minute
Choose the exact minute the job should start.
Timezone
Determines the timezone in which the schedule should apply. You can also use your browser's local timezone.
Cron Pattern
Automatically generated from your selections to define when the job will run.
Preview
A list of upcoming executions based on your current configuration. Useful to verify the setup.
tip
Depending on your backup type, not all settings may be visible, particularly those related to retention.
Click the OK button.
Your schedule will be created and applied to the backup job.
By default, every schedule fires on its own cron: two jobs planned at the same time will run in parallel and compete for resources. A sequence chains existing schedules instead: pick the schedules to include, order them, and give the sequence its own cron. When it fires, the schedules run one after the other, in the order you defined.
To create one, go to the Backup view, open the Sequences tab and click New sequence: name it, add the schedules in the desired order, and set when the sequence itself runs.
Typical use: run the backup job first, then the replication job on the same VMs, without guessing how long the first one takes.
There are two ways to select which VMs will be backed up:
Manually selecting multiple VMs
Smart backup
Picking VMs manually can be a limitation if your environment moves fast (i.e. new VMs to protect are created often). In that situation you would previously need to constantly go back and edit the backup job to add the new VMs.
Thanks to smart backup, you have more flexibility: instead of specific VMs, you select criteria (power state, pool placement, tags), and the job resolves them at the time the backup job is executed. Let's see some examples!
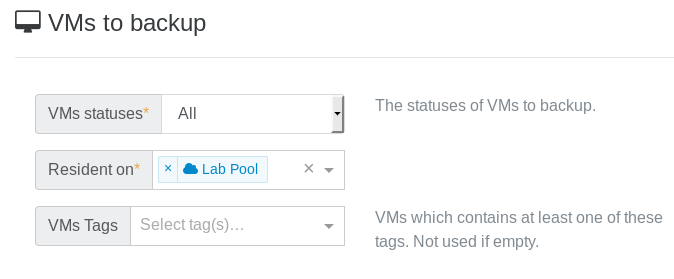
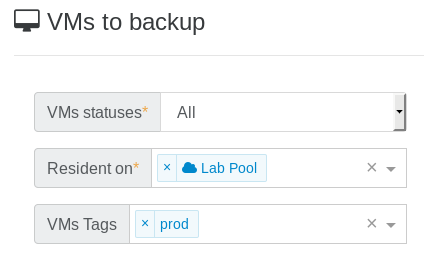
This job will back up all VMs on the pool "Lab Pool" when scheduled:
zoomed detailSmart mode in a backup job: VMs statuses set to All and Resident on set to Lab Pool
It means: every VM existing on this pool at the time of the backup job will be backed up. Doesn't matter if you create a new VM, it will be backed up too without editing any backup job.
You now have the ability to intelligently backup VMs in production pools!
Smart mode offers the following criteria, evaluated at each run:
VMs statuses: back up all VMs, only running VMs, or only halted VMs
Pools: only VMs resident on the selected pools, with an optional exclusion list (Not resident on)
Tags: only VMs carrying at least one of the selected tags, with an optional list of excluded tags
tip
XO pre-fills the excluded tags with Continuous Replication, Disaster Recovery and the XO proxy tag, so a smart backup job doesn't back up the replicas created by your own replication jobs. Those two tag values kept the former names of the incremental and full replication modes, and XO still writes them as such on the replicas. VMs tagged xo:no-bak are always excluded, whatever the job configuration.
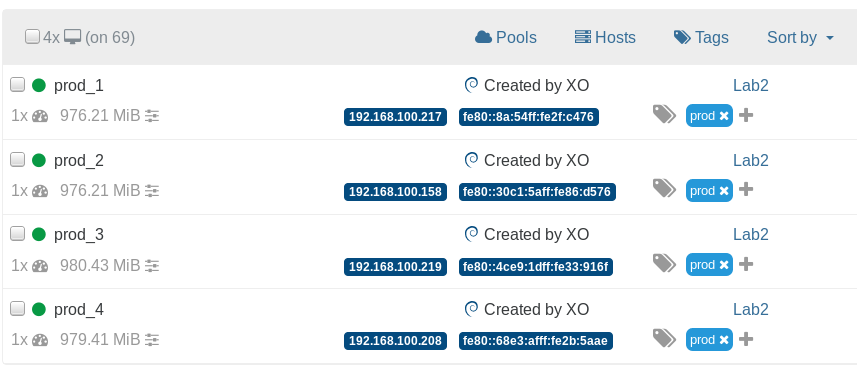
Remember the prod VMs? I added a tag "prod" to each of them:
zoomed detailThe Home view with four VMs, each carrying the prod tag
Now if you do this:
zoomed detailSmart mode combining Resident on Lab Pool with the prod tag
It means any VMs on "Lab Pool" with the "prod" tag will be backed up.
This feature is only compatible with XCP-ng 8.0 or more recent. Citrix Hypervisor never merged our changes, even though we contributed them to their code directly.
XCP-ng modified XAPI is able to create VMs in a Suspended state with a suspend_VDI property set. When a VM is suspended, all of its memory contents are written into a disk called suspend_VDI. When the VM is restored, the suspend_VDI is read to recreate the memory of the VM. Once the resuming is done it's as if the VM was never suspended.
In practice, a RAM enabled backup takes a checkpoint of the VM: a snapshot that includes both the disks and the memory contents. You can enable it per job with the snapshot mode setting, or per VM with the xo-memory-backup tag (see backup modifier tags).
It is already possible to snapshot a VM with its RAM, however when restoring a VM, the VM was created in the Halted state so it wasn't possible to restore the VM with its RAM. With our XAPI modification a VM can now be created in a Suspended state with preset memory contents, so when snapshotting a VM with RAM, the snapshotted VM will also have the RAM contents set.
This can be very useful when you're running a VM that needs RAM coherence to run:
For instance, snapshotting a Windows VM used to be very tricky for this reason. The Citrix VSS script previously answered part of this problem, when snapshotted, the VM flushed its cache but if it happened that the snapshot had coherence issues, the restored VM would be broken. And the VSS script is no longer available.
VMs running databases could also need such a feature in order to keep transient transactions.
A VM can be restored on a different host, now the RAM can be as well.
In a nutshell this functionality can be seen as hot copy, similar to hot migration but the original VM is not deleted.
This feature allows you to regularly send a copy of a VM to a target SR. The copied VM will be Suspended and ready to be resumed if the original VM encounters issues. As the copied VM is Suspended, no reboot will be required, resuming it is much faster.
For instance, if an hourly incremental replication is configured on a VM, if the VM is lost, you can quickly resume a running VM with a memory loss of one hour tops.
warning
In order to use this functionality, the CPU of the host the VM is restored on should be the same or more recent than the CPU of the host the VM was originally running on.
Quiesced (VSS) snapshots are gone: the feature was removed from XCP-ng and Citrix Hypervisor, and Xen Orchestra no longer attempts them. Use RAM enabled backup instead when you need consistency beyond a plain disk snapshot.
All backup types rely on snapshots. But what about data consistency? Older XenServer releases could take a quiesced snapshot of a Windows VM: with the guest tools and the extra VSS provider installed, the operating system was notified and flushed its caches to disk before the snapshot, making backups of services like MS SQL or Exchange consistent. Xen Orchestra used to try a quiesced snapshot first and fall back to a normal snapshot when it wasn't possible.
Since the VSS provider was removed from the guest tools and the snapshot_with_quiesce capability was dropped from the platform, this mechanism no longer exists. Xen Orchestra now always takes normal snapshots, and offers two ways to get a stronger consistency level per VM:
RAM enabled backup (checkpoint): the memory is captured together with the disks, so caches and transient transactions are preserved.
Offline snapshot or offline backup: the VM is cleanly shut down before the export, guaranteeing on-disk consistency.
Both can be applied per VM with backup modifier tags. Old quiesced snapshots taken before the removal are still identified by an "info" icon in the VM's Snapshots tab.
A backup job snapshots each VM right before exporting it, one VM after the other. When several VMs form a single system (an application server and its database, the nodes of a cluster...) their restore points end up minutes apart, and restoring the whole set gives you VMs that are not consistent with each other.
Enable Synchronize snapshots in the Advanced settings of a backup or replication job to snapshot every VM of the job up front, before the first export starts. All the restore points of a run are then taken within the same short window, so the whole job can be restored as a coherent set.
The snapshots are taken in parallel, up to the job's snapshot concurrency (2 by default), and the VMs are not frozen: this narrows the window between the restore points, it does not make them simultaneous. The snapshot concurrency can be raised to narrow the window.
note
VMs that are exported without a snapshot are not part of the batch: offline backup, offline snapshot, or a halted VM in a full backup.
Two consequences to keep in mind:
Each VM keeps its snapshot until its own export runs, so the snapshots taken first live for most of the job and grow as the VMs write to their disks. Expect more space used on the storage repository while the job runs, especially on thick-provisioned SRs.
In the backup logs, a VM's task starts when its snapshot is taken instead of when its export starts, so the duration reported for a VM includes the time it waited for its turn to export. The duration of the job itself is unchanged.
Backup repositories (BR), formerly called remotes, are places where your backup and delta backup files will be stored.
To add one, go to the Settings/Remotes menu (the XO 5 screens still use the former name).
Supported backup repository types:
Local (any folder in XOA filesystem)
NFS
SMB (CIFS)
Amazon S3 and S3-compatible object storage
Microsoft Azure Blob Storage
warning
The initial "/" or "\" is automatically added.
For disks larger than 2 TiB, store backups on block-based backup repositories. Since QCOW2 reached general availability in XCP-ng, a single disk can grow up to 16 TiB, so this matters more than ever.
For qcow2 disks, enable NBD for incremental backups: without it, each run falls back to a full backup.
We support SMB storage on Windows Server 2012 R2 and later.
warning
For continuous delta backup, SMB is NOT recommended (or only for small VMs, eg < 50GB)
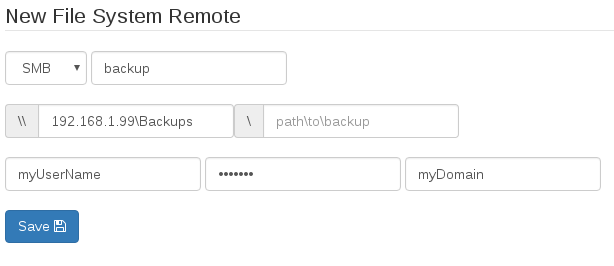
Also, read the UI twice when you add an SMB store. If you have:
192.168.1.99 as SMB host
Backups as folder
no subfolder
You'll have to fill it like this:
zoomed detailNew file system remote form for SMB: host and share on the first field, the optional path field left empty, then username, password and domain
warning
PATH TO BACKUP is only needed if you have subfolders in your share.
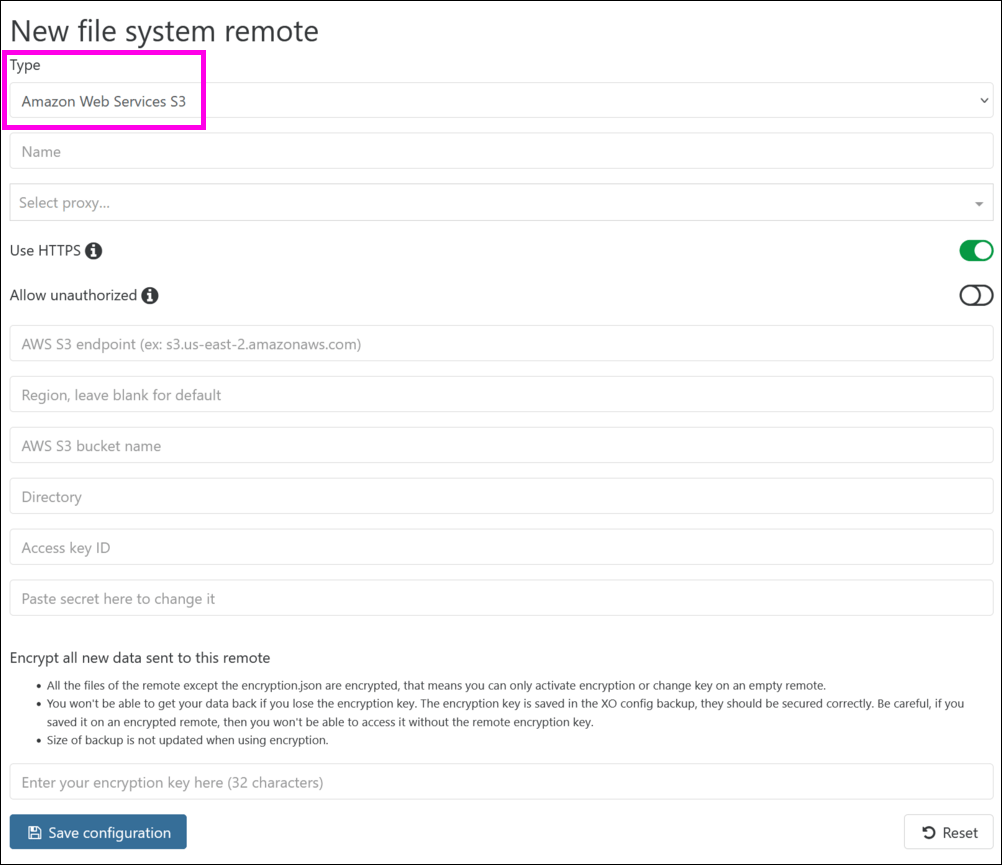
Xen Orchestra supports Amazon S3 storage and other S3-compatible providers, so you can back up your data to a variety of cloud storage services.
warning
Not all S3-compatible providers adhere perfectly to Amazon S3 standards. Check the supported object storage providers list and its support tiers, and test your setup before trusting it with critical backups.
Losing your encryption key means your backups will be permanently inaccessible. If you enable encryption, make sure your key is stored securely, and outside of the backed up infrastructure, as there's no way to recover your data without it.
If the bucket has S3 Object Lock enabled, read S3 Object Lock first: it constrains which backup modes and retention settings you can use, and XO does not set the retention period itself.
note
XO identifies itself to object storage providers with a User-Agent: Xen Orchestra FS <version> header, which helps S3-compatible services (Wasabi and others) with compatibility tracking.
zoomed detailNew file system remote form with the Amazon Web Services S3 type selected: endpoint, region, bucket, directory, credentials and the optional encryption key
The xo-backups CLI (from the @xen-orchestra/backups-cli package) lets you explore the contents of a backup repository, verify backup sets and repair issues from a terminal, without going through the web interface:
It also works against a whole repository URL (including S3, Azure or encrypted ones) with --remote=<BR URL>. Run xo-backups --help for the full command list.
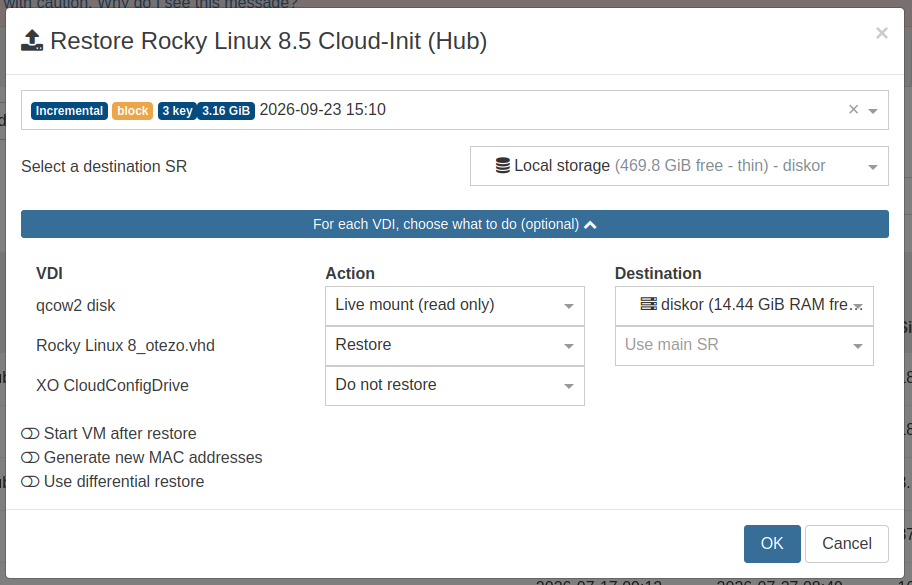
When the selected backup is an incremental one, the restore modal lists every disk of the backup in a collapsed panel. For each VDI, choose what to do (optional). Each disk has an Action and, depending on that action, a Destination:
Action
Destination
Result
Restore (default)
An SR, or nothing to use the main SR (shown as Use main SR)
The disk is copied to that SR, as in a regular restore.
Live mount (read only)
A host
The disk is not copied: it is attached to the VM in read-only mode, straight from the backup. See Live mount a disk.
Do not restore
None
The disk is left out of the restored VM.
zoomed detailThe Restore VM modal with the per-disk panel expanded: one disk restored to the main SR, one live mounted on a host, one not restored
Leaving the panel untouched restores every disk to the main SR, as before.
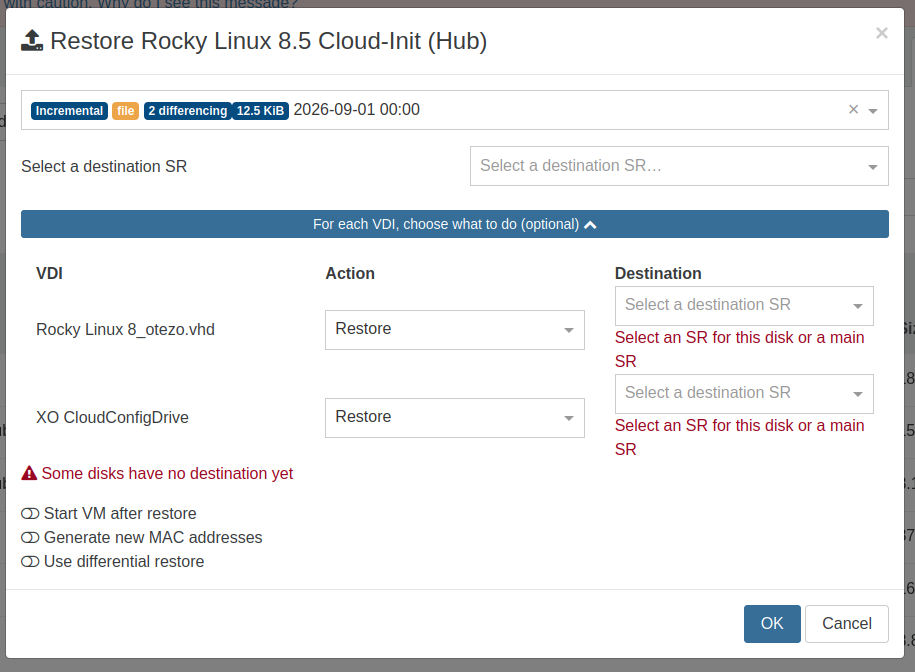
You cannot confirm the restore while a disk is missing the destination required for its action (an SR for Restore when no main SR is selected, a host for Live mount). The missing destination is shown in red in the corresponding row. Since the panel may be collapsed, a red line saying Some disks have no destination yet also appears under it:
zoomed detailA live mounted disk without a host: the row says Select a host to live mount this disk on, and Some disks have no destination yet is shown under the panel
note
A full backup has no per-disk choice: the whole VM is restored to the main SR.
A live mount attaches a disk from an incremental backup to the restored VM without copying it. Xen Orchestra serves the disk from the backup repository (BR) as a read-only iSCSI LUN, which the host sees as a dedicated SR. Regardless of the disk size, it is usable as soon as the restore completes.
Typical uses:
Get data back from a large data disk while only the system disk is copied.
Check the content of a backup without waiting for a full restore.
A live mounted disk is, by design, much slower than the BR it is read from. Each read done by the VM goes from the host to Xen Orchestra over iSCSI, then from Xen Orchestra to the BR, which must find the right blocks in the backup chain before answering. This is expected: a live mount is meant to get to your data quickly, not to run a production workload.
With a slow or distant BR, typically an S3 or Azure BR outside your network, reads can take so long that the host gives up on them: the mount can fail, or the VM can get I/O errors on that disk. In that case, restore the disk instead of live mounting it.
Incremental backups only. Live mount is not available for full backups, nor in backup health checks.
Read-only. The VM sees a read-only disk. It is best suited for data disks: most operating systems need a writable system disk.
One host per restore. All the disks live mounted by one restore use the same host, and that host must be able to reach the main SR: its own host for a local SR, any host of its pool for a shared SR. The host selector only offers these hosts, and the most likely one is pre-selected.
Network. The hosts connect to Xen Orchestra (or the proxy) over iSCSI, on a TCP port picked for each mount. A firewall between the hosts and Xen Orchestra must let the hosts open TCP connections to it. For the firewall of XOA itself, see Firewall of Xen Orchestra. The address given to the hosts is auto-detected; if they cannot reach it (NAT, several networks), set it in the configuration file, for example /etc/xo-server/config.iscsi.toml:
[iscsi]
# address of Xen Orchestra, as reachable from the hosts
advertisedAddress='192.168.0.1'
# address the iSCSI targets listen on, all interfaces when unset
#bindAddress = '0.0.0.0'
Temporary. A live mount only lasts as long as the Xen Orchestra process serving it: restarting or updating XOA ends it, and the disk becomes unavailable to the VM. Stop using the disk before restarting or updating XOA. If Xen Orchestra stopped unexpectedly, the [XO backup] <VM name> SR stays behind with nothing serving it: detach the disk from the VM and forget the SR.
Each live mounted disk is served on its own TCP port, picked when the disk is mounted, so it cannot be allowed in the firewall in advance. So when ufw is enabled on Xen Orchestra, as on XOA, Xen Orchestra opens these ports in ufw itself, only when needed. This is enabled by default.
To turn it off, and manage the firewall yourself, add to the configuration file, for example /etc/xo-server/config.iscsi.toml, then restart Xen Orchestra:
[iscsi]
manageFirewall=false
If a firewall still blocks the hosts, the restore fails with the host cannot reach the iSCSI target at <address>:<port>, check iscsi.advertisedAddress and the firewalls between them.
How it works:
One rule per mount. When a disk is mounted, Xen Orchestra adds a rule allowing only the host it is mounted on to connect, only on the port of that mount. The rule is removed when the mount is released, or right away if the mount fails.
Host address. The rule uses the management address of the host. If advertisedAddress points to another network, such as a storage network, the host connects from another address and the rule does not match: allow that network in ufw yourself.
Not saved. The rules exist only in the running firewall: they are not written to the ufw configuration and do not appear in ufw status. To list them:
iptables -S ufw-user-input | grep xo-live-mount
# hosts with an IPv6 management address
ip6tables -S ufw6-user-input | grep xo-live-mount
Without ufw. If iptables is not installed, if ufw is not enabled, or if Xen Orchestra does not run as root (XOA and the proxies do), no rule is added and the live mount goes on as usual: any other firewall must let the hosts in. When not running as root, a warning is logged for each mount, since ufw may be enabled and block the hosts.
Only ufw is supported: any other value than 'ufw' or false makes live mounts fail with unsupported iscsi.manageFirewall.
What happens if ufw is changed (ufw allow, ufw delete, ufw reload, ufw disable then ufw enable, restarting the ufw service):
ufw rebuilds its rules and drops those added by Xen Orchestra. XOA and the proxies are appliances: their firewall is not meant to be changed by hand while disks are live mounted.
A disk in use keeps working, since ufw still accepts established connections. But the next time the host has to connect again (network outage, host reboot, SR unplugged then plugged again), the connection is blocked and the VM gets I/O errors on that disk.
The rules are not added back automatically. To be safe, release the mounts and live mount the disks again. Releasing a mount whose rule was already dropped works as usual, and logs a warning.
Disks live mounted after the change are not affected: their rules are added as usual.
What happens if Xen Orchestra crashes (process killed, appliance lost power):
Its rules can stay in the firewall. Nothing listens on their ports anymore, so a host trying to connect gets refused.
They are removed the next time Xen Orchestra starts, or when the appliance reboots, whichever comes first. Xen Orchestra and a proxy running on the same machine only remove their own rules.
If you set manageFirewall = false before restarting, Xen Orchestra no longer removes them. List them with the command above, then delete each one with iptables -D, followed by the rule as listed without its leading -A.
As with any crash, the [XO backup] <VM name> SR also stays behind (see Temporary above).
A normal stop or restart of Xen Orchestra releases every mount, which removes their rules.
A live mount remains active after the restore until you release it. Releasing the mount stops serving the disk and forgets its SR. The backup itself is never modified.
Xen Orchestra releases a live mount on its own as soon as its disk is deleted:
Delete the restored VM with its disks: the mount is released.
Delete the live mounted disk from the VM: the mount is released, the VM is kept.
Delete the VM but keep its disks: the mount stays, until the disk is deleted.
tip
Only deleting the disk releases the mount. Detaching the disk from the VM does not.
Administrators can also release a mount using the REST API, with POST /rest/v0/backup-archives/<backup id>/live_disks/<mount id>/actions/unmount. The mount ID is stored in the xo:live-mount entry of the SR other_config.
Differential restores come in handy when you need to restore a VM to a storage unit that already contains your original VM, with optimal restoration time.
Instead of performing a full restore, Xen Orchestra leverages the existing VM disk or snapshot as a foundation and restores only the differential data to a new disk. This method significantly cuts down on restore time, especially for large VMs. For instance, with a transfer rate of 60 MiB/s and a 200 GiB VM, a typical restore would take around an hour. However, with a differential restore, even a 600 GiB disk can be restored in just minutes.
Most importantly, this process prioritizes data integrity. The original VM disk remains untouched throughout the restore; we simply read from the latest snapshot to use it as a foundation for creating the new VM and disk.
Make sure the following conditions are met in order to do a differential restore:
Restore the VM to the same Storage Repository that contains the VM to be restored.
The backup you're restoring must be a delta backup (not a full backup).
The delta chain, from the original snapshot to the backup you're restoring (excluding the base VM), must be uninterrupted.
To perform a differential restore:
Go to the Backup → Restore menu.
A list of VMs appears.
Choose the VM you want to restore from the list. In the last column, click the Restore icon.
A pop-up window with a drop-down list appears.
Choose the backup you want to restore from the drop-down list.
More parameters appear, including a drop-down list for your destination Storage Repository (SR).
From that drop-down list, choose your destination SR.
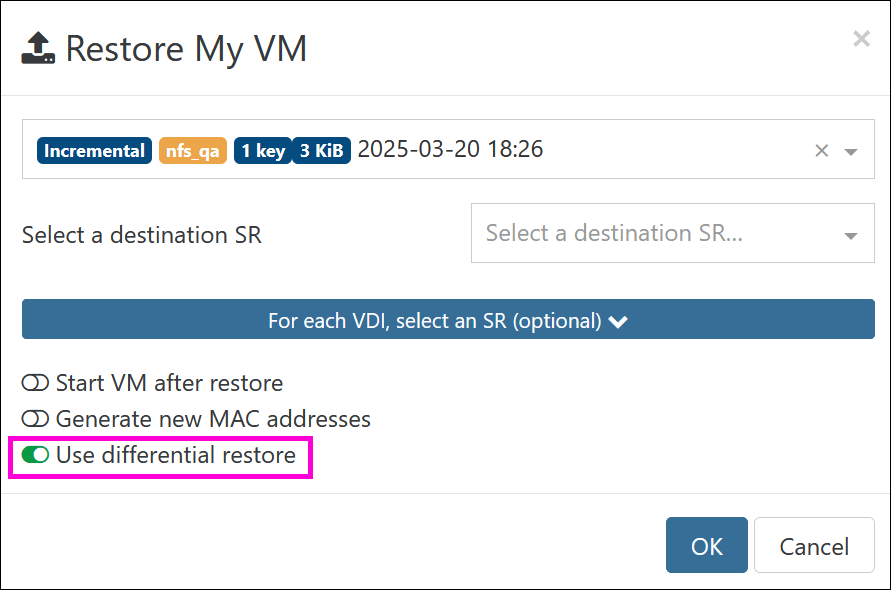
Activate the switch called Use differential restore:
zoomed detailThe Restore VM modal with the Use differential restore switch enabled
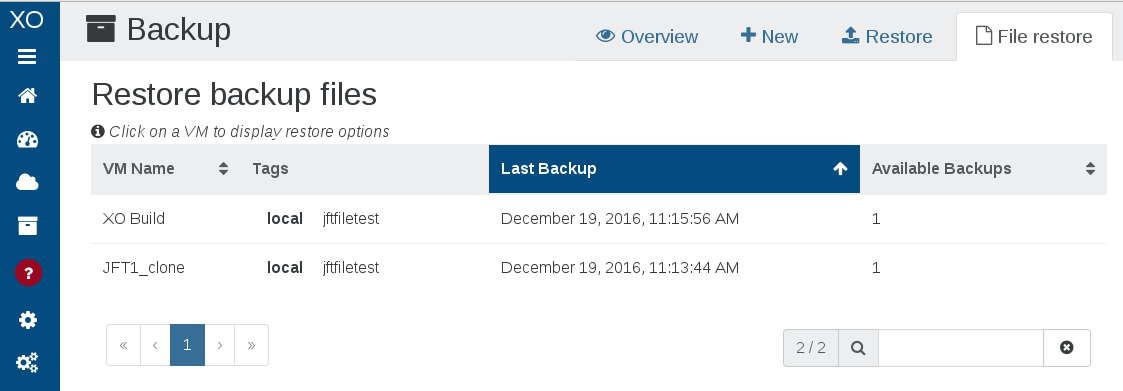
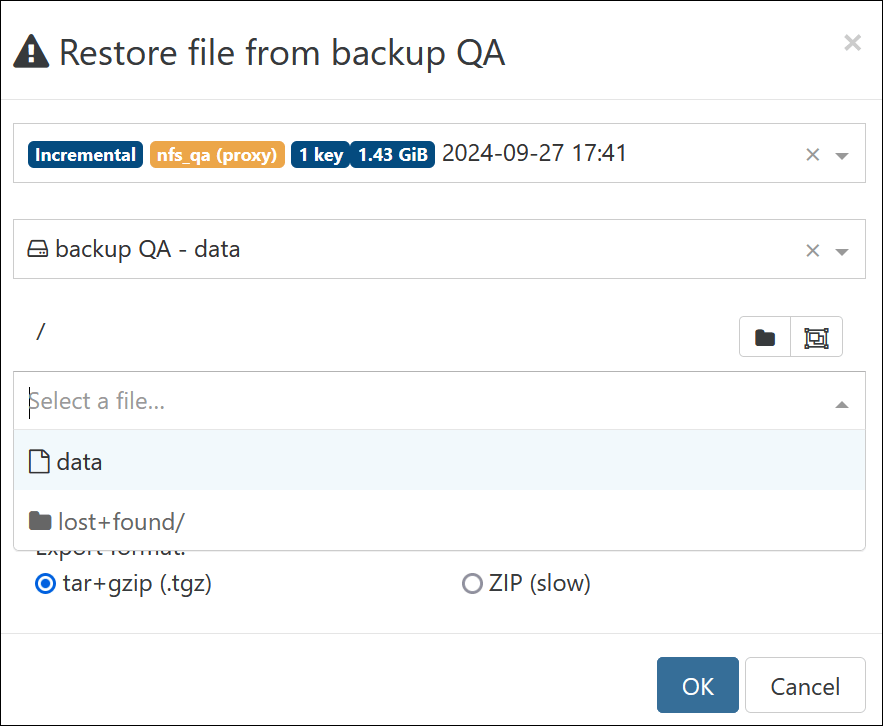
You can also restore specific files and directories inside a VM. It works with all your existing delta backups.
warning
File level restore is only possible on incremental backups. Also, due to some technical limitations, you won't be able to do file level restore if you have a chain longer than 99 (ie retention longer than 99 records without any full between). Take a look at the key backup interval section to set this correctly.
File level restore is only possible on a single VDI, it does not support LVM Volume Groups that span multiple VDIs.
The following Microsoft solutions are not supported:
By default, Backups are compressed (using GZIP or zstd, done on host side). There is no absolute rule but in general uncompressed backups are faster than GZIP backups (but sometimes much larger).
Citrix Hypervisor uses Gzip compression, which is:
slow (single threaded)
space efficient
consumes less bandwidth (helpful if your NFS share is far away)
However, XCP-ng is using zstd, which is far better.
tip
If you have compression on your NFS share (or destination filesystem like ZFS), you can disable compression in Xen Orchestra.
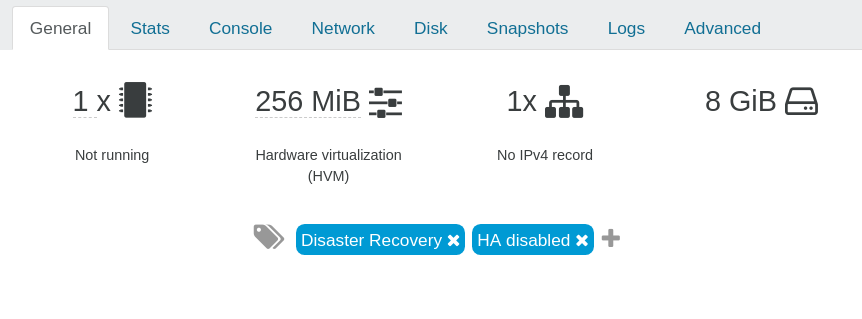
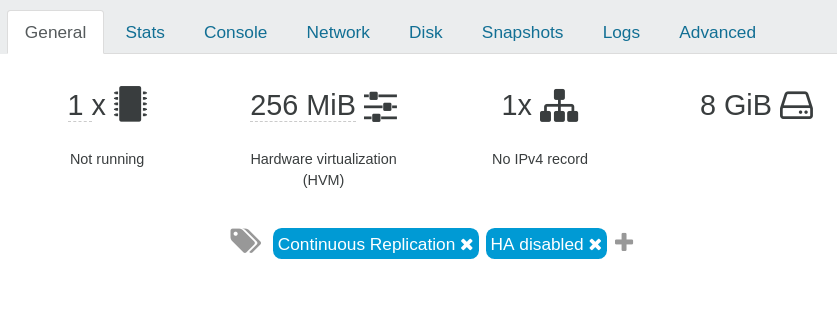
XCP-ng takes replicated VMs into account for High Availability. To avoid the resulting trouble (HA trying to restart your replicas), XO disables HA on the replicated VMs and adds a tag indicating this change.
A full replication replica, carrying the Disaster Recovery and HA disabled tags:
zoomed detailA full replication replica: the VM carries the Disaster Recovery and HA disabled tags
An incremental replication replica, carrying the Continuous Replication and HA disabled tags:
zoomed detailAn incremental replication replica: the VM carries the Continuous Replication and HA disabled tags
tip
The tag won't be automatically removed by XO on the replicated VMs, even if HA is re-enabled.
Xen Orchestra 5.20 introduced new tools to manage backup concurrency. Below is an overview of the backup process and ways you can control concurrency in your own environment.
When you perform a backup in XCP-ng/XenServer, the first operation performed is to "freeze" the data at a specific time - this is done by making a snapshot. This operation is pretty quick, only a few seconds in general. However it uses a lot of I/O on your storage, therefore more I/O activity means longer times to snapshot. Still, the order of magnitude is seconds per VM.
Xen Orchestra will fetch the content of the snapshot made in step 1. This operation can be very long, obviously depending on the size of the snapshot to export: exporting 1TiB of data will take far longer than exporting 1GiB!
When it's done exporting, we'll remove the snapshot. Note: this operation will trigger a coalesce on your storage in the near future (a coalesce is required every time a snapshot is removed).
Concurrency is a parameter that lets you define how many VMs your backup job will manage simultaneously.
tip
Default concurrency value is 2 if left empty.
Let's say you want to backup 50 VMs (each with 1x disk) at 3:00 AM. There are 2 different strategies:
backup VM #1 (snapshot, export, delete snapshots) then backup VM #2 -> fully sequential strategy
snapshot all VMs, then export all snapshots, then delete all snapshots for finished exports -> fully parallel strategy
The first purely sequential strategy will lead to the fact that: you can't predict when a snapshot of your data will occur. Because you can't predict the first VM export time (let's say 3 hours), then your second VM will have its snapshot taken 3 hours later, at 6 AM.
tip
If you need your backup to be done at a specific time you should consider creating a specific backup task for this VM.
Strategy number 2 is to parallelise: all the snapshots will be taken at 3 AM. However it's risky without limits: it means potentially doing 50 snapshots or more at once on the same storage. Since XCP-ng/XenServer doesn't have a queue, it will try to do all of them at once. This is also prone to race conditions and could cause crashes on your storage.
By default the parallel strategy is, on paper, the most logical one. But you need to be careful and give it some limits on concurrency.
danger
High concurrency could impact your dom0 and network performances.
You should be aware of your hardware limitation when defining the best concurrency for your XCP-ng infrastructure, never put concurrency too high or you could impact your VMs performances.
The best way to define the best concurrency for you is by increasing it slowly and watching the result on backup time.
So to summarize, if you set your concurrency at 6 and you have 20 VMs to backup the process will be the following:
We start the backup of the first 6 VMs.
When one VM backup has ended we will launch the next VM backup.
We keep launching new VM backups until the 20 VMs are finished, keeping 6 backups running.
Removing the snapshot will trigger the coalesce process for the first VM, this is an automated action not triggered directly by the backup job.
xo:no-health-check (or xo:no-health-check=reason) to ignore this VM during backup health check
xo:no-bak (or xo:no-bak=reason) to exclude this VM from all backup jobs, even if it's explicitly selected. XO itself uses xo:no-bak=Health Check on the ephemeral VMs restored during health checks.
For example, you could have a regular backup job with 10 VMs configured with Normal snapshotting, including two which are database servers. Since database servers are generally more sensitive to being restored from snapshots, you could apply the xo-memory-backup tag to those two VMs and only those will be backed up in RAM-enabled mode. This will avoid the need to manage a separate backup job and schedule.
Just a refresher/summary: You can select multiple backup methods for the same job:
Full: Backup and Full replication (the XO 5 button still reads Disaster Recovery)
Deltas: Delta Backup and Incremental replication (the XO 5 button still reads Continuous Replication)
The Full and Delta options are mutually exclusive; Rolling Snapshots are compatible with both. The Backup and Delta Backup go to a backup repository (e.g. NFS); both replication modes write to another XCP-ng storage repository (i.e., not the one on which the VMs being backed up reside). In the Schedule configuration, you will have the option to select the number of "Backup Retention" if your backup includes a Backup (or Delta Backup); you will have the option to select the number "Replication Retention" if you have selected a replication mode in the backup configuration.
This feature is close to Backups, but it creates a snapshot when planned to do so. It also handles the retention (to remove the oldest snapshot).
warning
Snapshots are not backups. They help to roll back to a previous state, but all snapshots are on the same Storage than their original disk. If you lose the original VDI (or the SR), you'll lose all your snapshots.
Vates recommends keeping the Rolling Snapshots retention to a minimum; if you check Dashboard → Health, you'll see a table for 'Too Many Snapshots', which shows VMs that have more than 5 snapshots saved. This includes the snapshots used for any kind of backup, not simply the rolling snapshots.
If your backup includes both a (Delta) Backup and a replication, you will have the option to select the number you wish for both "Backup retention" and "Replication retention" in the Schedule configuration; make sure to assign the number you want to the correct retention.
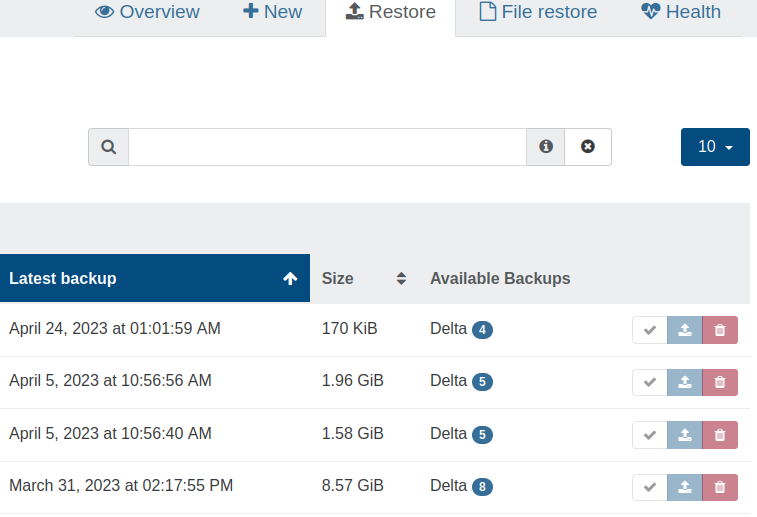
If you need to restore a (Delta) Backup (or clone and spin up a VM from a replica), you will be able to select all the available backups or VMs, regardless of the retention or delta scheme. If you have multiple backup jobs backing up the same VM, you'll see all the backups in the restore list, sorted by date.
It is often a good idea to configure retention of older backups with decreasing frequency. For example, you may want a nightly backup, but you don't want 365 backups to be able to restore from a year ago. The solution is to set several different schedules/retention policies for the same backup job. A reasonable approach might be to schedule...
a nightly backup, except on Sunday (retaining 6)
a weekly backup on Sunday (retaining 4)
a monthly backup (retaining 12)
Again, all of these can be assigned to the same backup job. Note that if you do a weekly and a monthly backup, at some point, these will fall on the same day. Xen Orchestra is designed to fail gracefully (with an error message) if a backup job for a VM is already running. For this reason, you will want to set the time on the monthly job to run before the weekly job so that if one fails, it will be the weekly rather than the monthly one; if the weekly one fails, the monthly will be there for that spot in the retention plan; if the monthly one fails, the weekly one will only be retained for 4 weeks, and then there will be a gap in the monthly retention.
Xen Orchestra supports the Grandfather-Father-Son (GFS) backup retention strategy, providing an efficient way to manage long-term backups. Backups are organized into daily, weekly, monthly and yearly intervals, optimizing storage while keeping important recovery points over time.
GFS on a month of nightly runs, with 7 daily, 4 weekly and 1 monthly restore points keptdailyweeklymonthlyrotated out
What happens if I change my GFS retention policy?
Excess backups will be deleted during the next job execution to match the updated retention settings.
Is GFS retention applied globally or per repository?
GFS retention is applied on a per-repository basis, allowing you to manage retention independently for different storage locations.
How does Xen Orchestra decide which backups to retain?
The oldest backup within each retention period (daily, weekly, monthly or yearly) is preserved. For example, the first backup of the week is saved as the weekly backup.
warning
Definition of a week:
The start of the week is computed with the timezone set in the schedule.
What GFS isn't:
GFS in Xen Orchestra stands for Grandfather-Father-Son. It's a backup strategy, and is not related to the file system called GFS2 (or Global File System 2), supported by XenServer.
GFS retention is defined per schedule. For example, if a backup has two schedules, two independent GFS backups will be created. This is why we recommend using a single schedule for any job utilizing GFS long-term retention.
To enable GFS retention, configure the settings in the backup job's "Long-term retention of backups" section. During each backup run, Xen Orchestra evaluates existing backups and removes any excess backups based on the configured policy.
Backup health check ensures the backups are ready to be restored: after a run, XO restores the backup for real, boots it, and only marks it healthy if the guest comes up.
Health check: every step a real restore would take, run automaticallybackuptest VMverified
XO will restore the VM, either by downloading it for a delta/full backup or by cloning it for a full or incremental replication, start it, and then wait for the guest tools to be loaded before the end of a timeout of 10 minutes (boot + guest tools).
A VM without guest tools will fail its health check.
If a VM has the tag xo-backup-health-check-xenstore during a backup health check, then XO will wait for a script to change the value of the xenstore vm-data/xo-backup-health-check key to be either success or failure.
In case of failure, it will mark the health check as failed, and will show the (optional) message contained in vm-data/xo-backup-health-check-error.
The script needs to be planned on boot. It can check if the record vm-data/xo-backup-health-check of the local xenstore contains planned
to differentiate a normal boot and a boot during health check.
On success it must write success in vm-data/xo-backup-health-check.
On failure it must write failure in vm-data/xo-backup-health-check, and may optionally add details in vm-data/xo-backup-health-check-error.
The total timeout of a backup health check (boot + guest tools + scripts) is 10 minutes.
Then edit the schedule and check the Health check box.
zoomed detailThe Schedule form with Health check enabled: optional VM tags filter and the SR used for the test restore
You will then need to select the SR used, which must have enough space to restore the VMs. Health check will be done after each VM backup, before starting the next one.
You can filter the VMs list by providing tags, only the VMs with these tags will be checked.
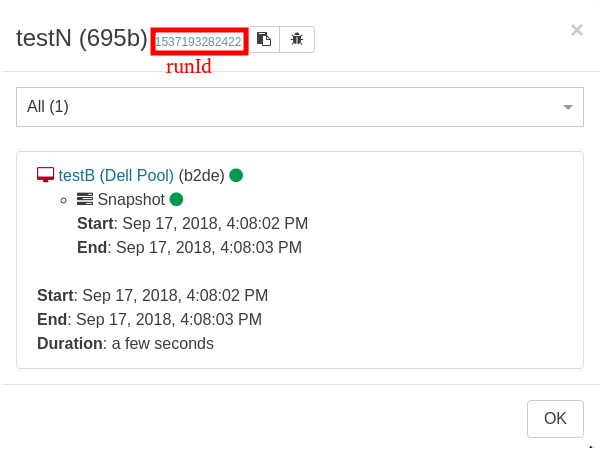
![The Disks tab of the restored VM: the live mounted disk sits on the [XO backup] SR and is attached in read-only mode](/img/xo5/live-mount-vm-disks.png)