Xen Orchestra includes a Kubernetes cluster recipe that provides a simple way to deploy an official Kubernetes distribution called MicroK8s (maintained by Canonical).
tip
One of the key benefits of MicroK8s is its automatic security updates. For example, patch releases (like 1.30.x to 1.30.x+1) are applied automatically. This saves Kubernetes admins a lot of time and effort.
This recipe uses Calico, the default Container Network Interface (CNI) plugin included with MicroK8s, to handle container networking. Calico provides secure networking and network policies for Kubernetes, and its default configuration is ready for production: no additional setup required.
If you need to adjust the Calico setup, check the MicroK8s documentation for step-by-step instructions.
Since version 5.113 of Xen Orchestra, the pod and service CIDR can be customized via the recipe form. There is no need to perform manual configuration to change them. See Deployment steps.
note
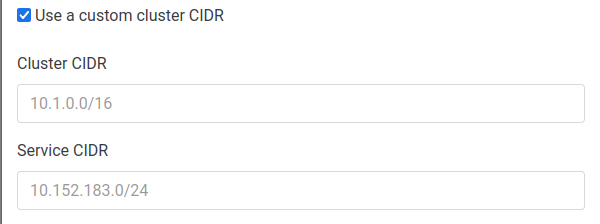
The default CIDR for pods is 10.1.0.0/16. All pods are assigned an IP address in that range.
The default service CIDR is 10.152.183.0/24. 10.152.183.1 is reserved for the Kubernetes API, and 10.152.183.10 is used by CoreDNS.
This recipe automatically deploys the Xen Orchestra Cloud Controller Manager (CCM), a bridge between your Kubernetes cluster and the underlying Xen Orchestra instance. In short, it:
initializes nodes: sets the providerID, node addresses, taints, and Xen Orchestra labels (pool, host) on each node
manages the node lifecycle: when a VM is deleted from Xen Orchestra, the associated node is automatically removed from the cluster
keeps labels in sync: XO metadata is periodically reconciled back to the Kubernetes nodes
The CCM repository is the source of truth for its features, configuration and standalone installation (manifests and Helm chart).
For the CCM to function properly, the Xen Orchestra instance must be reachable by the cluster nodes (VMs) via either an FQDN or IP address (see Deployment steps).
The recipe automatically generates an API token for the current user with a validity of 6 months.
warning
You will need to renew this token and update the xenorchestra-cloud-controller-manager secret in the Kubernetes cluster before it expires to maintain CCM functionality.
Make sure your infrastructure meets these requirements:
A running Xen Orchestra instance connected to an XCP-ng pool
Enough resources to host the control plane and worker nodes (each node gets a 10 GB disk; CPU and RAM can be adjusted after deployment)
Internet access from the pool and the node network: the recipe downloads its own Debian 13 base image and the MicroK8s snap, so you do not need to prepare a VM template
The Xen Orchestra instance must be reachable by the cluster nodes (VMs), via an FQDN or an IP address, for the Cloud Controller Manager
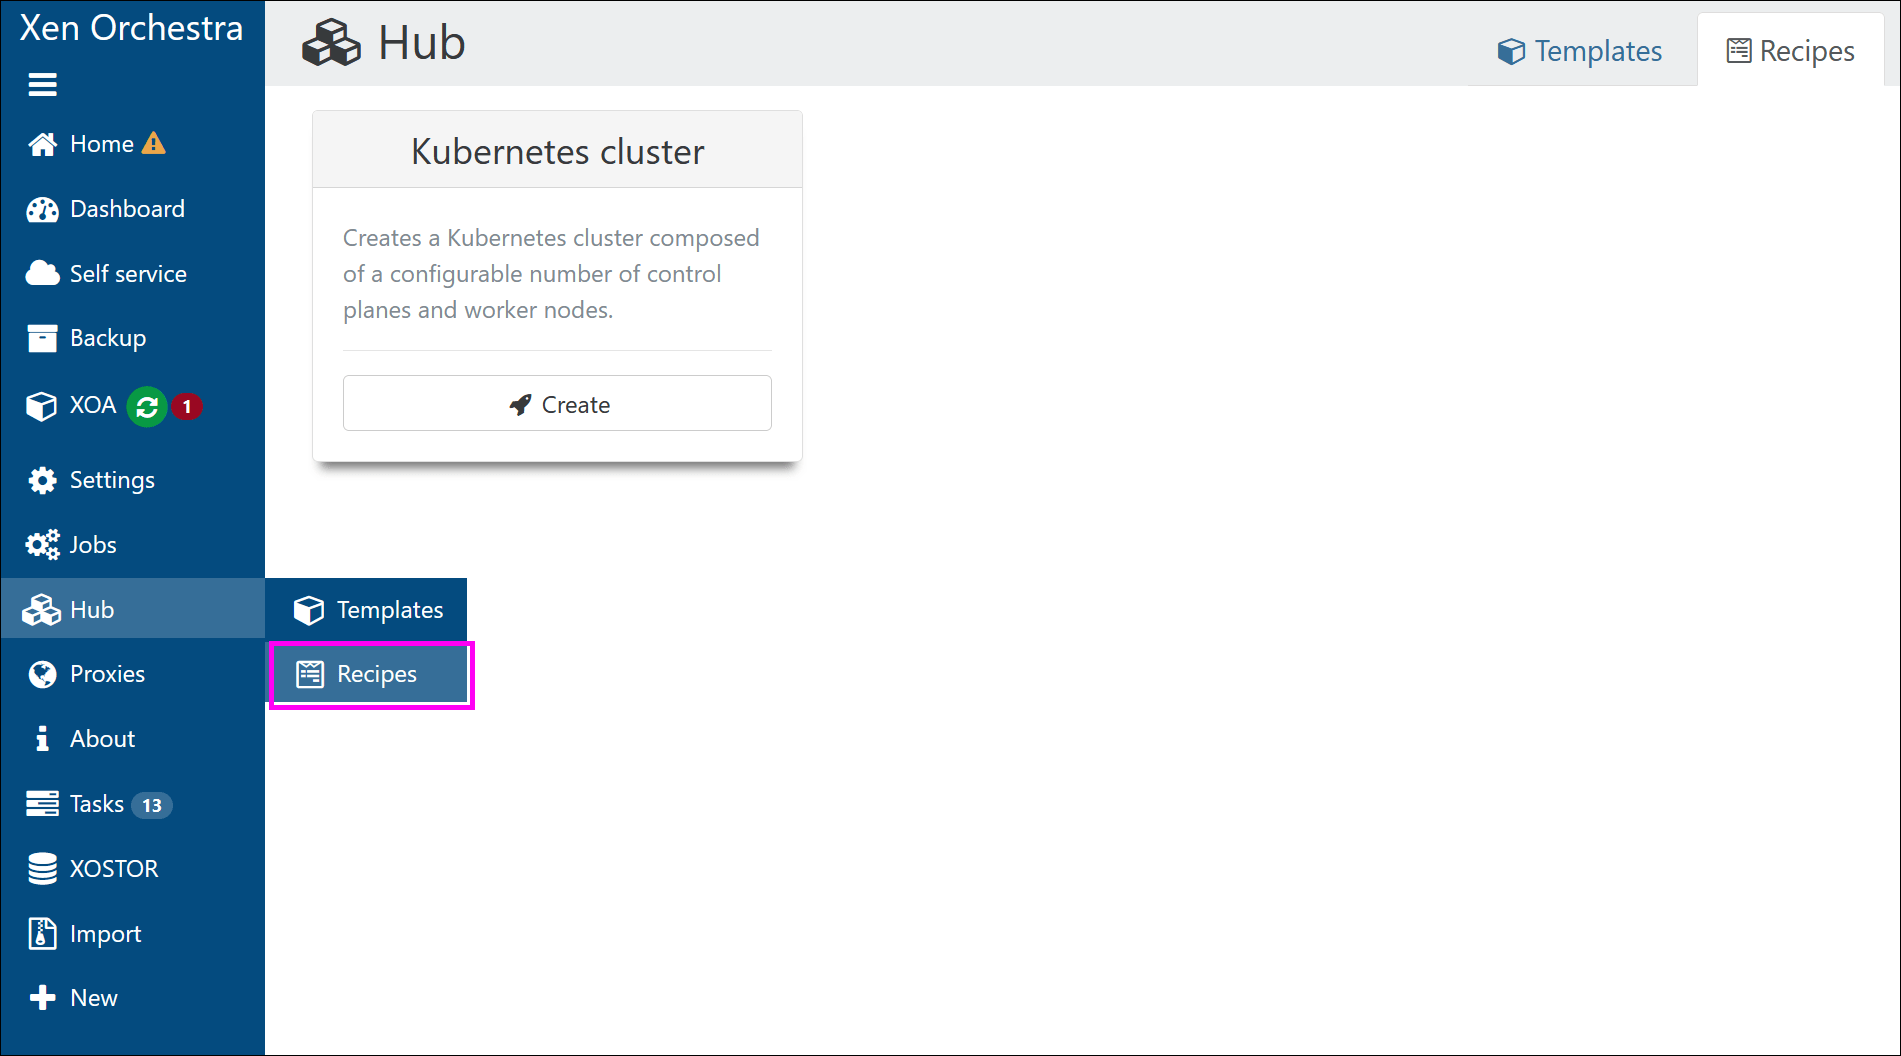
In Xen Orchestra 5, go to Hub → Recipes.
A list of recipes appears:
https://your-xo/v5/#/hub/recipes
The Recipes view of the Hub, with the Kubernetes cluster recipe
Go to the Kubernetes cluster recipe and click Create.
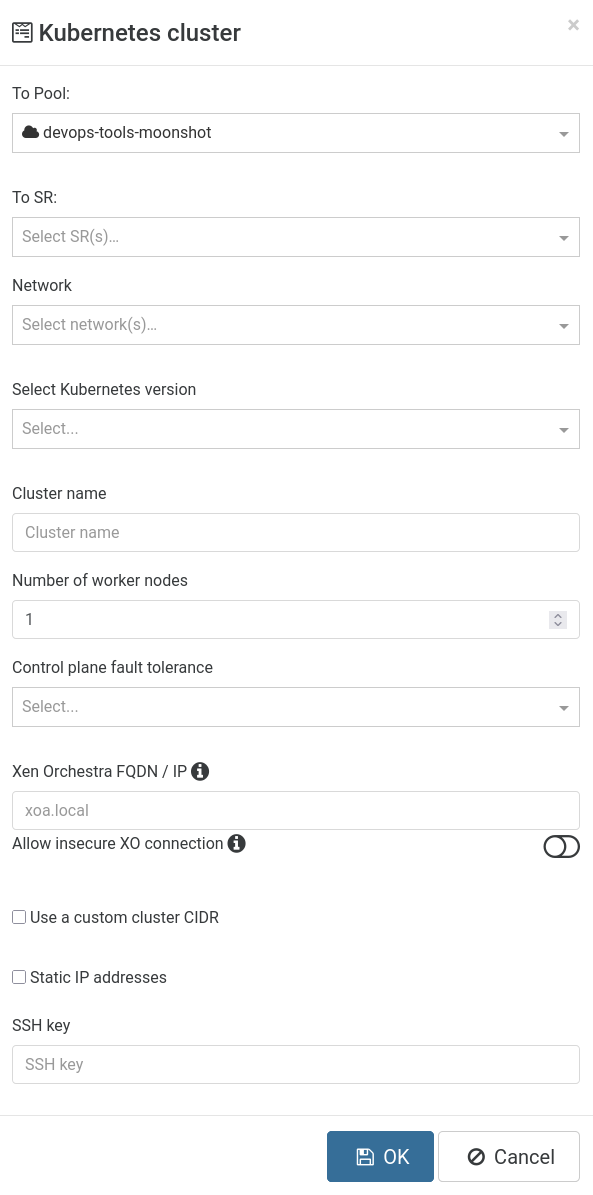
A cluster creation form appears:
zoomed detailThe Kubernetes cluster creation form
Configure your cluster:
Select a pool where you want to deploy your cluster.
Select a storage repository, a network and a Kubernetes version.
Enter a name for your cluster.
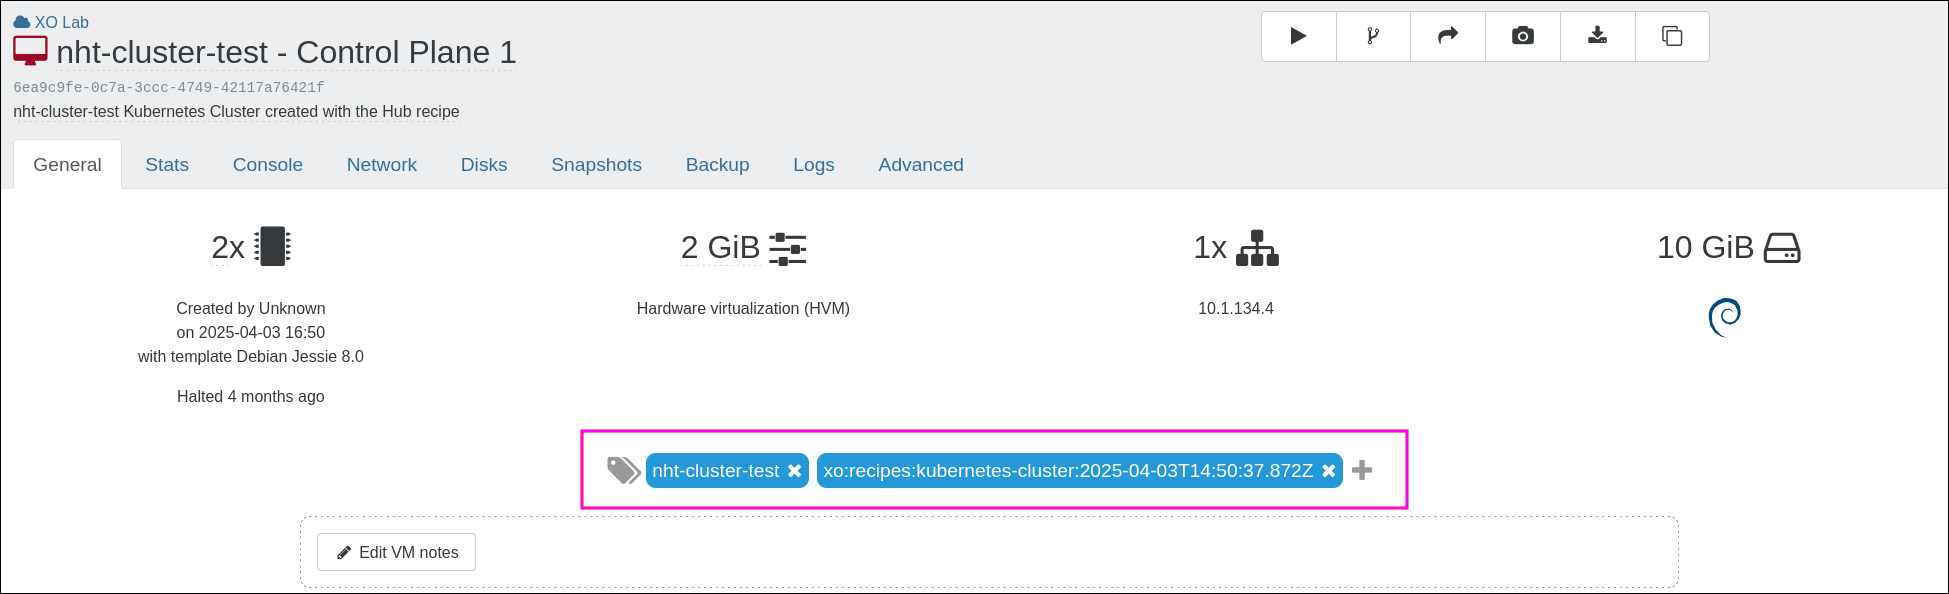
The name will be used to tag VMs (see VM tagging).
Define the number of worker nodes.
Choose the fault tolerance level for the control plane, which sets the number of control plane nodes (three or more enables high availability).
Define the FQDN or IP address that the Cloud Controller Manager (CCM) will use to reach this Xen Orchestra instance. If the instance uses a self-signed HTTPS certificate, toggle "Allow insecure XO connection".
(Optional) To change the default CIDR for your cluster pods and services, check the Use a custom cluster CIDR box and specify the new IP ranges to use.
zoomed detailThe custom pod and service CIDR fields
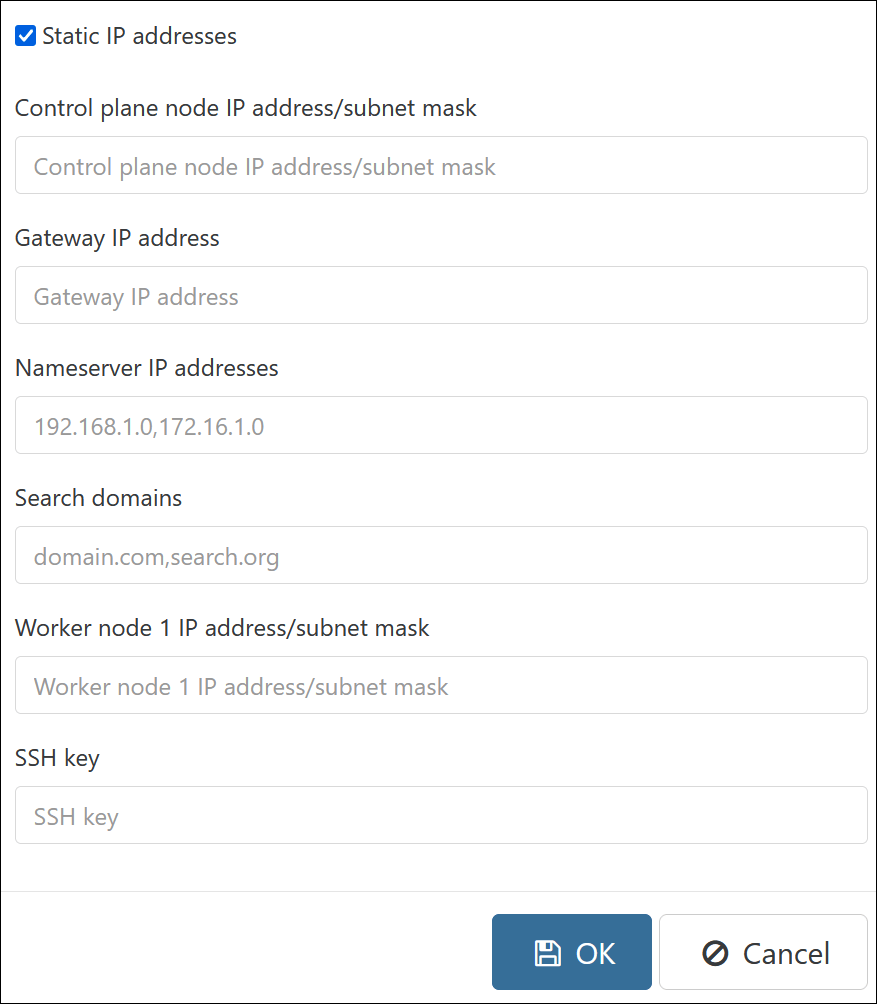
(Optional) If you want your cluster to use static IP addresses, check the Static IP addresses box and specify the IP address parameters:
zoomed detailThe static IP address parameters
Click OK to start deploying the cluster.
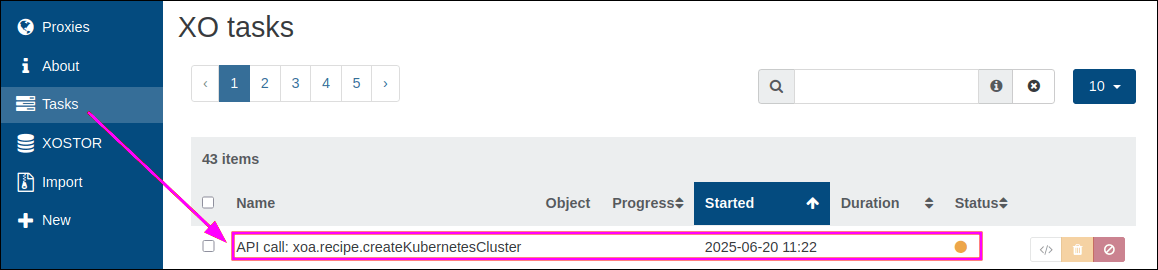
Xen Orchestra handles the rest: cloning VMs, assigning IPs, bootstrapping Kubernetes and configuring internal networking.
Once the cluster and its VMs are ready, SSH into the first control plane node as the debian user (the nodes run Debian 13). From there, you can manage your Kubernetes cluster:
control plane node — list the cluster nodes
# microk8s kubectl get nodes
NAME       STATUS   ROLES    AGE   VERSION
cp-1       Ready    <none>   40m   v1.33.0
cp-2       Ready    <none>   30m   v1.33.0
cp-3       Ready    <none>   31m   v1.33.0
worker-1   Ready    <none>   31m   v1.33.0
worker-2   Ready    <none>   31m   v1.33.0
worker-3   Ready    <none>   31m   v1.33.0
The VMs in your Kubernetes cluster are created with default CPU and RAM settings, but you can easily adjust these to match your workload needs. This gives you the flexibility to fine-tune performance or cut costs, depending on what your use case demands.
MicroK8s handles patch releases automatically by design, so you always benefit from the latest security fixes and improvements without manual intervention.
For minor version upgrades (for example, from 1.30.x to 1.31.x), follow the official MicroK8s upgrade guide. These upgrades typically involve checking the current version, refreshing the MicroK8s snap to the desired channel, and restarting the nodes if necessary:
node — upgrade MicroK8s to a new minor release
# Check current version# microk8s version# Upgrade to a new minor release# sudo snap refresh microk8s --channel=1.31/stable
warning
Always review the MicroK8s documentation for the most up-to-date instructions before performing a minor upgrade.
When deploying Kubernetes clusters with recipes, it's important to plan for performance and reliability:
Always allocate enough CPU and memory resources for both control plane and worker nodes. Using three control plane nodes ensures high availability in production environments.
Place the VMs on shared storage to allow live migration if needed.
For security, restrict SSH and API server access, and consider adding network policies once the cluster is running.