PowerShell module
Introduction
Xen Orchestra (XO) is a powerful tool for managing XCP-ng and XenServer virtualization environments. However, relying solely on the web interface can result in repetitive manual tasks. For system administrators, particularly those working in Windows-centric environments, PowerShell is the go-to automation tool. The xo-powershell module combines the strengths of these two tools by offering PowerShell's scripting capabilities to interact directly with the Xen Orchestra API.
What the module provides
The module covers the whole infrastructure, not just VMs:
| Area | Cmdlets (examples) |
|---|---|
| Session | Connect-XoSession, Test-XoSession, Disconnect-XoSession |
| VM lifecycle | Get-XoVm, Start-XoVm, Stop-XoVm, Restart-XoVm, Suspend-XoVm |
| Snapshots | New-XoVmSnapshot, Get-XoVmSnapshot |
| Storage | Get-XoSr, Get-XoVdi, Get-XoVmVdi, Get-XoVdiSnapshot |
| Disk export | Export-XoVdi, Export-XoVdiSnapshot (to VHD or raw) |
| Infrastructure | Get-XoServer, Get-XoHost |
| Tasks | Get-XoTask, Wait-XoTask |
For the full, current cmdlet reference, see the xo-powershell GitHub repository: it is the source of truth for the module's capabilities and options.
Installation and connection
The xo-powershell module is installed from the PowerShell Gallery in a single command:
# Install-Module -Name xo-powershell -AllowPrerelease
PowerShell 7.0 or later, on Windows, Linux or macOS. Windows PowerShell 5.1 is not supported. The module is currently published as a prerelease (1.0.0-beta), hence the -AllowPrerelease flag (or Install-PSResource -Name xo-powershell -Prerelease with PSResourceGet).
Connecting to your Xen Orchestra instance is just as straightforward, requiring only the host address and an API token:
# Connect-XoSession -HostName "https://your-xo-server" -Token "your-api-token"
In Xen Orchestra, go to your user page and generate an authentication token. See REST API authentication for details.
Pipeline-driven automation
What distinguishes this module from a simple API wrapper is its deep integration with the PowerShell pipeline. Most commands are designed to pass objects to one another, allowing the creation of single-line commands that are both powerful and expressive.
Simple usage examples
# List XCP-ng servers
# Get-XoServer
# Monitor ongoing tasks
# Get-XoTask
# Get information about virtual disks
# Get-XoVdi

To stop all virtual machines whose name contains Test, one line suffices:
# Get-XoVm | Where-Object { $_.Name -like "*Test*" } | Stop-XoVm
This command first retrieves the list of all VMs, filters it to keep only those whose name matches the criteria, and then passes only these VMs to Stop-XoVm. This is possible because Get-XoVm does not return text but a collection of PowerShell objects: each VM object has properties (.Name, .Memory, etc.) that can be inspected by Where-Object before the complete object is passed to the next command.
The same principle applies to more complex filtering, such as suspending running VMs with more than 4 GB of memory:
# Get-XoVm -PowerState Running | Where-Object { $_.Memory.size -gt 4294967296 } | Suspend-XoVm
This capability transforms script writing, moving from a series of disconnected commands to a fluid flow of data and actions.
Beyond VM management
Some practical combinations:
| Scenario | Command sequence | Benefit |
|---|---|---|
| Storage audit | Get-XoSr → Get-XoVdi → Get-XoVmVdi | Comprehensive storage utilization view |
| Maintenance planning | Get-XoHost → Get-XoVm → Stop-XoVm → Wait-XoTask | Planned maintenance without data loss |
| Session verification | Test-XoSession | Verify automation readiness |
Wait-XoTask deserves a mention: it enables robust scripts that wait for lengthy operations (such as creating a snapshot) to complete before continuing execution. This makes the module a true command-line interface for Xen Orchestra and not just a tool for a few common tasks.
Example: Creating virtual machine snapshots
This demonstration shows how to create and verify a virtual machine snapshot.
Step 1: identify a base VM.
# Get-XoVm | Format-Table Name, Uuid, PowerState
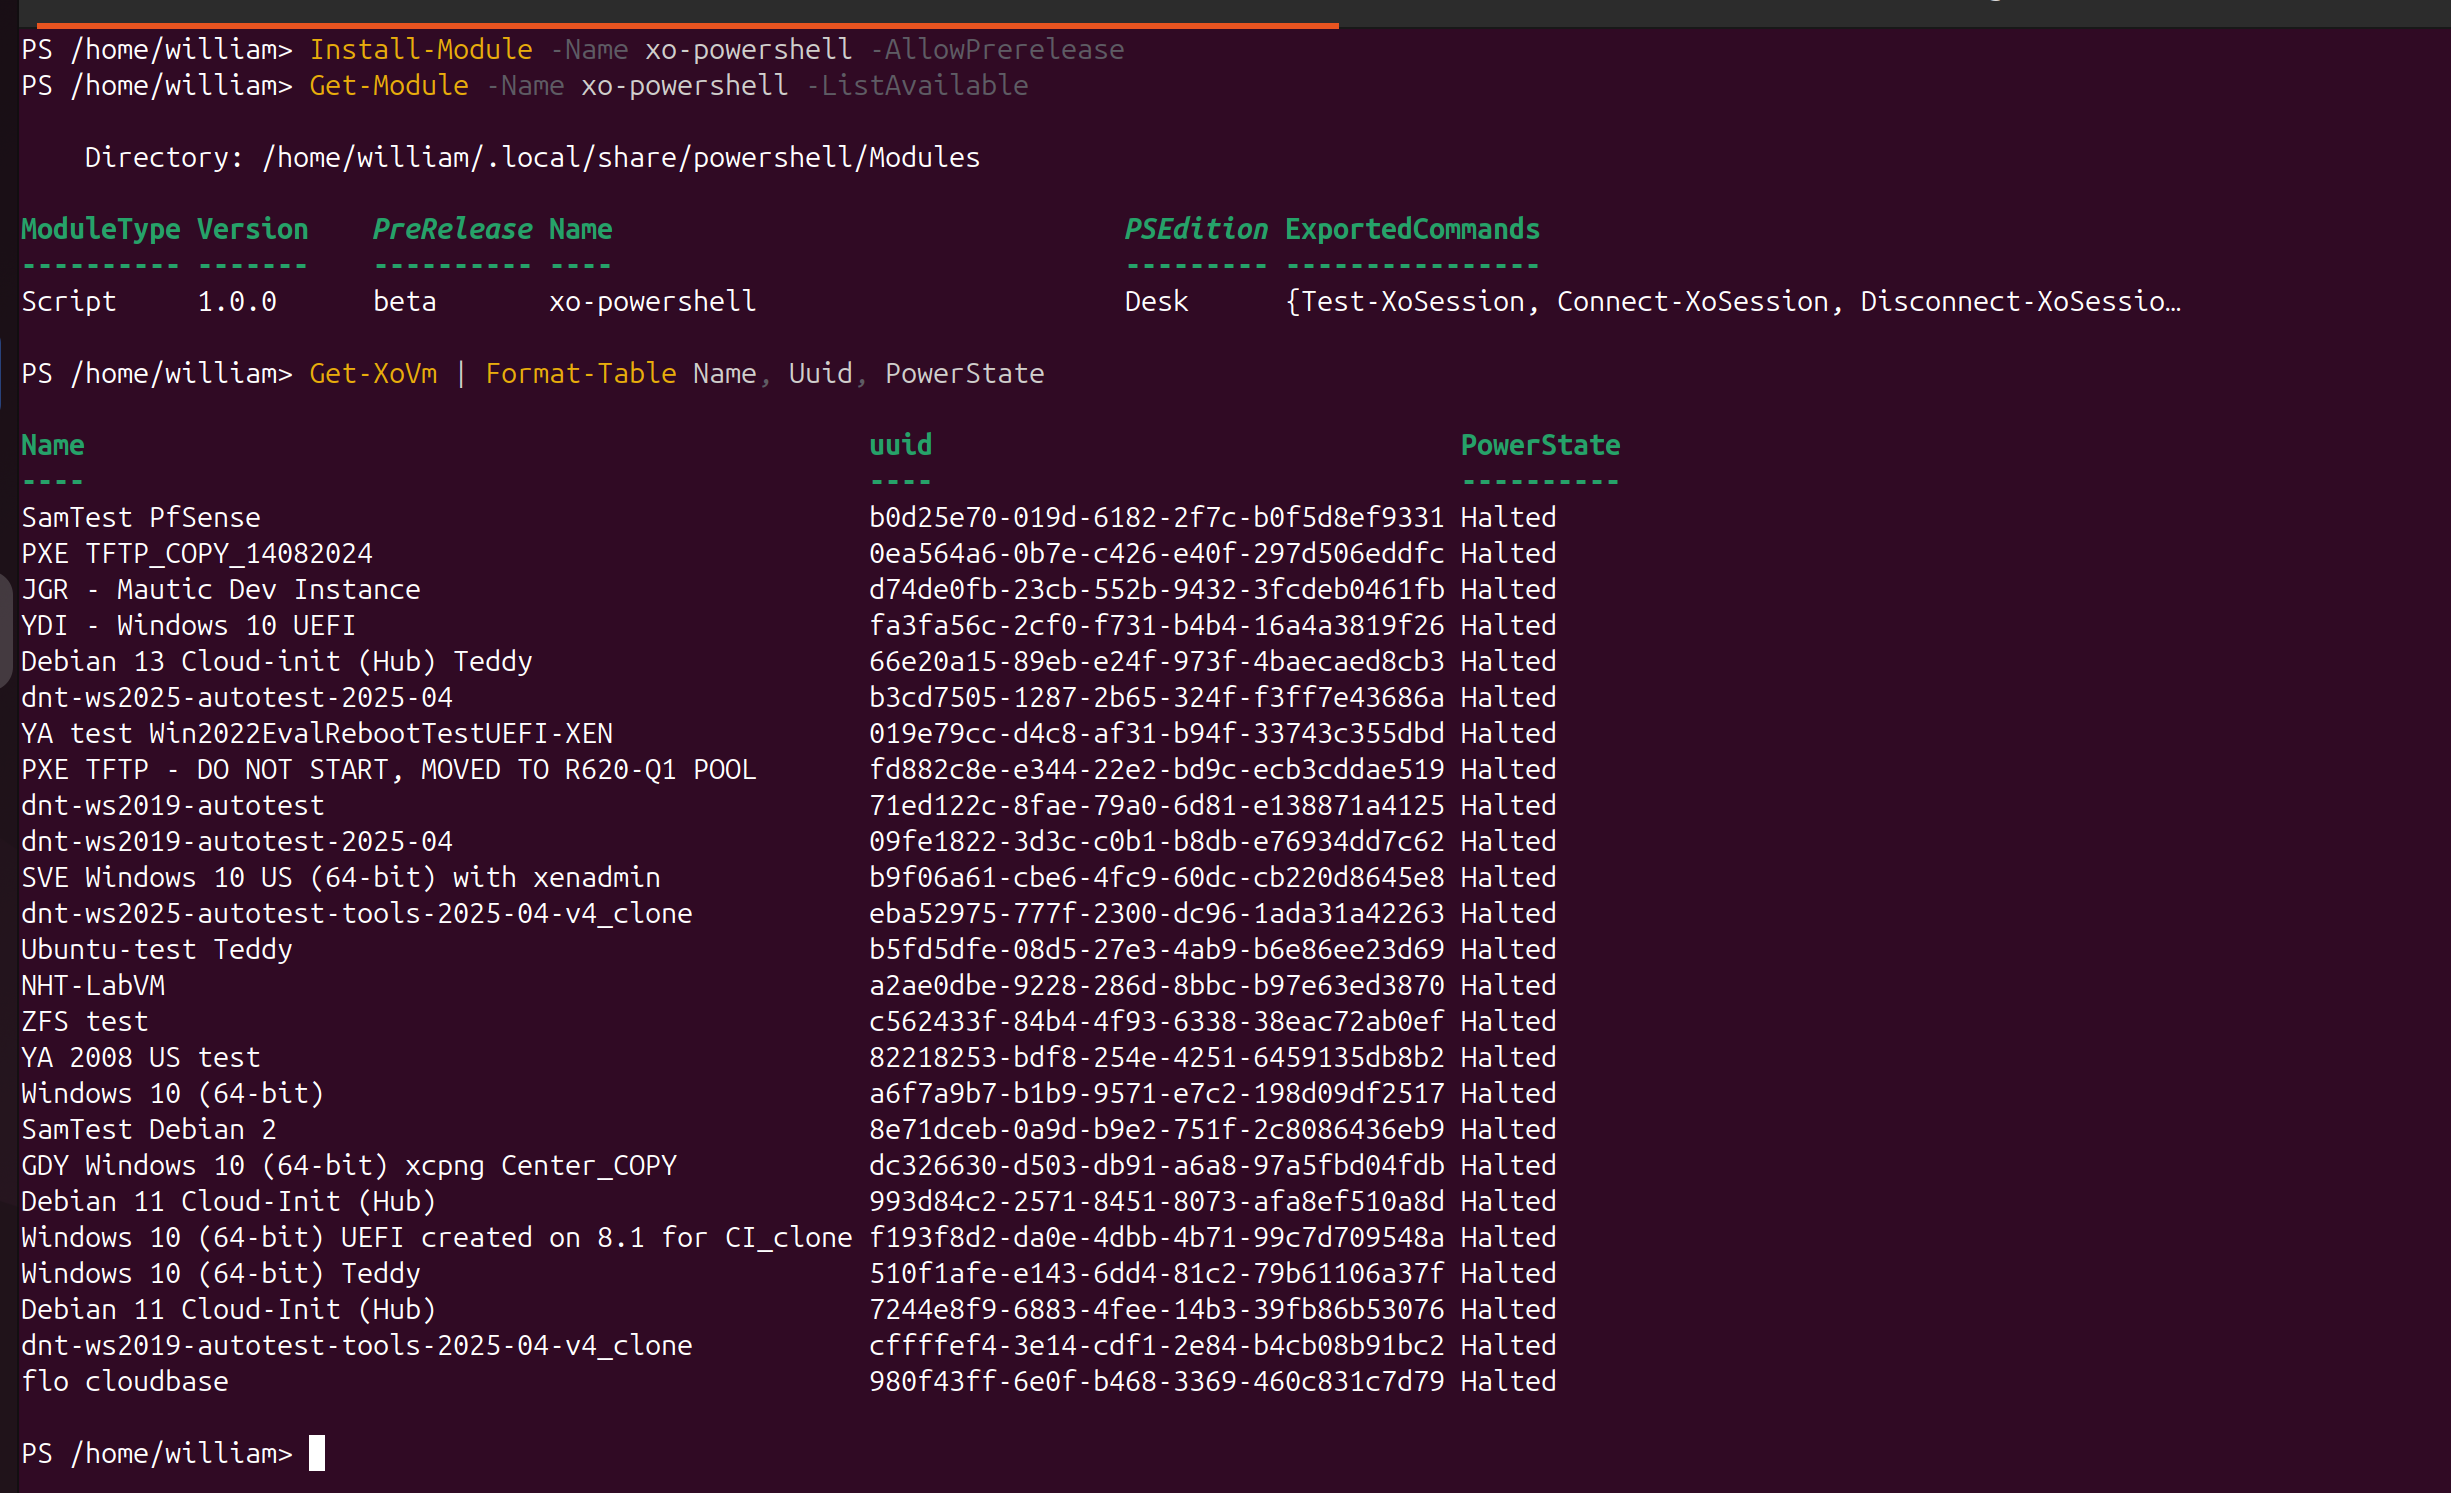
Step 2: create a snapshot.
# New-XoVmSnapshot -VmUuid "993d84c2-2571-8451-8073-afa8ef510a8d" -SnapshotName "your-snapshot-name"

Step 3: verify the snapshot creation.
# Get-XoVmSnapshot -Filter "name_label:your-snapshot-name"

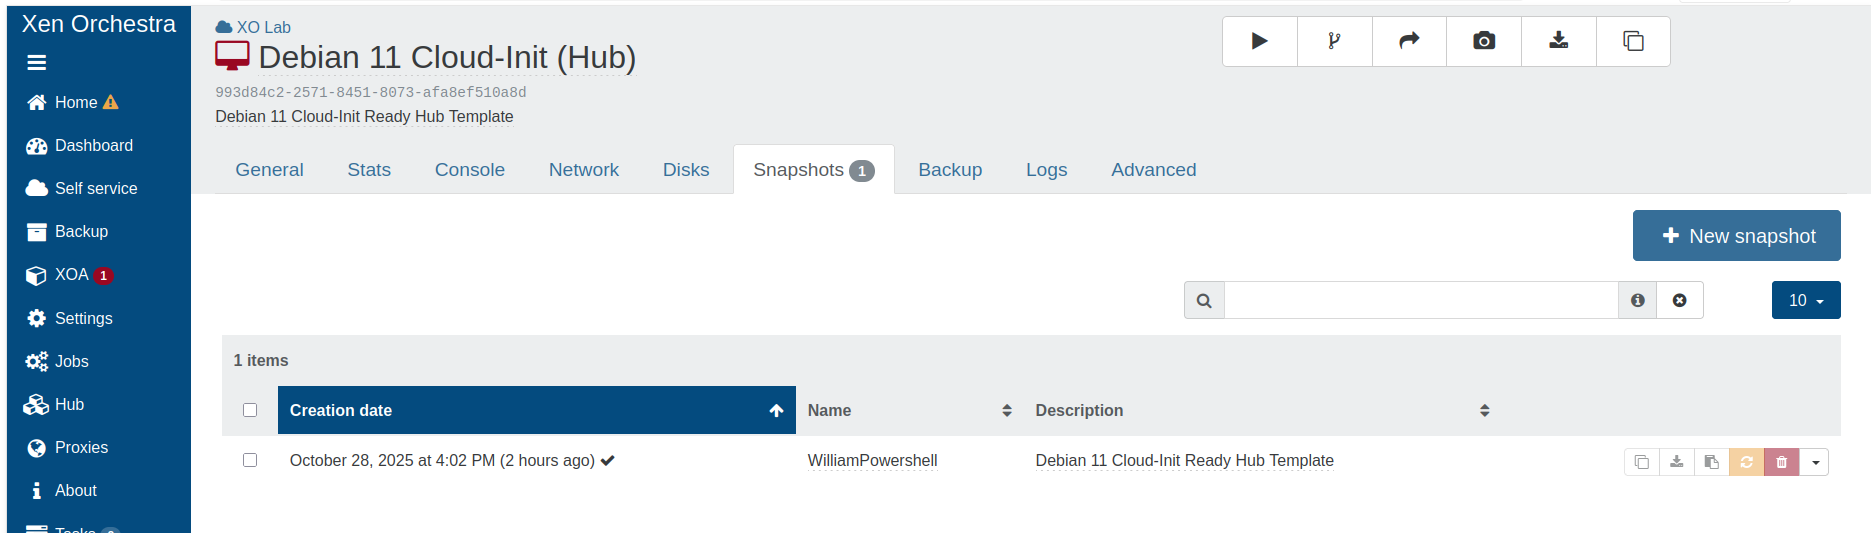
The snapshot also shows up in the Xen Orchestra web interface:
Conclusion: Rethink your XCP-ng management
The xo-powershell module is much more than just a collection of commands: it is a gateway to powerful, scalable and efficient automation within the XCP-ng/Xen Orchestra ecosystem. Leveraging the PowerShell pipeline and a comprehensive set of commands aligns it with the DevOps philosophy, bringing automation practices closer to Windows administrators and helping them save valuable time while reducing the risk of human error.
Related links
- xo-powershell on GitHub (source of truth for cmdlets and options)
- xo-powershell on the PowerShell Gallery
- Infrastructure as Code category on the XCP-ng forum
- REST API authentication