Incremental replication
Incremental replication is the current name of the job type formerly called Continuous Replication (CR). Both names describe the same thing, and you will still meet the old one: XO 6 labels this mode Incremental replication, while the XO 5 interface still labels it Continuous Replication, and replicas keep a Continuous Replication tag.
This feature is an incremental replication system for your XCP-ng or XenServer VMs, without any storage vendor lock-in. You can replicate a VM every X minutes or hours to any storage repository (SR): a distant XCP-ng or XenServer host, or simply another local storage target. After the first full transfer, each run only sends the blocks that changed since the previous one.
This feature covers multiple objectives:
- no storage vendor lock-in
- no configuration (agent-less)
- low Recovery Point Objective, from 10 minutes to 24 hours (or more)
- flexibility
- no intermediate storage needed
- atomic replication
- efficient DR (disaster recovery) process
If you lose your main pool, you can start the copy on the other side, with very recent data.
It is normal that you can't boot the replicated VM directly: we protect it. The normal workflow is to make a clone and work on the clone.
This protection also covers VMs with "Auto power on" enabled: replicas will not start on your incremental replication destination if you happen to reboot it.
Configure it
As you'll see, it is trivial to configure. In the "Backup/new" section, select the incremental replication mode: this XO 5 screen still labels the button Continuous Replication.
Then:
- Select the VMs you want to protect
- Schedule the replication interval
- Select the destination storage repository (it can be any SR connected to any host!)
That's it! Your VMs are protected and replicated as requested.
To protect the replication, we removed the possibility to boot your replicated VM directly: if you start it, it will break the next delta. The solution is to clone it when you need it (a clone is really quick). You can then do whatever you want with this clone!
Reverse replication and failback
Since Xen Orchestra 6.5, incremental replication works in both directions: the replication engine can reuse a snapshot it finds in common between the source and the destination, even if that snapshot was created by another job, running the other way. This is what the release notes call bidirectional (or symmetrical) replication.
There is no special job type for it. To replicate in the reverse direction, simply create a new incremental replication job going the other way:
- Select the replica (or the VM running on your DR side) as the source VM
- Select your original production SR as the destination
On its first run, instead of sending a full copy, the job looks for a common snapshot on both sides (using the content metadata XO writes on every replicated disk) and only transfers the blocks that changed since that snapshot. Then, on the production side:
- If the original VM's disks are exactly as the original job last replicated them, the job updates the original VM in place: no duplicate VM, your production VM simply catches up with what happened on the DR side. This requires the original VM to be halted (or suspended), its disks not to be used by any other VM, and not a single block to have been written to them since the original job's last snapshot.
- Otherwise, the common snapshot is still used as the delta base, but the job creates a new VM next to the original rather than overwriting anything.
Shutting down the original VM counts as a change: the shutdown itself writes to its disks (logs, file system journals). If the VM was still running when the original job last ran, the reverse job creates a new VM, even if nobody touched the VM since. To get an in-place update, shut the VM down before the original job's last run, and don't start it again.
This matters in two situations:
- Failing back after a failover: your production site went down, you force-started the replica and ran on the DR side for a few hours or days. Once production is repaired, a reverse job brings all the changes back as a delta, without transferring entire VMs across the WAN. Since the production VM was still running after its last replication, the job creates a new VM next to it.
- Testing or executing a recovery plan: you can do a planned switch to the DR site, work there, then switch back, with only deltas moving in each direction. This is where the original VM can be updated in place: see Planned switch.
Constraints to be aware of:
- The cross-job snapshot reuse only kicks in when the job has a single replication target SR (no additional targets or backup repositories in the same job).
- It relies on the content metadata introduced with this feature: both sides need replication snapshots created by a recent XO (the same-VM reuse arrived in XO 6.3, the cross-direction reuse in XO 6.5). Older chains fall back to a full transfer on the first reverse run.
- As always with incremental replication, don't delete or alter the replication snapshots: they are the common base that makes the reverse run a delta instead of a full.
Planned switch with an in-place update
- Shut down the VM on the production side.
- Run the original job one last time, then disable it: its snapshot now holds the VM's final state.
- Force start the replica on the DR side, and work there.
- To switch back, shut down the DR VM and run the reverse job: it updates the original VM in place.
An in-place update turns the original VM into a replica of the DR VM. It keeps its UUID, but:
- it takes the DR VM's name, prefixed with the reverse job's (
[XO Backup <job name>] …), and the DR VM's description and settings (CPU, memory, tags). - it gets the
Continuous Replicationtag, and its start is blocked like any replica's: force start it to resume production. - its HA restart priority is cleared, and it gets the
HA disabledtag.
To see which outcome a run had, look at the snapshot the reverse job just created on the production side: if it belongs to your original VM, the VM was updated in place.
Manual initial seed
If you can't transfer the first backup through your network because it's too large, you can make a seed locally. To do so, follow this procedure (until we make it accessible directly in XO).
This is only if you need to make the initial copy without pushing the whole transfer through your network. Otherwise, you don't need this.
Job creation
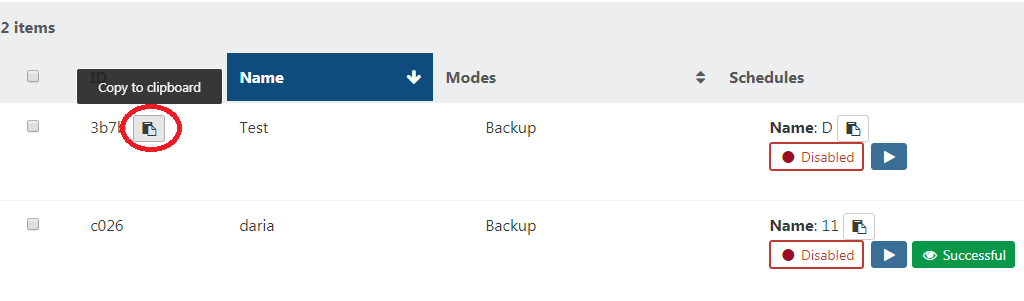
Create the incremental replication backup job, and leave it disabled for now. On the main Backup page, copy the job's backupJobId by hovering to the left of the shortened ID and clicking the copy to clipboard button:
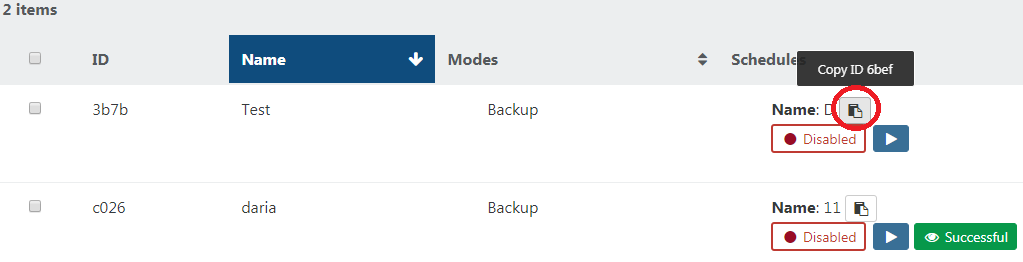
Copy it somewhere temporarily. Now we also need to copy the ID of the job schedule, backupScheduleId. Do this by hovering over the schedule name in the same panel as before, and clicking the copy to clipboard button. Keep it with the backupJobId you copied previously, as we will need them all later:
Seed creation
Manually create a snapshot on the VM being backed up, then copy this snapshot UUID, snapshotUuid, from the snapshot panel of the VM:
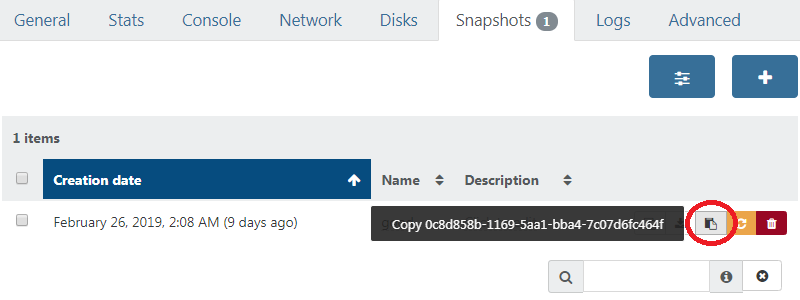
DO NOT ever delete or alter this snapshot. Feel free to rename it to make that clear.
Seed copy
Export this snapshot to a file, then import it on the target SR.
We need to copy the UUID of this newly created VM as well, targetVmUuid:
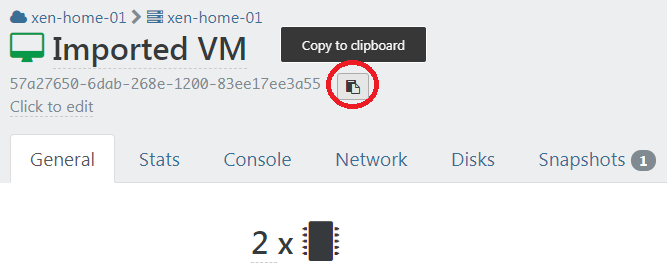
DO NOT start this VM or it will break the incremental replication job! You can rename this VM to more easily remember this.
Set up metadata
The XOA backup system requires metadata to correctly associate the source snapshot and the target VM with the backup job. We're going to use the xo-cr-seed utility to set them up.
First install the tool (all the following is done from the XOA VM CLI):
# sudo npm i -g --unsafe-perm @xen-orchestra/cr-seed-cli
Here is how the utility expects the UUIDs and info passed to it:
# xo-cr-seed
Usage: xo-cr-seed <source XAPI URL> <source snapshot UUID> <target XAPI URL> <target VM UUID> <backup job id> <backup schedule id>

xo-cr-seed v0.2.0
Putting it all together with our values and UUIDs, the command will look like this (it is a long command):
# xo-cr-seed https://root:password@xen1.company.tld 4a21c1cd-e8bd-4466-910a-f7524ecc07b1 https://root:password@xen2.company.tld 5aaf86ca-ae06-4a4e-b6e1-d04f0609e64d 90d11a94-a88f-4a84-b7c1-ed207d3de2f9 369a26f0-da77-41ab-a998-fa6b02c69b9a
If the username or the password of your XCP-ng/XenServer hosts contains special characters, they must use percent encoding.
An easy way to do this with Node on the command line:
# node -p 'encodeURIComponent(process.argv[1])' -- 'password with special chars :#@'
password%20with%20special%20chars%20%3A%23%40
Finished
Your backup job should now be working correctly! Manually run the job the first time to check that everything is OK, then enable it. From now on, only the deltas are sent: your initial seed saved you a LOT of time if you have a slow network.
Failover process
In the situation where you need to failover to your destination host, you simply need to start your VMs on the destination side.
If you want to start a VM on your destination host without breaking the incremental replication jobs on the other side, make a copy of the VM and start the copy. Otherwise, you will be asked if you would like to force start the VM.
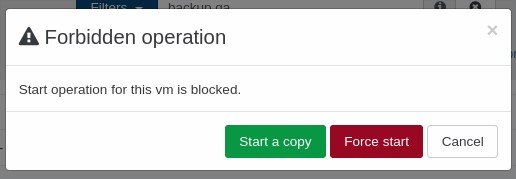
Force starting the most recent replica gets your services back quickly, but it consumes that replica: once production is back, the original job can no longer update it, and creates a new replica next to it (still transferring only a delta).
Once your production site is back online, use reverse replication to fail back: create an incremental replication job from the DR side to your production SR. Everything that happened while you were running on the DR site comes back as a delta, in a new VM next to the original one: the original VM most likely kept running after its last replication, so it can't be updated in place. To finish, shut down the DR VM, run the reverse job one last time so nothing written on the DR side is lost, force start the new VM, and select it in the original job instead of the old one.